This series is designed to guide students step by step through the process of learning to blog. The activities can be completed at student’s own pace, in any order and you can customize for your students.
The series assumes that the student blogs have already been set up ready for students to use. Refer to sign up & register blog if you don’t have a blog.
The aim of this first activity is to:
- Learn what a blog is.
- Help students log into their blog, navigate the dashboard, change their timezone settings, and change their theme.
What is a blog?
Watch the following video to learn more about blogging.
Key blogging terms to listen for while watching the video are footer, header, menus, pages, posts, comments, sidebars, theme and widgets.
Practice what you’ve learnt by completing the following cross word puzzle!
 Loading...
Log into your blog
Your blog dashboard is the administration area of your blog where you write posts, pages, manage comments, change your blog design, add widget etc.
The easiest option to log in to your blog dashboard is to use admin bar at the top of your blog.
An admin bar is located at the top of all newly created Edublogs.
Here is how you log in:
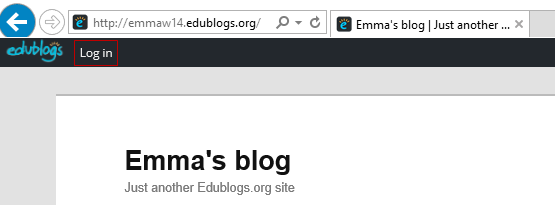
1. Go to your blog URL.
![]()
2. Click on the Log in link in your admin bar.
3. This takes you to your login page.
4. Enter your username and password then click Log In.
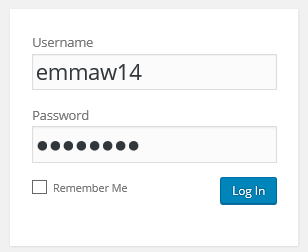
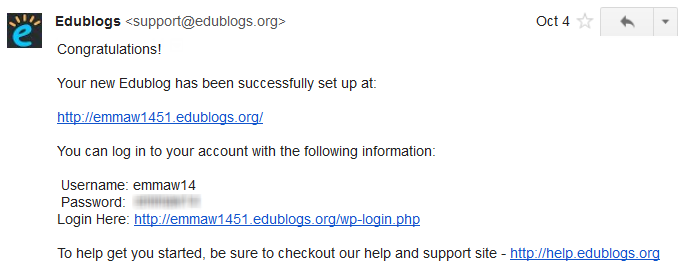
Your login details are included in the email sent when your blog was set up or is provided by your teacher.
This should take you to the dashboard of your student blog. Your dashboard is made of your main navigation on the left hand side and Reader on the right with the admin bar at the top.
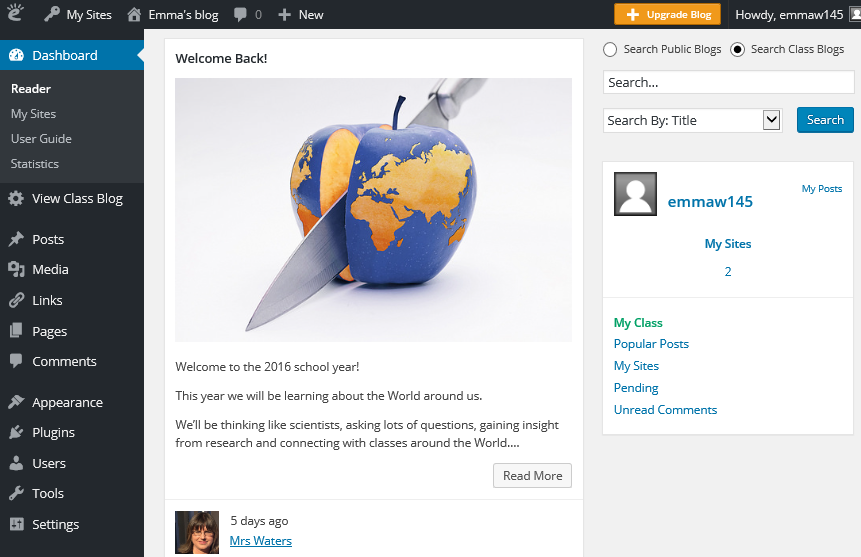
The Admin bar
The admin bar at the top of your blog provides shortcuts to Edublogs features.
Drop down menus appear when you hover your mouse over the icons in the admin bar.
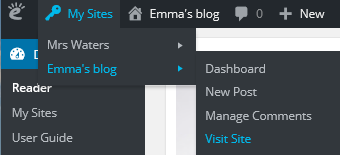
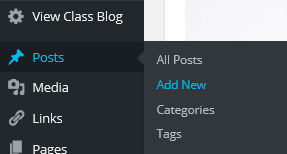
The My Sites menu, located next to the Edublogs logo, is on the left-hand side of your admin bar. The My Sites menu provides handy shortcuts to areas inside your dashboard such as the dashboard, new posts, comments and a link to your class blog (if connected to a class blog).
Reader
By default, the Reader is displayed on the right hand side of your dashboard when you log into your account.
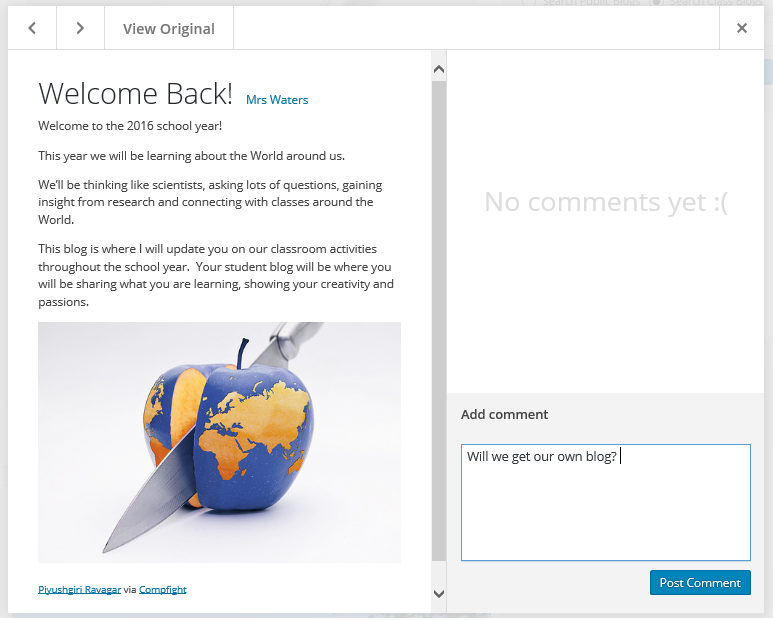
The reader is designed to make it easy to read and comments on posts from directly inside your dashboard. This is where you read posts from every one in your class if all student blogs are connected using My Class.
Your navigation menu is on the left side of your Dashboard.
Hovering your mouse over a menu item displays all the sub-menu options under that item.
You can return to the dashboard area of your blog from any page within your administration panel by clicking on the Dashboard menu item at the top of your navigation menu.
Check your settings
The default timezone settings on all newly create blogs is based on London, UK time. All posts and comments are automatically time stamped as London time unless you change your timezone.
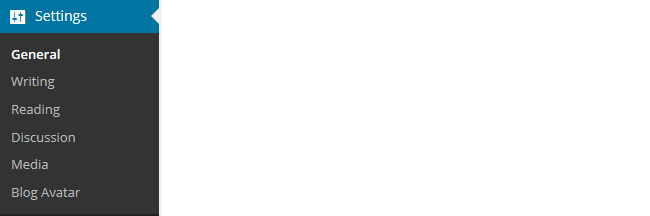
To learn how the main navigation menu works we’re going to get you to change your time zone in Settings > General to your location.
Here’s how to change your timezone:
1. Go to Settings > General
2. Select your timezone from the drop down menu option.

3. Click Save Changes.
Customize your blog theme
Your theme is what controls the look and appearance of your blog; this is what people see when they visit your blog.
This is how you give your blog its personal touch.
Like most things in life, first impressions count.
Great blog themes make good impressions on readers so that visitors are more likely to check out your blog. Overwhelming themes detract from your blog content, and make visitors less likely to read your content.
Every newly created blog normally has the same default theme. The last thing you want is to look like all the other blogs.
Customizing your blog theme is normally one of the first thing most people want to do when they first log into their blog.
Your final task is to change your blog theme and customize it.
Have a look at the following student blogs to get ideas on how other students have customized their blogs:
- simplyaubree.edublogs.org
- ethancaba14.edublogs.org
- 6jacquelineg.edublogs.org
- blog.elanco.org/covertcjv
- blog.elanco.org/forre5yz
Using the theme customizer
Customizer video
Here’s how to change your theme using the theme customizer:
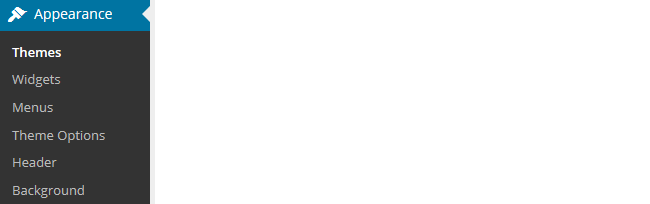
1. Go to Appearance > Themes
2. Click on ‘Live Preview‘ below the theme you want to use.

Or if you want to customize your current theme, click on ‘Customize‘ under the current theme.

3. This loads the customizer. Now all you do is work through the control panels on the left to customize the theme to preview the theme changes in real time before activating it on your blog.
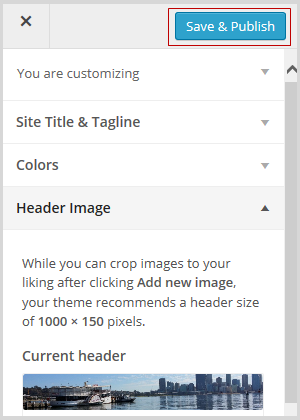
4. Once you’re happy with the changes you just click ‘Save & Publish’.
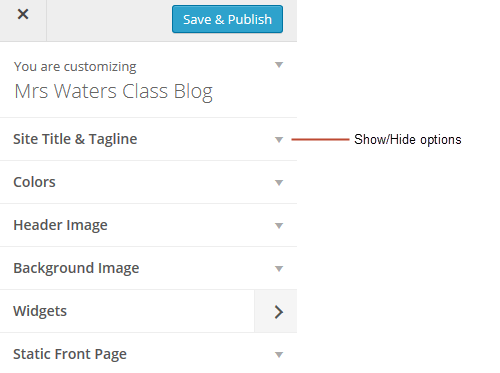
Below’s a quick summary of each customizer control panel:
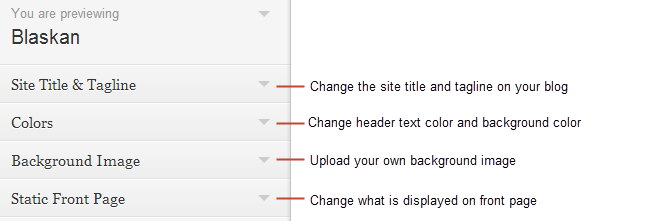
Don’t change your site title without asking with your teacher!
Uploading own custom header image
Almost all Edublogs themes include an option to upload your own custom image header.
A custom image header is a great way of adding your “own personal touch” to your class blog.
Uploading your own custom header image is as simple as:
1. Click on Add new image in the header image section of the customizer.

2. Choose an image from your media library or upload a new image from your computer.
- Only .jpeg, .gif, and .png files can be used for image headers.
- You’ll find a wide range of images on Pixabay that you are allowed to use for free.

3. Click on Select and Crop.
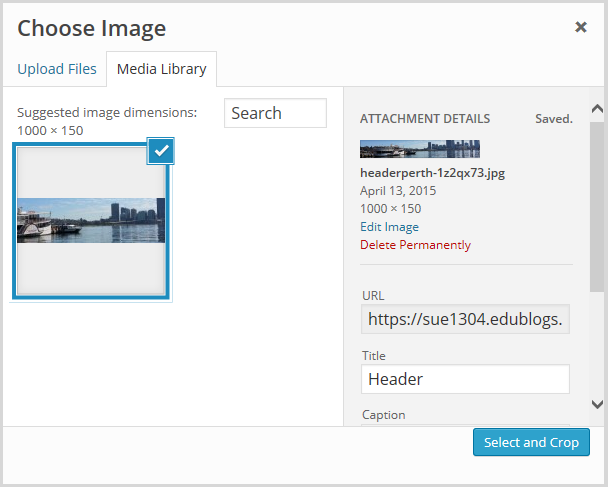
4. Click on Crop image.
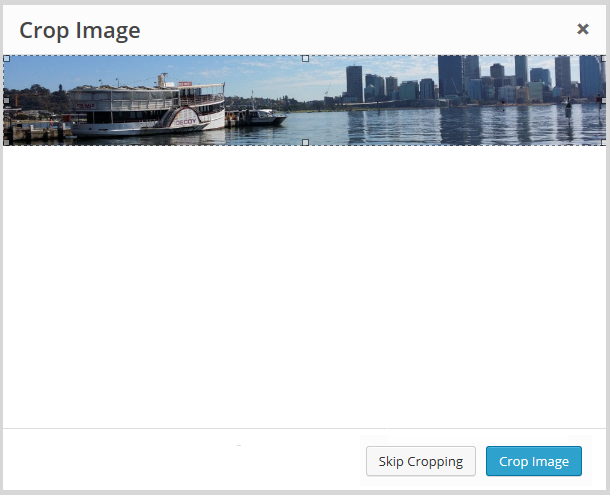
5. Your new header image should appear in your blog preview window.
6. Click Save & Publish on the Customizer to activate the new header on your blog.
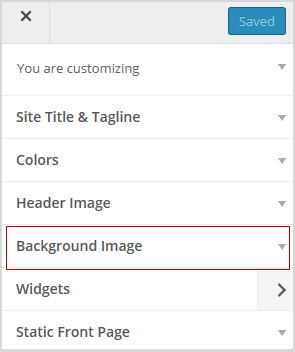
Uploading own Background Image
On many themes, much like custom header images, you can add images to your blog’s background. A background image is another great way of adding that personal touch to your class blog.
Uploading your own custom background image is as simple as:
Click on Background Image in the Customizer.
- If you don’t see the Background Header section in the Customizer it means the theme doesn’t support this option.
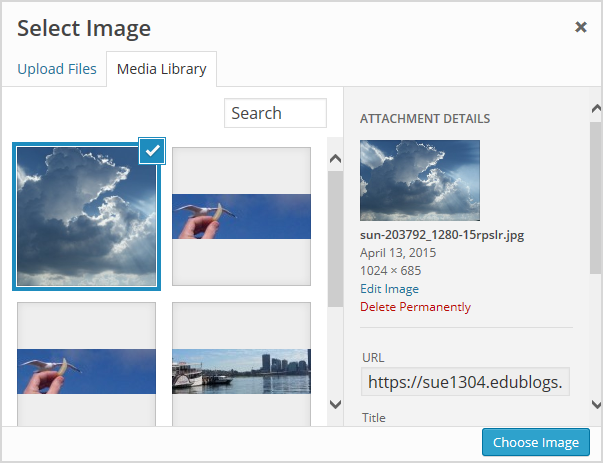
3. Click on Add new image.
4. Choose an image from your media library or upload a new image from your computer.
- Only .jpeg, .gif, and .png files can be used.
- You’ll find a wide range of images on Pixabay that you are allowed to use for free.
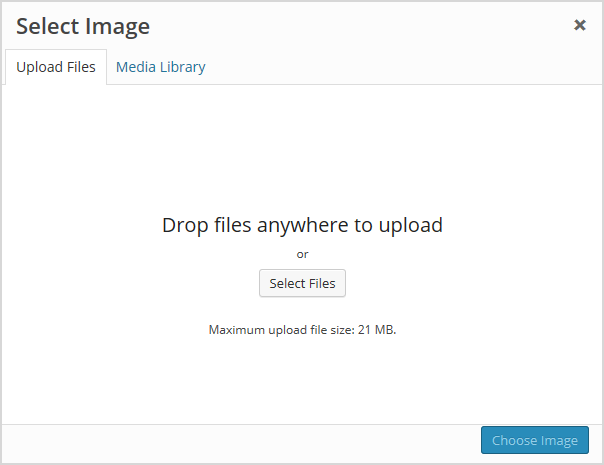
5. Click on Choose Image.
Once you have selected an image the background image options will appear:
- Background repeat: controls if the background image is repeated. Choice are:
- No Repeat -background image is only displayed once on the page.
- Tile – background image is tiled horizontally and vertically.
- Tile horizontally – the background image only repeats horizontally.
- Tiled vertically – the background image only repeats vertically.
- Background position: allows you to control the position of the background image. Options are left, center and right.
- Background attachment: determines if you want the image to scroll with the content or to remain ‘fixed’ in place when a reader scrolls down the page.
For best results we recommend you use Tile, left and Scroll.
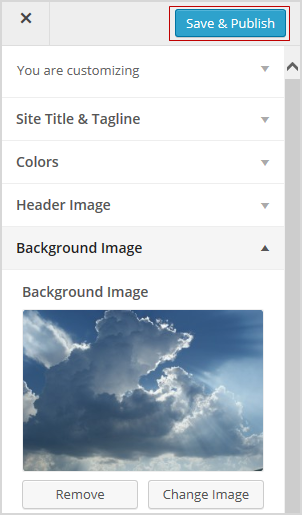
6. Your new background image should appear in your blog preview window.
7. Click Save & Publish on the Customizer to activate the new background on your blog.
Your Task
Complete the following tasks:
- Change the time zone of your blog to your location in Settings > General.
- Change your theme in Appearance > Themes and customize your theme. I recommend you select a theme that has a sidebar as you will be adding widgets to the sidebar in Step 6.
- Optional: Practice what you’ve learnt about blogging terms and vocabulary by completing the blogging crossword puzzle. Use this sheet to check your answers.
- Leave a comment on this post and tell us how you went logging into your blog and changing your theme. For example, you could tell us what theme you chose and why? Or what you found easy? What aspects were hard and you would like to know more about? Remember to leave a link to your blog in your comment so we can have a look at your new blog.
Man, this is the blog that helps EVERYONE out. Thanks for doing this man. COOOOOOL!
i found it easy
it went fine other then the fact that we couldnt help each other i love how we get to pick our own themes
i really liked the way we did our own themes and how we made our own person that look like us like so cool love it…
I chose the high wind theme because it was a easy start to this website. I did enjoy making a blog because I can finally put what I think instead of seeing what others think.
Well done to UNMS students for all your great work and comments recently! I hope you enjoy setting up your blogs and continue on with the challenge! 🙂
When I first signed in I didn’t know what a blog was but there was steps to show me what to do and i found that helpful. The parts that was easy for me was choosing the color for the theme and choosing the background. I did enjoy it because I liked how I could make my own blog instead of watching someone making one.
I chose the wolf theme because wolves are very cool and vicious animals
I really liked how there was a cross word puzzle there to help me know what is what. Also Something that I really didn’t like was picking the theme because there was so many to choose from and the scrolls never stopped but I did like where you can pick the color you want your name to be in.
http://elizabr18.edublogs.org/
The name of my theme is escutcheon. No it was not easy making this blog, I was kinda lost. I needed help. The part I was lost with was getting started like finding the settings to start my theme.
http://cheyennewi18.edublogs.org/
I also forget to mention some things I found hard was picking a theme because there was so many to pick from and when I picked one I found a different one I liked. Some things i found easy was navigating around everything was easy to find.
http://aniahpe18.edublogs.org/
It was really fun looking at all the themes, it was difficult cause there was alot of good themes but at the end i ended up deciding on the perfect one.
http://naomyes18.edublogs.org/
The theme that I chose to go with was Affinity. I chose this theme because I liked the quote about love a lot. Also, there were a lot of leaves and and it made me think of fall, which is one of my favorite seasons. The whole setup part seemed pretty simple to me once I get the hang of it.
It was easy for me to pick for me to find the theme that I liked because their was so many. But I got it and it will do for now. But it was a challenge to find everything like the setting and all that.http://johnathenpi18.edublogs.org/
Hi sue it was really easy logging in but it was really hard finding a Themes because i didn’t know where to find my theme the theme i am doing now is called sample page and it was not so easy finding the one i wanted
https://jaydenpo18.edublogs.org/
Hi Jayden, I agree, it can be hard choosing the theme that’s perfect for you blog. I often find I have to spend a bit of time playing around until I decide on the one I like the best! 🙂
The theme that i chose was the spun because it looked cool and the way when you post something it would show you the name of the story and the picture that you chose that represents the theme of your story
This was useful but the only hard part I found about this was setting up my own header/background image. It was difficult because I didn’t realize that I had to download the picture that I wanted then, download it. I didn’t know the link to the pictures even though it was clearly stated. What was easy was setting up a color for my theme which was Metro CreativeX.
Thank you for this boot camp. Some of the steps, I couldn’t do because some themes can’t use things like others can do, for example, mine is Blog Sixteen and it doesn’t have a background image like some other themes do. But I was still able to do the best I can.
For the theme i choose Baskerville and i changed the picture by using pixabay. It was hard for me to find the header but on your side bar you go to appearances click on it a little rectangle will pop up look for header and click on it. please visit my blog at: danielaum18.edublogs.org
This was really helpful! For my theme I chose Oblique. I chose this because I really liked the style and layout of it.
Sue,
I was starting to loose patience I didn’t know there was so many steps to making a blog.
I just went in and acted like i knew what I was doing because I was excited. I put my theme because it looked clean and not everything happening at once. I used Activello. http://aniyare18.edublogs.org/
well what I found easy was logging on to my edublogs and the hard part was trying to find a image for my blog page.
i chose the “Fara” theme because i looked nice just the ways it moves also because of the background it looks smooth. well, finding the theme was pretty easy that’s all. i wanna know how to use this site a lot better, everything is confusing a little.
The Steps really helped customizing and cleaning up the appearance of my blog and without it would have been really hard to know the content of blogging and actually start. I think the crossword was helpful in using description of some of the blogging vocabulary and help me learn blogging language. Although the description of how to upload images almost skipped a step in explaining how to download the image.
Heya Sue, nice website you got here!
I chose the “14-Glassy” Theme, what I personally loved about this theme is the overall accessibility it was advertised to have and did look pretty visually pleasing. I would say that getting used to navigating the site was a pretty hard task.
http://elijahbr18.edublogs.org/
The theme I chose was Aaron. The theme Aaron is a view of three snowy mountains from close but far. I chose it because I like looking at nature and are world, it relaxes me. What I found easy was customizing my theme, it was simple and fun. I found it as a way to express yourself. Something that was complicate was the main navigation system. At first, it could be complicated but it is simple.
I’m an 8th grader at UNMS in New York and this helped me a lot. I chose the Anarcho Notepad. The hard part about this was choosing a theme because there were so many good ones. `
Hi Sue, with your guidance I managed to setup my blog. I picked the Aaron theme for my blog and started to customize my blog page. All thanks to you. Please visit my blog at:
http://www.mingli18.edublogs.org
Thank you again for helping me.
The steps really helps me out about how to use the Edublogs and it tells you the specific direction about how you using it. For example it tells you where to change the background image and how to change your theme. My theme is Aries because it’s easy to read and I want my theme to be simple.
I went to appearance and activated a theme, I went to customize the theme and looked on the left side of the page and saw the options they had. I looked for header image and I pressed it and choose an image, crop the image so it can look nice. I finished cropping it and pressed add image and it popped up as my header image.
The theme of that I choose for my blog is called Adelle and I choose that theme was because it looked simple. What I think was hard about this blog is that sometimes it confusing on where everything is when I just started, and what I liked about this blog is that you can share your thoughts and free write on whatever you want.
Making my blog went super easy thanks to these steps. The theme i chose was Adler because i wanted my blog to look simple so they wouldn’t be overwhelmed when they look at my posts. Also because it looked the most simple to navigate, i don’t want people to look at my blog and not know where to go to to find things. This was a big help. Thanks!
Hi Sue, my theme I chose was book lite. I chose this theme because it most interested me, it was simple but somewhere I know I can list all my thoughts. The most hard part of this process was customizing my blog, the steps helped though with that. I liked the fact that we got to make our blog our own but at times it gets confusing with so much to do.
I chose the preset theme. I feel like setting up my account was pretty easy since I watched the video of how to setup. Also, I look foward to writing a blog!
http://demitriusen18.edublogs.org/
Hi it was really easy logging in but it was really hard fing a Themes because i didn’t know where to find my theme
hi sue, i choose the theme book lite because i wanted something where i can kind of free write and explain my ideas hope you like my blog
The theme i picked was Amadeus because i really like how it was set up and how the picture was behind it which made it move a little to see most of the picture
http://aniahpe18.edublogs.org/
Hey sue. I choose to do reader.It was really really hard to learn how to get to settings . I keep on opening multiple tabs by an accident.
I Found this helpful!!!
This helped a lot
HI Sue we have a blogging program after school and thanks for all your help and it is really fun. Please visit my blog at:
http://www.xpress360.net.au/dps18kaiden
thank you for all your help, Kaiden.
HI Sue we have a blogging class after school and thanks for all your help. It is really fun . Please visit my blog: http://www.xpress360.net.au/dps17xavier
Hey Sue thanks for all of the info. I was in a group with Mrs Wyatt learning about blogging.
Here’s the link for my blog http://www.xpress360.net.au/dps18dylan
hi sue how are you today worked with Mrs Wyatt we learned how to log in and to comment seeya
http://www.xpress360.net.au/dps19isaac
to Sue
i have been doing a blog with Mrs Wyatt in Tasmania
i have been following the directions you said and made a blog
from Jarrod: http://www.xpress360.net.au/dps19jarrod/
Sue show us how to login and she was grate fun i don’t want to stop to day.
http://www.xpress360.net.au/dps19alex/
Hi Sue today we worked with Mrs Wyatt we learned how to log on to our blog and how to post on our blog.
here is my blog
http://www.xpress360.net.au/dps19bonnie
hi sue today we worked with Mrs Wyatt we learned lots I learned how to log in themes and made some posts here is my link
http://www.xpress360.net.au/dps19isaac
Hi Sue today i worked with miss Wyatt with my friends. we learnt a lot today.
Please come visit my blog. Maddie
http://www.xpress360.net.au/dps19maddie
very nice video