Welcome to the sixth step in our free self-paced course to help you set up your own personal or professional educator blog!
The aim of this step is to:
- Discuss copyright, fair use, and using images on blogs.
- Introduce you to Creative Commons.
- Explain how to find and add Creative Commons images to posts.
- Define free and public domain images, and explain how to source them.
Introduction To Copyright, Fair Use, And Images In Posts
You can’t just use any image you like in a blog post.
Why? Because unless stated otherwise, the law automatically grants full “copyright” over any creative work a person makes.
You may be thinking it’s okay because as educators, we have a few more flexible rules, called “Fair Use”, to play by.
Fair use, in some cases, means you may have more flexible copyright rules if an image, text, video, etc. is being used for educational purposes.
The trouble is, most of the laws and rules that cover fair use and education were written well before the invention of the web. They don’t apply to the use of copyright material on the internet. Using copyright material leaves you open to copyright infringement.
So what does this mean?
You need to:
- Learn what images you are and aren’t allowed to use, and why.
- Learn how to correctly attribute images you are allowed to use.
- Educate your students that you can’t just use any images online on your blogs (or other digital work).
- Show students how to source and attribute images they are allowed to use, and be a role model with the use of images on your own blog.
Refer to The Educator’s Guide to Copyright, Fair Use, and Creative Commons for comprehensive information on the use of images, curriculum docs, text and quotes, music, and videos.
The safest way to source images for your blog is to either:
- Use Creative Commons images.
- Use free (Creative Commons Zero) or public domain images.
- Use your own photos or use images you’ve created.
Including The Source Is Not Enough
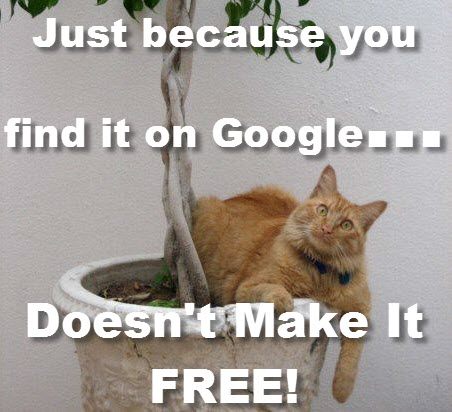
A situation we commonly see on blogs is where someone uses an image they found online and then include a link to the site they got it from.
For example,
Just because you link to the source of an image, does not mean you can use it. You would need to ask the image creator for permission.
Read on to find out about Creative Commons and ways you can find images to use — legally and ethically.
Introduction To Creative Commons
Creative Commons, founded in 2001, is an organization that provides free content licenses that people can apply to their work. These are known as Creative Commons licenses.
When you license your work with Creative Commons, you are allowing people to use it without having to ask permission, provided they use it in the manner stated in your Creative Commons license.
The reason people use Creative Commons licenses is to make it easier for everyone to share and adapt creative work without the concern of copyright infringement.
Watch this video on Creative Commons.
Creative Commons licenses are used for books, websites, blogs, photographs, films, videos, songs, and other audio and visual recordings.
If an image, or website, doesn’t include a Creative Commons license, or isn’t public domain work, or doesn’t indicate that the content is free to use, then it is automatically implied that all content is copyright and you shouldn’t use it! Put simply — unless stated otherwise, it is copyright.
There are websites that provide public domain images that are free to use, or have their own free to use licensing, but you need to make sure you follow their terms and conditions of use.
For those wondering, unless a blogger includes a Creative Commons license, all content on that blog is automatically the copyright of the blogger.
Back to Top
Creative Commons Licenses
There are several different types of Creative Commons licenses people use depending on what restriction(s) they want to apply to their work.
Here is a quick summary of the different types of Creative Commons licenses:
![]() Attribution CC BY
Attribution CC BY
Allowed to share (to copy, distribute and transmit the work), remix (to adapt the work) and use it for commercial purposes provided you attribute the work in the manner specified by the author or licensor.
![]() Attribution-NoDerivs
Attribution-NoDerivs
Allowed to share (to copy, distribute and transmit the work) and use it for commercial purposes provided you do not alter, transform or build upon the work and you attribute it in the manner specified by the author or licensor.
![]() Attribution-NonCommercial-ShareAlike
Attribution-NonCommercial-ShareAlike
Allowed to share (to copy, distribute and transmit the work) and remix (to adapt the work) provided it isn’t used for commercial purposes, you attribute the work in the manner specified by the author or licensor and you distribute it under the same license.
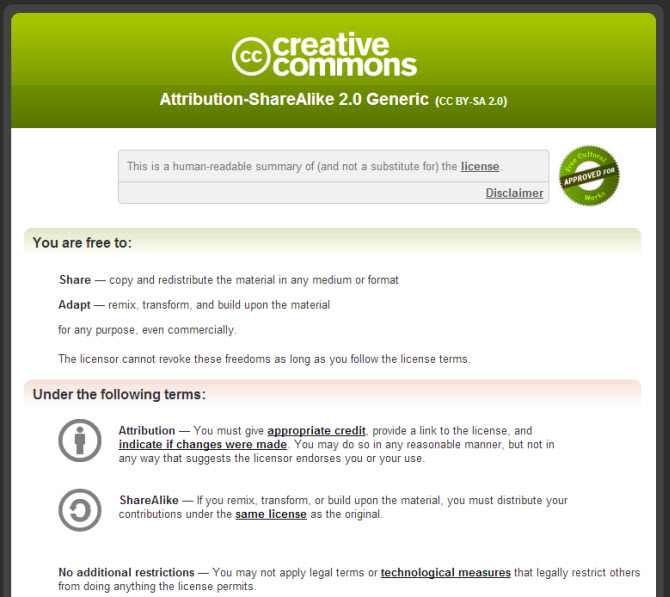
![]() Attribution-ShareAlike
Attribution-ShareAlike
Allowed to share (to copy, distribute and transmit the work) and remix (to adapt the work) and use it for commercial purposes provided if you alter, transform or build upon the work provided you distribute it under the similar license. You must attribute the work in the manner specified by the author or licensor.
![]() Attribution-NonCommercial
Attribution-NonCommercial
Allowed to share (to copy, distribute and transmit the work) and remix (to adapt the work) provided it isn’t used for commercial purposes. You must attribute the work in the manner specified by the author or licensor.
![]() Attribution-NonCommercial-NoDerivs
Attribution-NonCommercial-NoDerivs
Allowed to share (to copy, distribute and transmit the work) provided you do not alter, transform or build upon the work or use it for commercial purposes and you attribute it in the manner specified by the author or licensor.
Confused About Licenses?
If you want to add a Creative Commons license to your own work and you’re not sure what one you should add, try this license chooser tool. It also gives you the right license graphic to use.
Watch this video for a summary of the different Creative Commons licenses.
http://vimeo.com/ccanz/cckiwi
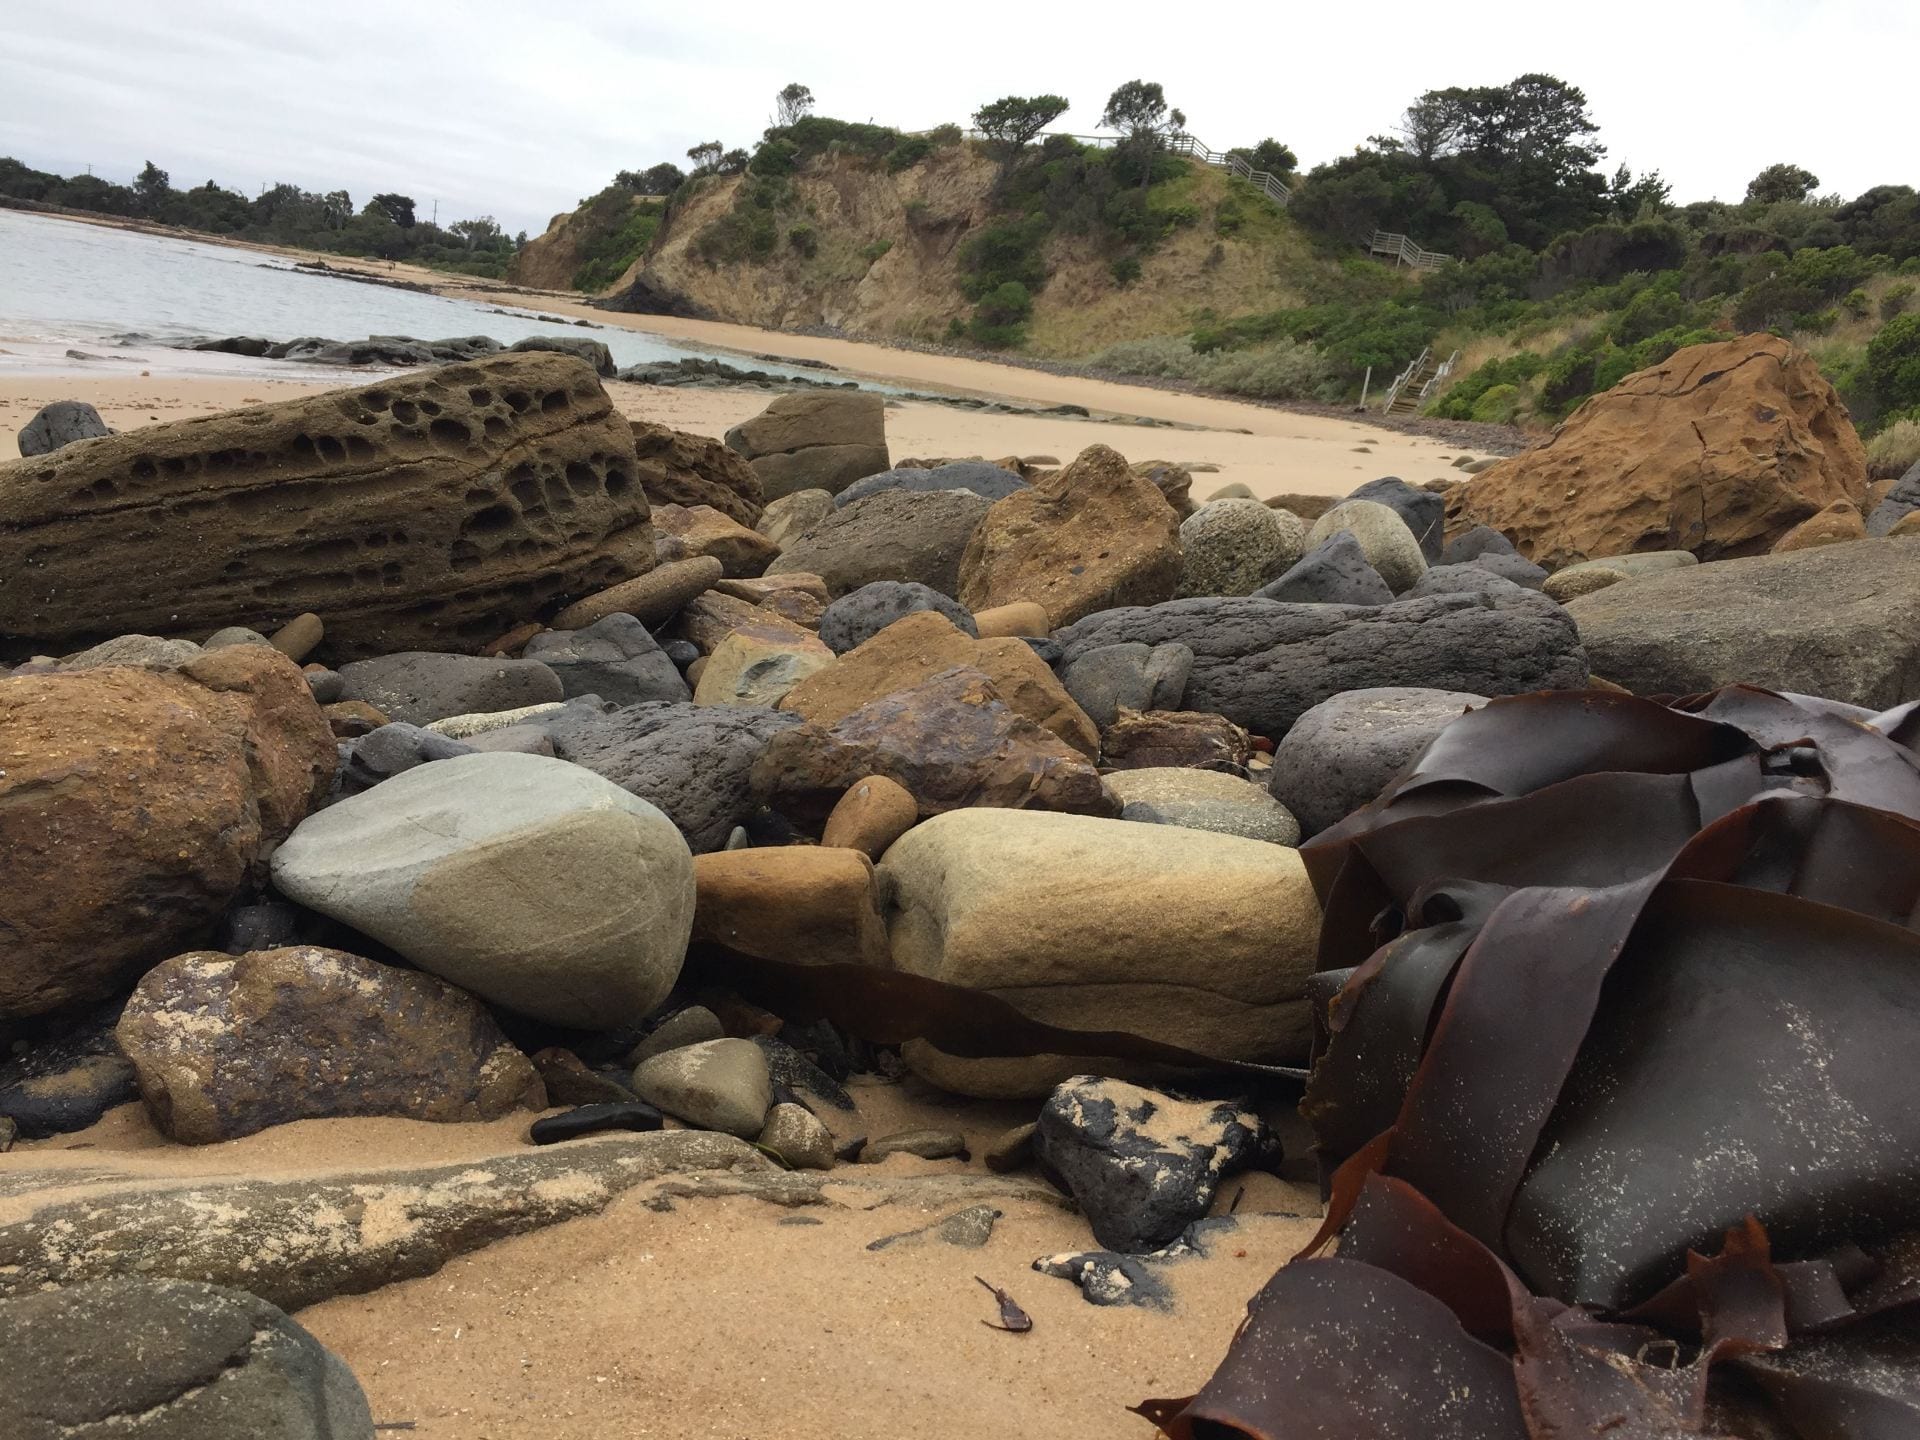
Flickr Creative Commons images
One of the most common sources of Creative Commons images used by bloggers is Flickr (an online photo sharing website).
Unfortunately, many assume all Flickr images are licensed under Creative Commons and are allowed to be used. This isn’t the case.
Images marked as “All Rights Reserved” are copyrighted and require permission from the person who uploaded it to Flickr. Images with “Some rights reserved” means the Flickr user has applied a Creative Commons license to their photo and you can use the image in the manner specified by the license.
If you look at images directly on Flickr always check to see which license applies to ensure you only use the image in the manner specified by the license.
The license is listed below the image.
For those you might be allowed to use, click on “Some rights reserved”.
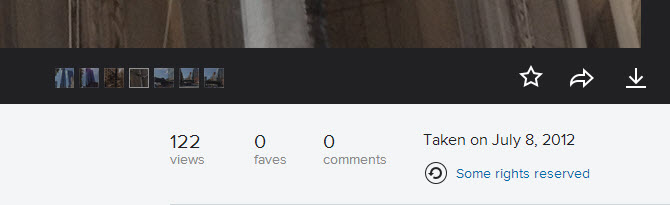
This takes you to the Creative Commons license where you can read how you are allowed to use the image.
Finding Creative Commons Images From Flickr
The best option for finding Flickr Creative Commons images is to use one of the great Flickr Search Engines.
Multicolr Search Lab
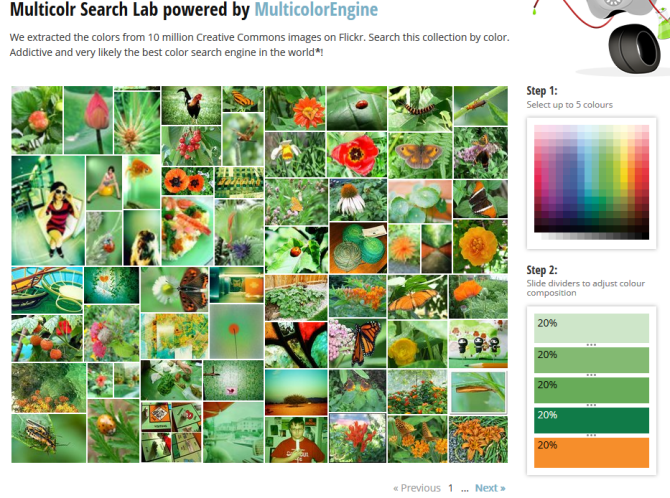
Multicolr Search Lab allows you to search Flickr images by color. This is a handy tool when you’re trying to match specific colors. All you need to do is select up to 5 colors.
Compfight
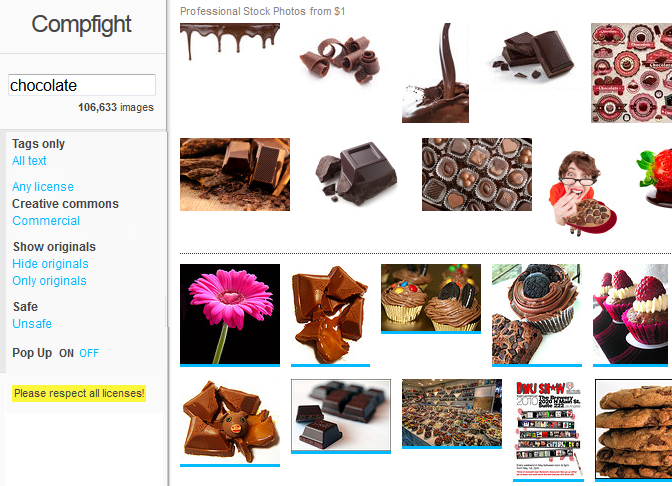
Compfight is one of the most popular Flickr Search engines. It provides a range of search options including:
- search by tags only
- search by all the text
- search by licenses
There’s also the option to show or hide originals and turn on/off the safe content filter.
All images above the line returned by your Compfight search are professional stock photos — they aren’t free to use. Those below the line are Flickr Photos.

Tip: How To Add An Image From The Compfight Website
Compfight is an image search engine that uses Creative Commons images from Flickr.
Here is how to add a photo using the Compfight website:
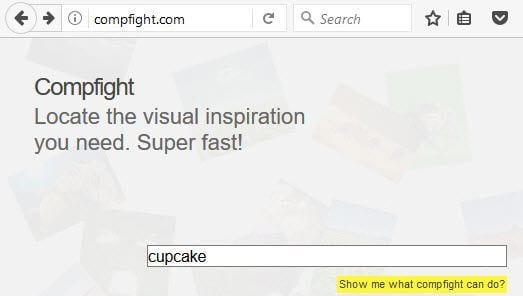
1. Go to Compfight.
2. Add your search term and then click Enter.
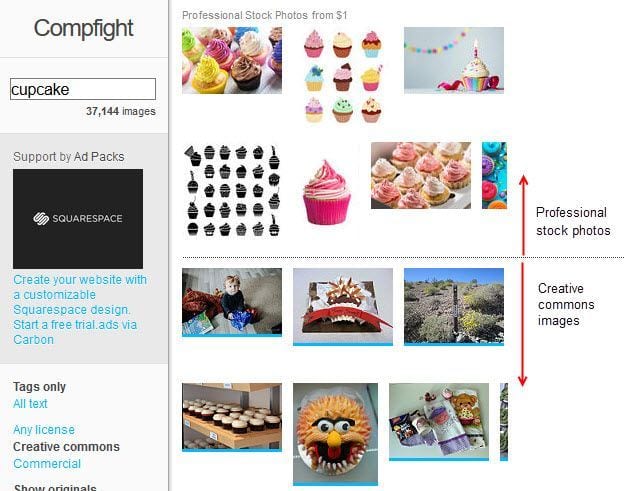
3. Click on Creative Commons on the search results page.

4. Click on the Creative Commons image you want to use (from below the line).
You can only use an image from below the line. All images above the line are professional stock photos and can only be used if you purchase them.
5. This launches a pop up image window.

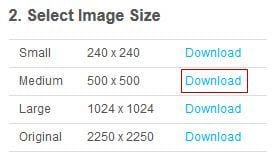
6. Click on ‘Download‘ next to the size you want to use to download it onto your computer.
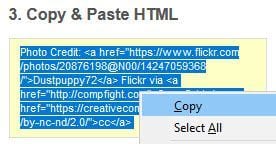
7. Copy the HTML.
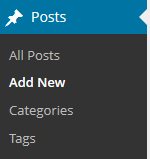
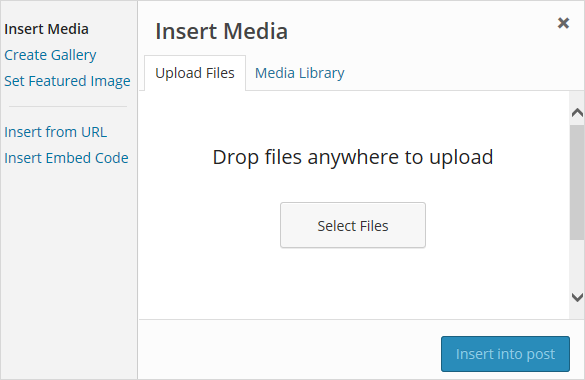
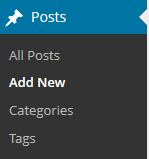
8. Go to Posts > Add New
9. Place your cursor where you want the image to appear and then click on the Add Media icon.

10. In the Add Media window click on the Upload files and then Select Files.

11. Find the photo you downloaded on your computer and then click Open to start uploading the image.
12. While your image is uploading you will see a progress bar.
13. Once the image has uploaded paste the HTML code into the caption field.
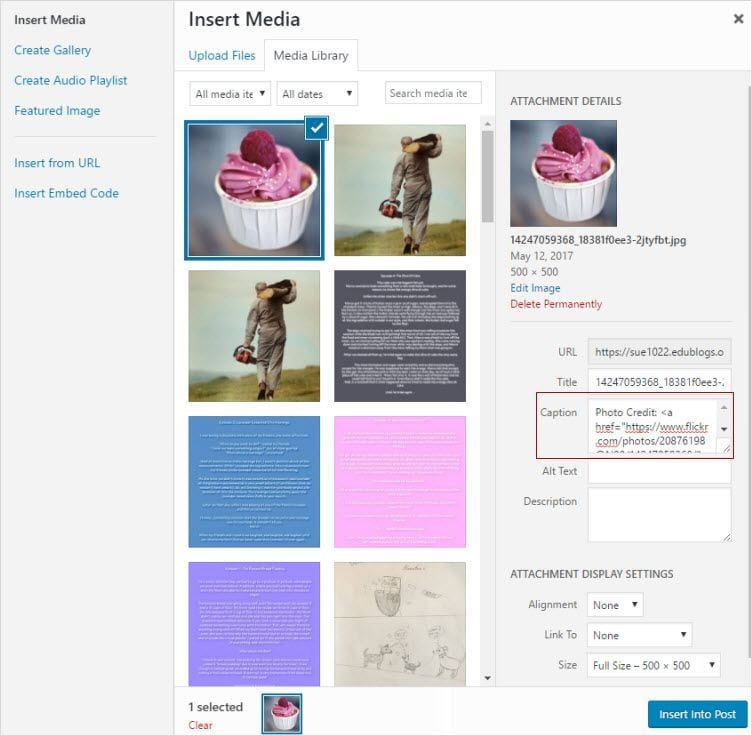
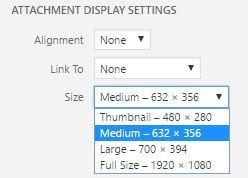
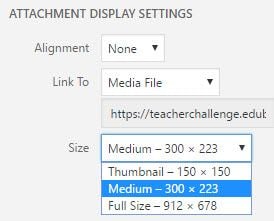
14. Select the size you want to insert from the dropdown menu next to ‘Size‘ in the attachment display settings.
13. Click Insert into Post.
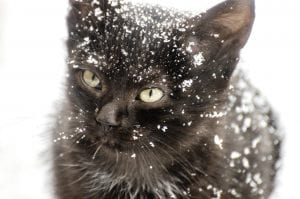
14. Your image will insert into your post and should look like the example below with the photo credit below it!
Creative Commons And Image Attribution
It’s a requirement of all Creative Commons Licenses that you attribute the original author. This means you can’t just use a Creative Commons image without correctly acknowledging the person who originally created it, unless the license is Creative Commons Zero.
Within or at the end of your blog post you must:
- attribute the image,
- include their copyright information,
- and you should link the photo back to its original photo page.
Here’s an example of image attribution:

Photo by Chotda licensed under Creative Commons Attribution 2.0 Generic.
Free And Public Domain Images
There are websites that provide public domain images that are free to use, or have their own free to use licensing.
Some of these are licensed with a Creative Commons Zero license. This is the least restrictive Creative Commons license and means there are no restrictions on use and no attribution required (although it can be polite to still attribute a Creative Commons Zero image).
Public domain works are those works that:
- Automatically enter the public domain when created because they are not copyrightable.
- Their copyright has expired.
- Their creator has assigned their work to the public domain.
Public domain images are free and available for unrestricted use.
Back to Top
Attributing Free And Public Domain Images
Public domain images and free to use images may not have a strict legal requirement of attribution, depending on the jurisdiction of content reuse, and depending on the terms and conditions of use of content from the website, but attribution is recommended to give correct provenance for most of these sites.
This means within or at the end your blog post it is recommended to attribute the image, include their copyright information and link the photo back to its original photo page.
Here’s a list of free and public domain websites:
All the images on Pixabay and Unsplash are Creative Commons Zero. They do not require any attribution and can be modified.
You need to refer to the terms and conditions on the other websites to see if attribution is needed and how it is meant to be added.
Back to Top
Add Image From Pixabay
Here is how to add an image from Pixabay if you don’t want to use the plugin as described above:
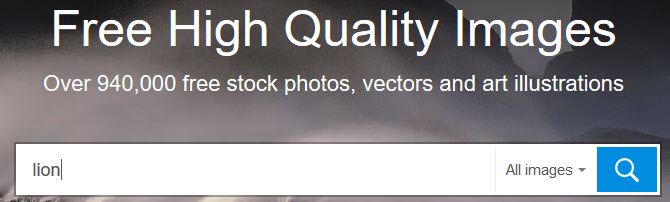
1. Go to Pixabay
2. Enter your search term and press Enter.
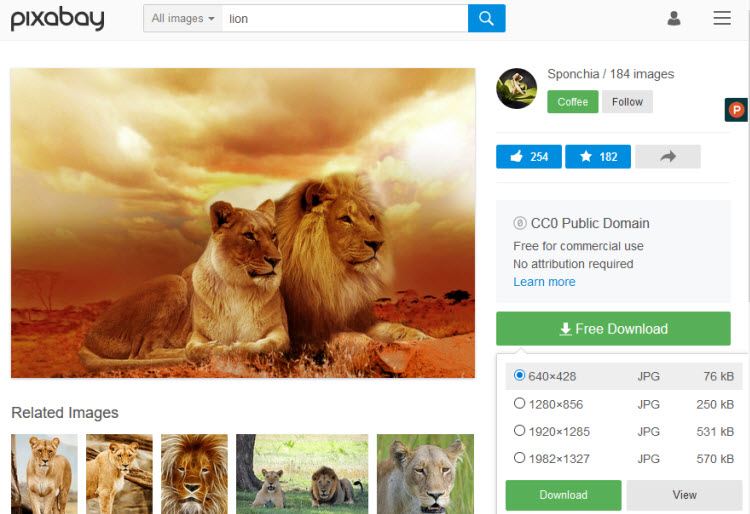
3. Click on the image you want to use (you can’t use any image in the sponsored images row).
4. This takes you to the image page.
5. Click on Free Download, select the size you want to download and then click Download. Save the image to your computer.
6. Go to Posts > Add New
7. Place your cursor where you want the image to appear and then click on the Add Media icon.

8. In the Add Media window click on the Upload files and then Select Files.
9. Find the photo you downloaded on your computer and then click Open to start uploading the image.
10. Select the size you want to insert from the drop-down menu next to ‘Size‘ in the attachment display settings.
11. Click Insert into Post.
Back to Top
Use The Pixabay Plugin To Add Creative Commons Images To Post
The Pixabay plugin is a quick and easy tool to find quality public domain images from Pixabay and upload them to your site with just one click.
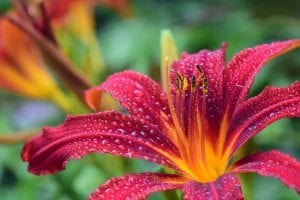
Below is an example of an image inserted using Pixabay plugin.
Using The Pixabay Plugin
Once you have activated the Pixabay plugin in Plugins > All you use it as follows:
1. Go to Posts > Add New (or Pages > Add New)
2. Write your post.
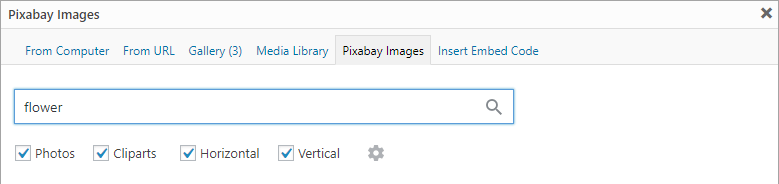
3. Place your cursor where you want the image to appear and then click on the Pixabay icon.

4. Add your search term and press enter.
5. Click on the image you want to insert into your post.

6. This uploads the image from Pixabay into your media library.
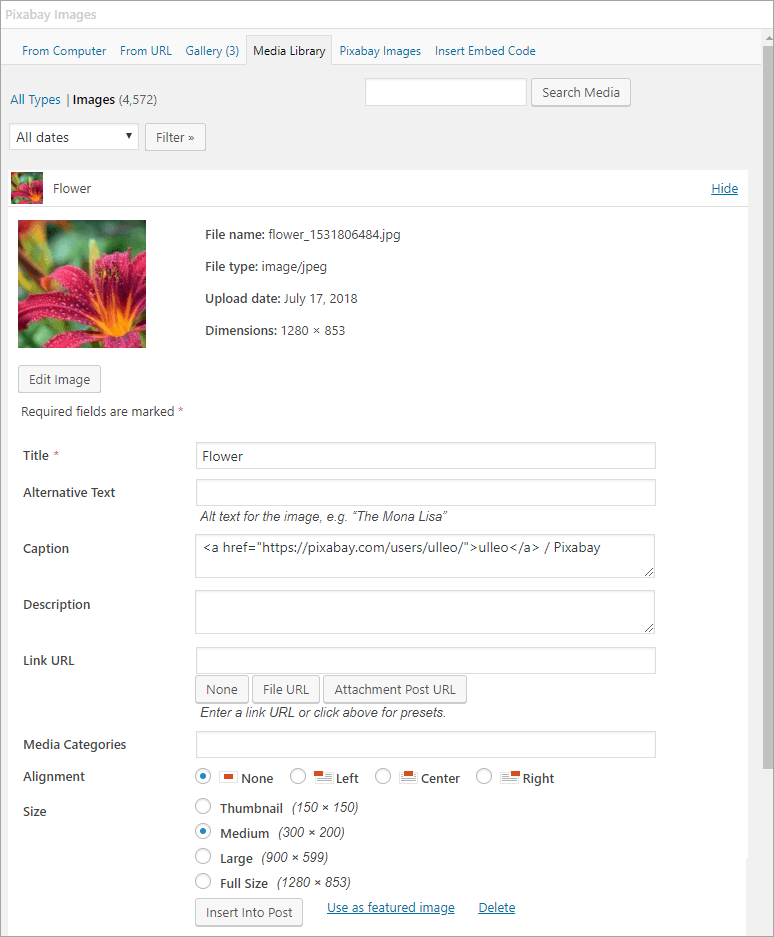
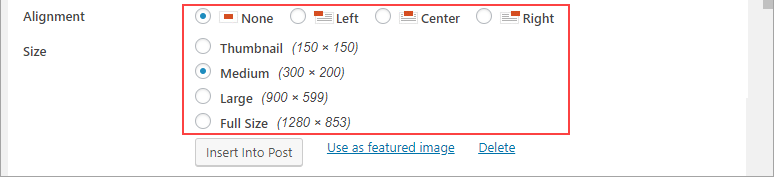
7. Select the Alignment, Size and then click Insert into post.
7. The image is added to the post with a link to the user who uploaded it to Pixabay.
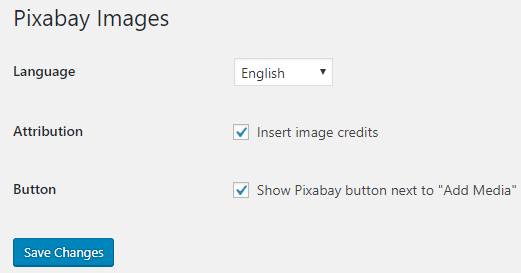
Pixabay Settings
You can change the Pixabay options in Settings > Pixabay. In most situations, you would not change these settings.
More Sources Of Free And Public Domain Images
Here are some good free and public domain image websites to use yourself or with students:
Openclipart
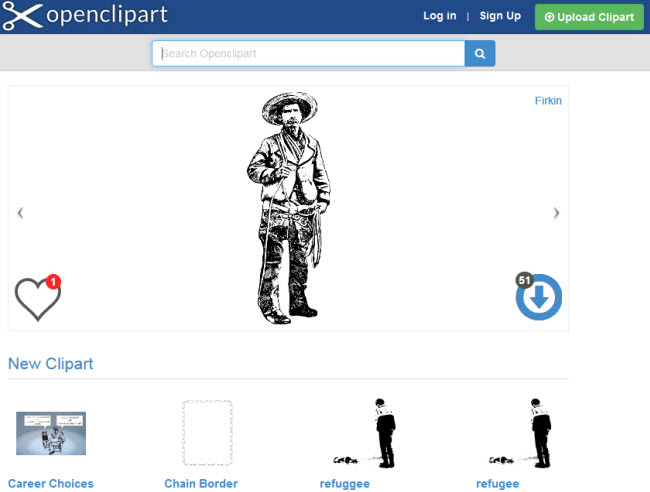
Openclipart is a gallery of clip art images that have been released into the public domain that can be used freely, for personal and commercial use, without attribution.
Wikimedia Commons
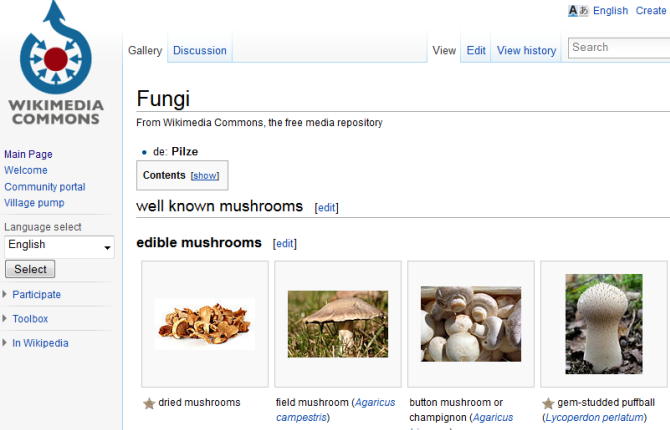
Wikimedia Commons is a media file repository for public domain and freely-licensed educational media content, including images, sound and video clips.
Images and other media on Wikimedia Commons are almost all under some kind of free license (usually public domain, CC-BY, CC-BY-SA, or GFDL (GNU Free Documentation license).
Clicking on an image or media file on Wikimedia Commons takes you to the information page for that file. This is where you’ll find the information supplied by the uploader, including the copyright status, the copyright owner, and the license conditions.
The following image from Wikimedia Commons is license under GNU Free Documentation and Creative Commons ShareAlike 3.0.

The Commons
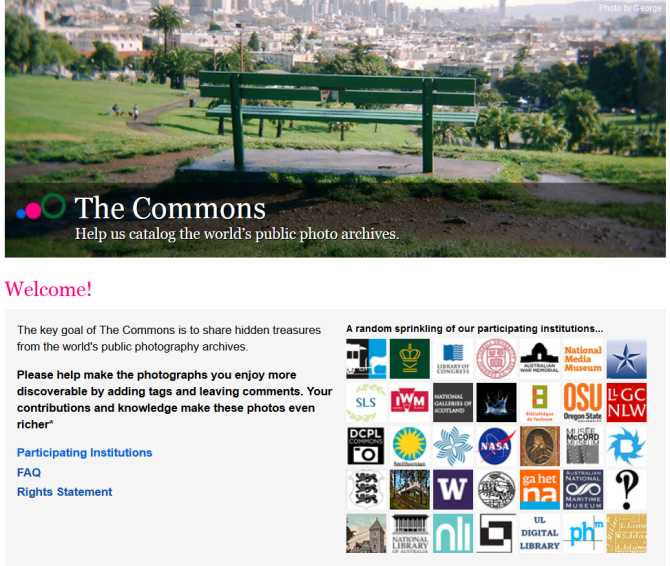
The Commons was set up to help share photos and images from the World’s public photography archives. There are over 56 institutions contributing images to The Commons.
A special rights statement — ‘No known copyright restrictions’ — was created to provide a copyright framework allowing institutions to add their photos to Flickr Commons and define how the public could use their work through their own rights statement.
Once you’ve located an image on The Commons you should click on the ‘No known copyright restrictions’ beneath the image.
This takes you to the Rights Statement for the Institution who supplied the image. This is where you’ll find information on how the institution would like the image to be attributed.

Below is an example of attributing an image from The Commons.
![River Cave, Margaret River [Western Australia, 2] [Frank Hurley] Courtesy of the National Library of Australia](https://teacherchallenge.edublogs.org/files/2013/09/9781155584_120ef3c486-1zys9lk.jpg)
Getty Open Content Images
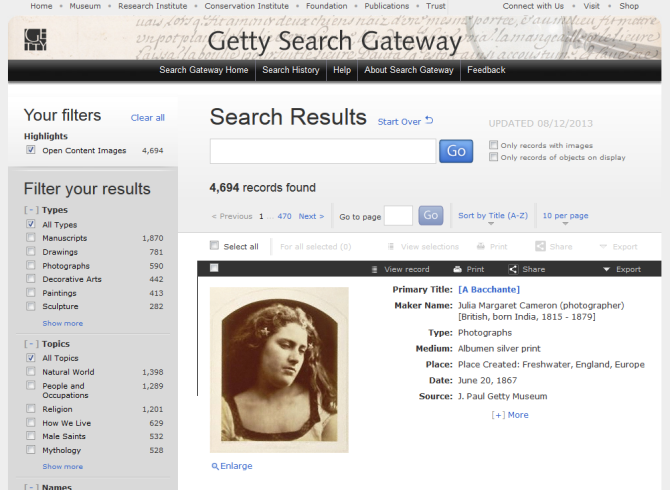
Getty Open Content images are all available digital images to which the Getty holds the rights or that are in the public domain to be used for any purpose. No permission is required.
The Getty requests that you use the following source credit when reproducing an image:
Digital image courtesy of the Getty’s Open Content Program.
Here’s an example of attributing an image from Getty’s open content program.
![Vincent van Gogh [Dutch, 1853 - 1890], Irises, Dutch, 1889, Oil on canvas, Digital image courtesy of the Getty’s Open Content Program.](https://teacherchallenge.edublogs.org/files/2013/09/00094701-11wy04t.jpg)
Getty Images
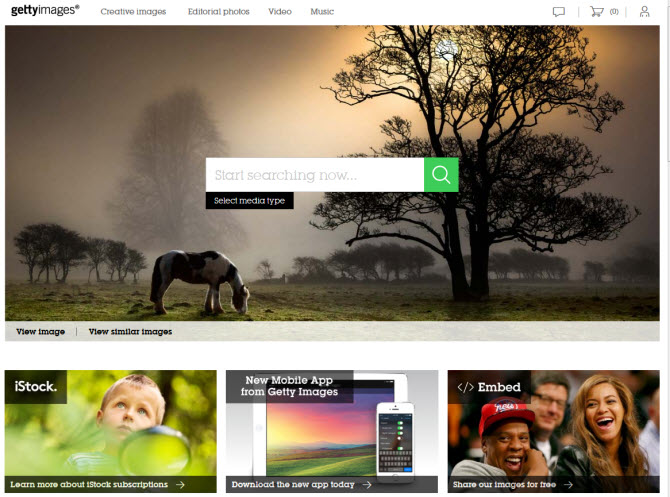
Getty Images is an American Stock photo agency which allows their images to be used for free for non-commercial use. Getty Images have no relationship with the J. Paul Getty Trust and the Getty Open Content images.
Once you have found an image on Getty Images you can embed it into a post or page using their embed code
Using Your Own Images
The alternative options for sourcing images from other websites are to upload your own photos or create images using online tools.
Here are some ideas for creating your own images:
- Comic Generators like ToonDoo
- Photo Editors like Befunky, fd’s Flickr Tools
- Tag Cloud Creators such as Wordle or WordArt.com
- Fun photo tools CutMyPic, Glitterfly, PhotoFunia
- Drawing tools like Google Drawings or Auto Draw
- Graphic Design sites like Canva or Adobe Spark
Your Task
Now we’ve talked about images, it’s time for you to show us your skills by writing a blog post that includes images.
Here are some ideas of what you might like to write about:
- Share what you have learned about Creative Commons and finding Creative Commons images. Tell us about your favorite sources of Creative Commons images.
- Share your tips for creating your own images.
- Write a review on ways of creating your own images using a range of different types of tools.
Leave a link to your post in a comment on this post so we can have a look at your post.
How to leave a comment: Scroll down to find the comment box. Write your comment, then enter your name and email address (email addresses are not published). Enter the anti-spam word. Press submit and we will moderate your comment ASAP.
https://dasarayransberry.edublogs.org/2023/04/24/copyright-information/
link to post
My favorite kind of source is Pixabay I would say that I learned a lot about Copyrights that i didn’t know before.
I tried out the feature to use external sources for pictures. Very confusing to do the others.
https://tr0m3r07.edublogs.org/2023/03/21/photos/
Useful information!
Really what I learned is that the safest and most creative bet on publishing/using photos is to use your own. Times are stressful, follow this link to find the best puppy headshot on the internet.
https://mvillagomez2.edublogs.org
Hello.
How are you guys doing?
I hope you have had a great start to your weekend.
I create my own images by utilizing my cell phone, emailing them, and then downloading to my computer.
Once downloaded, I can upload it to various media pages.
Got It!
https://mswashingtonweeklywinddown.edublogs.org/2022/12/03/blog-challenge-step-6-images-copyrights-ect/. I usedd my own personal photos.
It is very easy to take images and pictures that do not belong to you and use them in a project you create. We do not always have the right to use other peoples images.
My blog post with images on the main page,
https://rieska82.edublogs.org
I utilized Compfight when searching for my image to include in my most recent post “The Love for learning”. I am a creative person, so I found this task to be engaging. My first two times executing the step, I ran into an obstacle due to me not receiving the downloaded image but only the link to copy. I learned that to receive the download image, I had to click the original size of the imagine and then I was able to attain the picture in my files.
Here is the link: https://www.vecteezy.com/free-photos?utm_source=compfight&utm_medium=referral&utm_campaign=redirect
This lesson came as such a surprise to me because much like everyone else growing up, I assumed photos on the internet could be used anytime and for any purpose. I think I am likely a product of a generation that is used to being able to access whatever they want, whenever they want online.
Before this step, I believed that all pictures on the internet were free and didn’t know that some need to be purchased. I also learned ways to add images into a post which is very creative.
I liked using Pixabay the most since attributions aren’t needed.
Here’s a link to my post on it: https://malakhamed.edublogs.org/2022/11/28/my-experience-with-creative-commons-zero/
I was a bit confused about this step at first. I know that you can’t use any picture and upload it to your blog. You have to use pictures from certain sites that are free and open to the public. It was informing to know that everything on google isn’t free.
Before reading this step I did not know that there was a correct way to use photos from the internet and I did not realize that it was so easy to look for images to use and it is so easy to credit the author. From this step I also got many websites that I can use to get photos from. Overall using photos the correct way is easier that you might think.
Using the right images for your blog and understanding what to use and what not to use. It’s important to inform students of the proper usage of images. This is why using creative common images can help students make sure they are using a proper images. And also helps with copy rights issues because once you are licensed its a-lot easier to post the images you like.
I never realized how easy it is to take an image and use it as your own. This information has taught me how important it is to make sure if the author wants credit you give it to them. This slide has taught me there are resources to use to properly know what images need to be cited. It’s important to know that you can use your own images to reduce the risk of copyright issues.
One thing I learned from step 6 is that it is easy to take a picture from others without permission and that it is important to use websites that allow you to download images. Finding Creative Commons images can be easy using the right resources. One tip I thought was useful would be pixabay. Pixabay is a beneficial website where you can find useful pictures that give permission. One way I can create my own image would be to use a cartoon website where you can use your own different ideas to create an image.
My blog: https://haneeny123.edublogs.org
Haneen Yousef hyousef3@student.govst.edu
Only my photos from now on! And I will protect those too. There’s just too many rules to follow!
https://kwalker8.edublogs.org/2022/11/04/photos-and-copyrights-hmmm/
Step 6 taught me that I can’t just upload any image I see. I also learned that giving the site of the source isn’t enough. You have to ask for permission to use an image from someone else’s blog. I am going to use this information in the future when creating blog posts!
I learn that everything you find on the web is not common grounds for usage. Understanding this component of blogging is truly and eye opening event for me. As with all of these lesson I have a newfound interest and will work at it until I feel proficient in this subject matter (blogging).
Good Evening Educators and Future Educators
https://amartin16.edublogs.org/
I have learned a lot about Creative Commons. I used Pixabay to download great pictures for my blog. I actually had a lot of fun choosing the right images to support my blog. Check out my blog to see what all I have learned about it.
https://amartin16.edublogs.org/
The link to my post about pictures is:
https://jackiedonalds.edublogs.org/2022/04/03/the-importance-of-pictures/
I learned a lot about Creative Commons. Check out all I learned about it and see some of the cool images I was able to pull! https://notyouraverageteacher.edublogs.org/2022/04/04/images-copyright-creative-commons/
The link for my blog is
https://moldingminiminds.edublogs.org/
I learned so much regarding Creative Commons during this short lesson! There is still so much in order for me to feel like I have a handle of using images correctly.
Since I took a Digital Citizenship course, I learn about Pixaby and have been using that site for my images in my classroom presentations.
Ruth
rmangum@greenville.k12.sc.us
Hello, I really didn’t know what kind of picture I wanted on here so I just went with one that I took myself.
https://shanhallwill25.edublogs.org/2021/11/09/creating-images/
Hello, (Hailey Palella, hpalella@gmail.com)
I learned Creative Commons founded in 2001. Creative commons is an organization that provides free content licenses that people can apply to their work. I also learned from the different Creative Commons licenses people use depending on what restriction(s) they want to apply to their work, for example, Allowed to share (to copy, distribute and transmit the work), remix (to adapt the work) and use it for commercial purposes provided you attribute the work in the manner specified by the author or licensor. Creating your own photos takes a lot of time especially with a difficult topic. I would suggest just to use the website given in the blog. Using the these tools provided helps understand the true meaning behind it and what the licensures mean. I would check all of the websites out and see if I like any of the images provided there. Here is my blog post including an image check it out: https://testtakingtipsforstudents.edublogs.org/2021/11/03/testing-tip-number-2/
This was a lot of information and was a little bit overwhelming, but I cant wait to get better with adding photos to my blog to make it appealing to the viewer’s eye !!.
Here’s what I’m starting out with:
https://educator21.edublogs.org/2021/10/19/photos-photos-photos/
Posting images is something I love to do and even using my own image to brighten up my blog page.
I’m lucky to have found the resources on this page to find Creative Commons images for my future blog posts and possibly blog design. Even teaching about fair use, it can all be very confusing.
So much great information, a bit overwhelming. Now to put this all togther.
Creative commons laws allows the creator of a work to share it freely with others. Canva is a great source for getting creative common images. There is a free plan available and 50,000+ templates to create images and designs for any occasion.
My personal blog will be talking about books and conversations that I have with others about books. I don’t plan to share any text, but I do plan (or hope to use) the books’ images in my blog. I hope that doesn’t break any copyright laws by just showing the image.
I’m still confused on using the Pixabay plug-in. I actived it, and was thinking I’d see a button or link when I added media. I didn’t. I went to the website and downloaded a picture. Here is my blog: https://nellieleoma.edublogs.org/2020/09/05/covid-19-stress/
Hi there! When using the new WordPress Block editor, you would need to select the Classic block and then use the Add Media button from the toolbar in the Classic block. The Pixabay Images link will then appear on the left of the Add Media screen. All the best with the teacher blogging challenge! Thanks, Barry
I am currently working on my personal blog and do not have it completed. There is so much information that I am a bit overwhelmed. Hoping to get the hang of everything and finish my personal blog very soon.
I have taken many classes on creative commons, copyright, fair use guidelines and my plan to prevent myself from copyright infringement is to use my own photos that I have taken in my travels across the United States. I also plan to state that on my blog page that my photos were taken by me and that they are not allowed to be re-created without my permission, etc. I also plan to get permission from any family members before I post a photo on my blog page or else the photo will not be posted if said family member doesn’t give permission for their photo to be posted. Even with their permission because I am dealing with photos and family history that is why I am keeping my blog password protected. It is a complicated or can be a complicated world sometimes to figure out if an image found online can be in copyright infringement or not so I say if in doubt use your own photos.
SagartJDP
Wow! I am certainly learning so much with each step of this teacher challenge. While I still do not have widgets mastered, I did conquer adding images a little easier. I used both Pixaby and Compfight to find my images. Here is my post: https://napier7997.edublogs.org/
As I’ve began writing my first few posts, finding images that are copyright free and enhance the meaning behind the content, has been a challenge. I imagine that I’ll use a lot of my own images for my blog and then find images of pixabay and the commons as needed. I’ve also dabbled into creating my own images using Canva.
Hey Kelly! Canva is definitely one of my favorite tools, so easy to use and great templates too.
I have added to the blog I was working on in Step 5. Pictures from Pixabay (within a post) and some of my own pictures (on my about page) have been added.
https://leemansblog.edublogs.org/
I suspect it’s probably because of the theme I chose, but I found that in Edit mode, what I saw was not always what I got in relation to the alignment of pictures and text.
My blog post about Creative Commons
http://morganalbright.edublogs.org/2020/01/24/creative-commons/
My blog post with images…
http://longlearners.edublogs.org/2019/09/15/truth-sarcasm-and-diet-dew/
Creative Commons is a term that most people need to complete more research on, espcially in this age of cut, paste, and save as. It can get a bit complicated so I am hopeful adding the Pixaby widget will help me with this issue.
Knowing the importance of being aware of using the contents found on the internet is common yet we always ignore some of the rules while we “borrow” other people’s contents! Great content provided that reminds us one more time how to make use of the contents on the internet more wisely!
In the process of setting up any contents, we need to be aware of where the contents re from and whether or not we have the right to use them! This is one of the most important steps when I create my own blog! Keeping this information in mind is fairly important as e do not want to use the contents from other people if we do not obtain the right to do so!
What I learned about creative commons is that you have to be careful of what you post. You need to give credits and ask for permission when using pictures.
Here is a link of an image I found using creative commons.
http://yramos2.edublogs.org/2019/03/17/step-6/
I utilized pixabay when searching for my image to upload. I learned a lot about creative commons and images while executing this step. Overall i enjoyed it and gained lots of information. Here is the link to view the image i uploaded, i hope you enjoy it.
http://aivey21.edublogs.org/2019/03/01/hair-color/