Step 7: Images, Copyright, And Creative Commons
Welcome to the seventh step in our free professional learning series on class and student blogging!
The aim of this step is to:
- Discuss copyright, fair use, and using images on blogs.
- Introduce you to Creative Commons.
- Explain how to find and add Creative Commons images to posts.
- Define free and public domain images, and explain how to source them.
Introduction To Copyright, Fair Use, And Images In Posts
You can’t just use any image you like in a blog post.
Why? Because unless stated otherwise, the law automatically grants full “copyright” over any creative work a person makes.
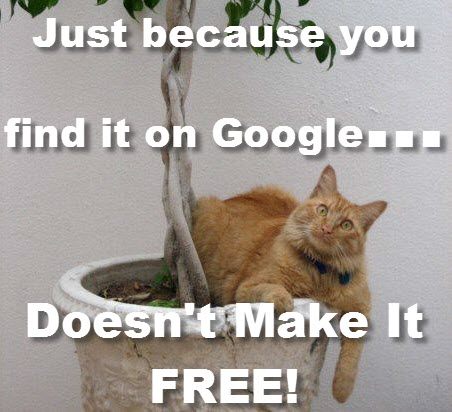
- Dexter the cat hates those that steal his photos…
You may be thinking it’s okay because as educators, we have a few more flexible rules, called “Fair Use”, to play by.
Fair use, in some cases, means you may have more flexible copyright rules if an image, text, video, etc. is being used for educational purposes.
The trouble is, most of the laws and rules that cover fair use and education were written well before the invention of the web. They don’t apply to use of copyright material on the internet. Using copyright material leaves you open to copyright infringement.
So what does this mean?
You need to:
- Learn what images you are and aren’t allowed to use, and why.
- Learn how to correctly attribute images you are allowed to use.
- Educate your students that you can’t just use any images online on your blogs (or other digital work).
- Show them how to source and attribute images they are allowed to use.
Understanding digital copyright is an essential skill we need to understand and teach our students.
Refer to The Educator’s Guide to Copyright, Fair Use, and Creative Commons for comprehensive information on the use of images, curriculum docs, text and quotes, music, and videos.
The safest way to source images for your blog is to either:
- Use Creative Commons images.
- Use free (Creative Commons Zero) or public domain images.
- Use your own photos or use images you’ve created.
Including The Source Is Not Enough
A situation we commonly see on blogs is where someone uses an image they found online and then include a link to the site they got it from.
For example,
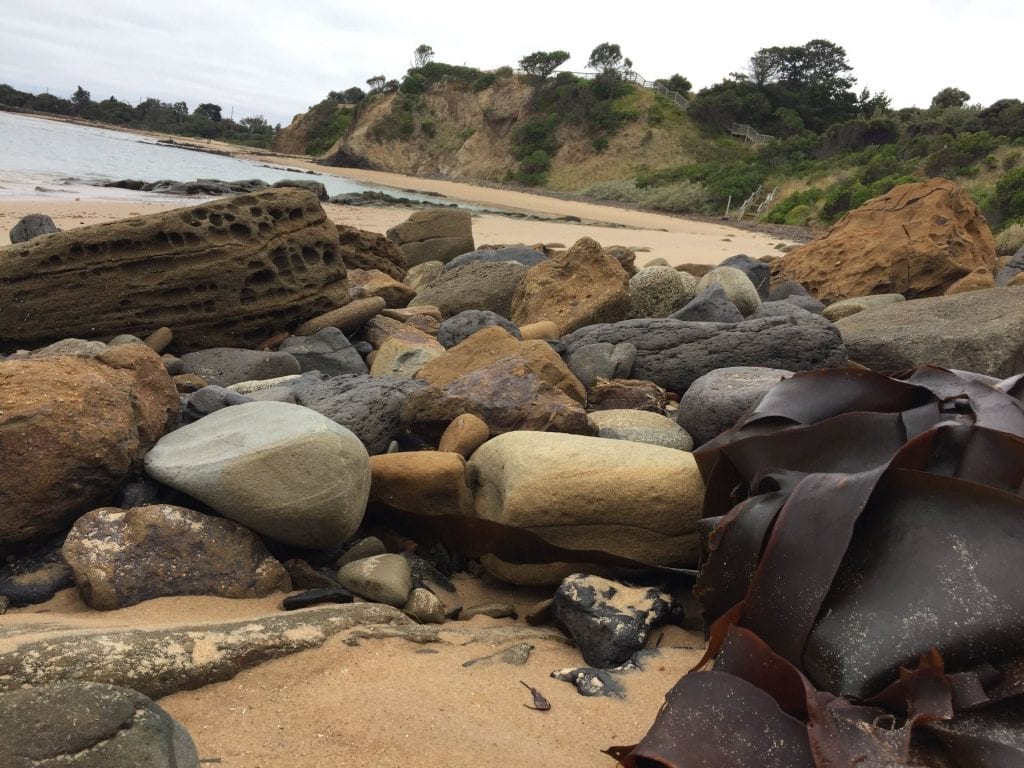
Just because you link to the source of an image, does not mean you can use it. You would need to ask the image creator for permission.
Read on to find out about Creative Commons and ways you can find images to use — legally and ethically.
Introduction to Creative Commons
Creative Commons, founded in 2001, is an organization that provides free content licenses that people can apply to their work. These are known as Creative Commons licenses.
When you license your work with Creative Commons, you are allowing people to use it without having to ask permission, provided they use it in the manner stated in your Creative Commons license.
The reason people use Creative Commons licenses is to make it easier for everyone to share and adapt creative work without the concern of copyright infringement.
Watch this video on Creative Commons.
Creative Commons licenses are used for books, websites, blogs, photographs, films, videos, songs, and other audio and visual recordings.
If an image, or website, doesn’t include a Creative Commons license, or isn’t public domain work, or doesn’t indicate that the content is free to use, then it is automatically implied that all content is copyright and you shouldn’t use it! Put simply — unless stated otherwise, it is copyright.
There are websites that provide public domain images that are free to use, or have their own free to use licensing, but you need to make sure you follow their terms and conditions of use.
For those wondering, unless a blogger includes a Creative Commons license, all content on that blog is automatically the copyright of the blogger.
Back to Top
Creative Commons Licenses
There are several different types of Creative Commons licenses people use depending on what restriction(s) they want to apply to their work.
Here is a quick summary of the different types of Creative Commons licenses:
 Attribution CC BY
Allowed to share (to copy, distribute and transmit the work), remix (to adapt the work) and use it for commercial purposes provided you attribute the work in the manner specified by the author or licensor.
 Attribution-NoDerivs
Allowed to share (to copy, distribute and transmit the work) and use it for commercial purposes provided you do not alter, transform or build upon the work and you attribute it in the manner specified by the author or licensor.
 Attribution-NonCommercial-ShareAlike
Allowed to share (to copy, distribute and transmit the work) and remix (to adapt the work) provided it isn’t used for commercial purposes, you attribute the work in the manner specified by the author or licensor and you distribute it under the same license.![]()
Attribution-ShareAlike
Allowed to share (to copy, distribute and transmit the work) and remix (to adapt the work) and use it for commercial purposes provided if you alter, transform or build upon the work provided you distribute it under the similar license. You must attribute the work in the manner specified by the author or licensor.
 Attribution-NonCommercial
Allowed to share (to copy, distribute and transmit the work) and remix (to adapt the work) provided it isn’t used for commercial purposes. You must attribute the work in the manner specified by the author or licensor.
 Attribution-NonCommercial-NoDerivs
Allowed to share (to copy, distribute and transmit the work) provided you do not alter, transform or build upon the work or use it for commercial purposes and you attribute it in the manner specified by the author or licensor.
Confused About Licenses?
If you want to add a Creative Commons license to your own work and you’re not sure what one you should add, try this license chooser tool. It also gives you the right license graphic to use.
Flickr Creative Commons Images
One of the most common sources of Creative Commons images used by bloggers is Flickr (an online photo sharing website).
Unfortunately, it is often assumed the Flickr images are licensed under Creative Commons and are allowed to be used. This isn’t the case.
- Images marked as “All Rights Reserved” are copyrighted and require permission from the person who uploaded it to Flickr.
- Images with “Some rights reserved” means the Flickr user has applied a Creative Commons license to their photo and you can use the image in the manner specified by the license.
If you look at images directly on Flickr always check to see which license applies to ensure you only use the image in the manner specified by the license.
The license is listed below the image.
For those you might be allowed to use, click on “Some rights reserved” for further explanation.

This takes you to the Creative Commons license where you can read how you are allowed to use the image.
Finding Creative Commons Images
A useful option for finding Flickr Creative Commons images is to use one of the great Flickr Search Engines.
Compfight
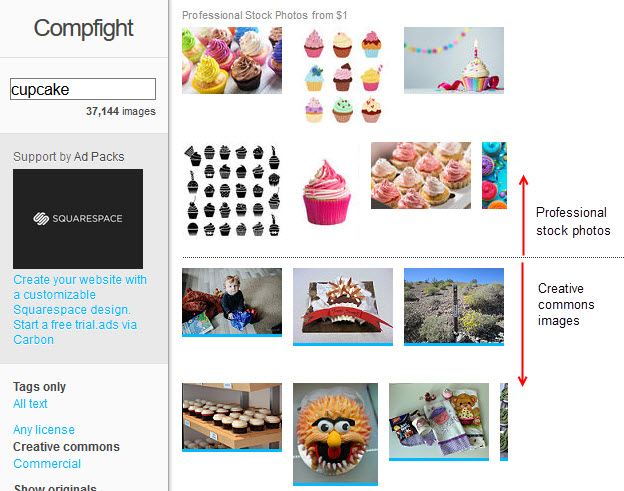
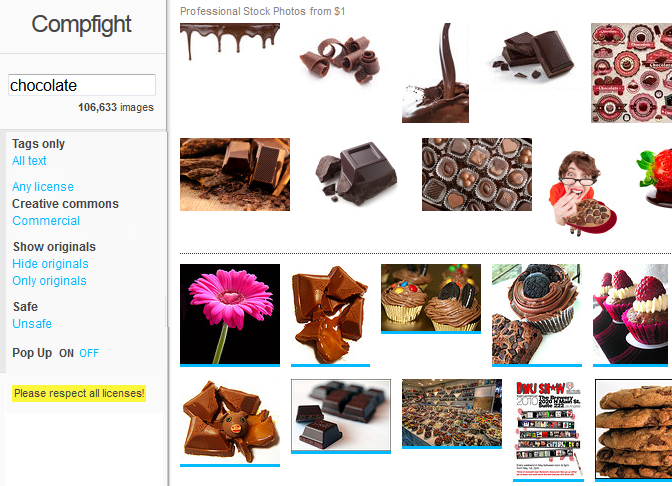
Compfight is one of the most popular Flickr Search engines. It provides a range of search options including search by tags only vs. all the text, licenses, the option to show or hide originals, and turn on/off the safe content filter.
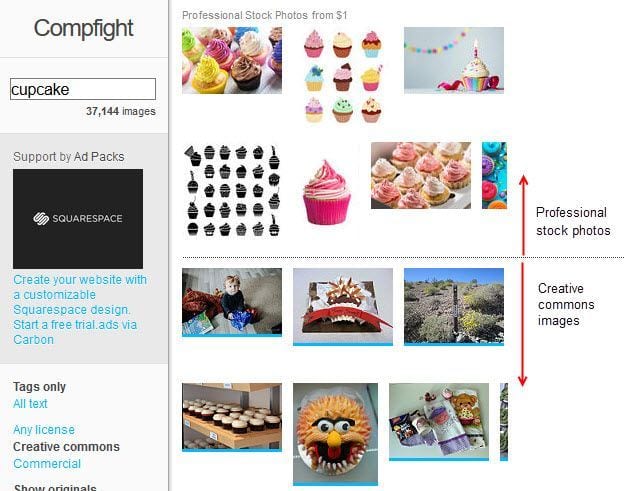
All images above the line returned by your Compfight search are professional stock photos — they aren’t free to use. Those below the line are Flickr Photos.
Photos for Class
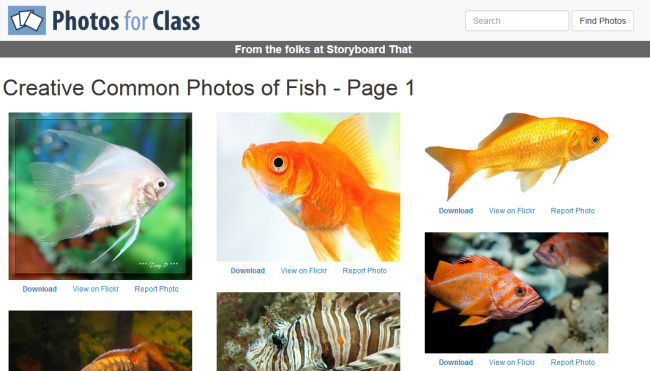
Photos for Class is a student friendly place for searching safe images from Creative Commons Flickr (and more recently, Pixabay Safe Search).
The downloaded images include attribution of the photographer and the image license terms.
Multicolr Search Lab
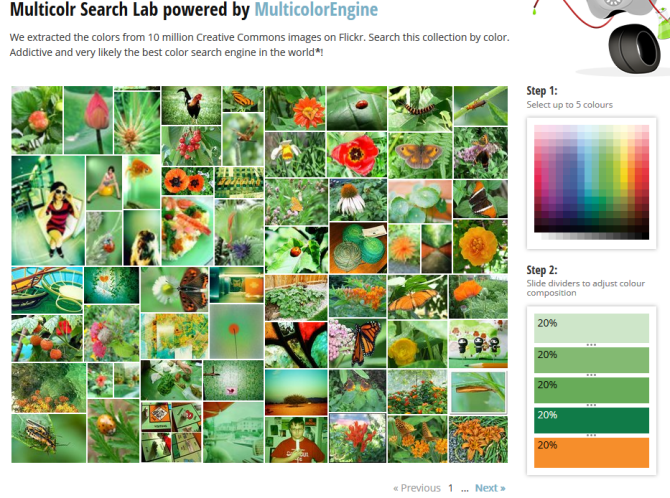
Multicolr Search Lab allows you to search Flickr images by color. This is a handy tool when you’re trying to match specific colors. All you need to do is select up to 5 colors.
Back to Top
Creative Commons And Image Attribution
It’s a requirement of all Creative Commons Licenses that you attribute the original author. This means you can’t just use a Creative Commons image without correctly acknowledging the person who originally created it.
Within or at the end your blog post you must:
- attribute the image,
- include their copyright information,
- and you should link the photo back to its original photo page.
Here’s an example of image attribution:
Photo by Chotda licensed under Creative Commons Attribution 2.0 Generic.
Back to Top
Use The Pixabay Plugin To Add Creative Commons Images To Post
The Pixabay plugin is a quick and easy tool to find quality public domain images from Pixabay and upload them to your site with just one click.
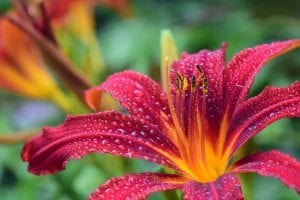
Below is an example of an image inserted using Pixabay plugin.

Using Pixabay
Once you have activated the Pixabay plugin in Plugins > All you use it as follows:
1. Go to Posts > Add New (or Pages > Add New)
2. Write your post.
3. Place your cursor where you want the image to appear and then click on the Pixabay icon.

4. Add your search term and press enter.

5. Click on the image you want to insert into your post.
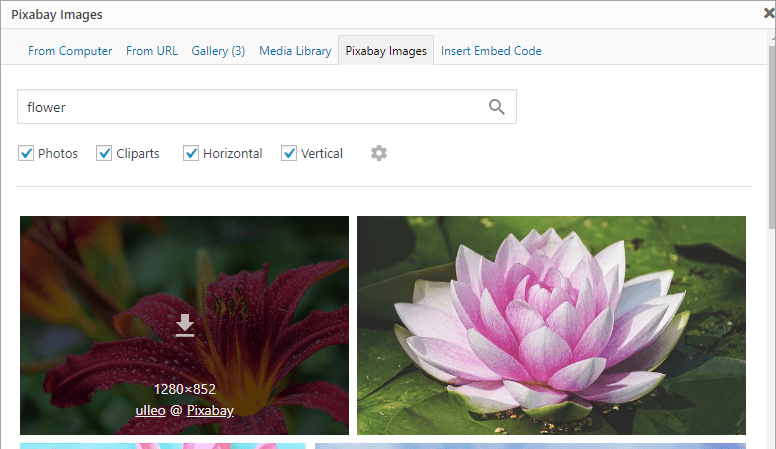
6. This uploads the image from Pixabay into your media library.
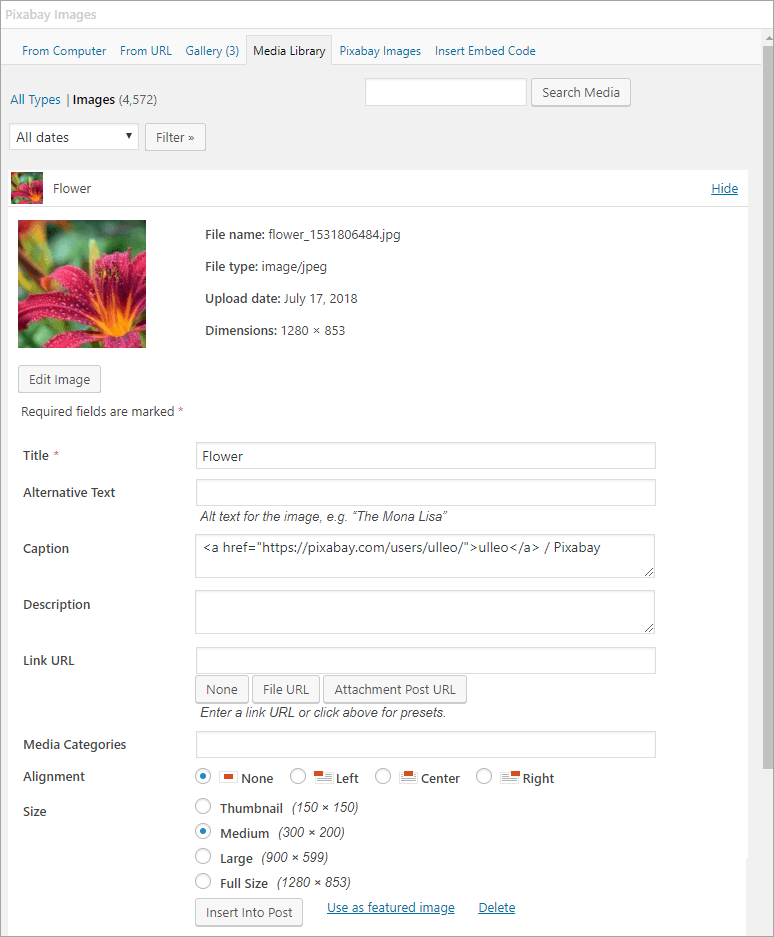
7. Select the Alignment, Size and then click Insert into post.

7. The image is added to the post with a link to the user who uploaded it to Pixabay.
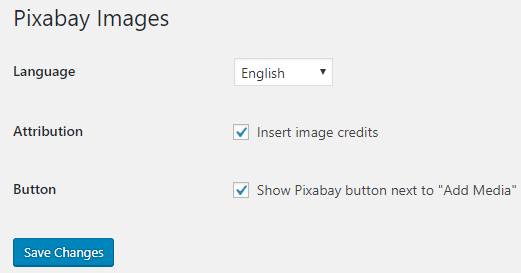
Pixabay Settings
You can change the Pixabay options in Settings > Pixabay. In most situations, you would not change these settings.
Add An Image From The Compfight Website
Compfight is an image search engine that uses Creative Commons images from Flickr.
Here is how to add a photo using the Compfight website:
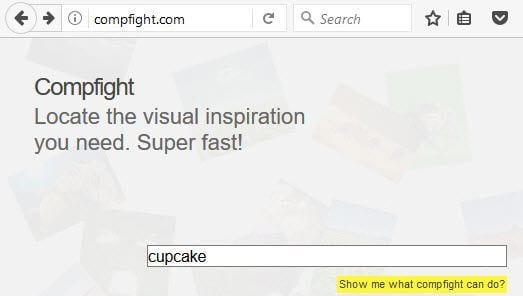
1. Go to Compfight.
2. Add your search term and then click Enter.
3. Click on Creative Commons on the search results page.

4. Click on the Creative Commons image you want to use (from below the line).
You can only use an image from below the line. All images above the line are professional stock photos and can only be used if you purchase them.
5. This launches a pop up image window.

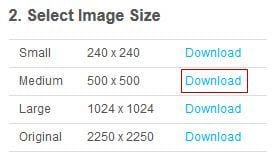
6. Click on ‘Download‘ next to the size you want to use to download it onto your computer.
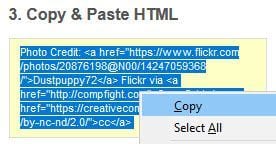
7. Copy the HTML.
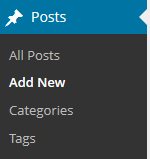
8. Go to Posts > Add New
9. Place your cursor where you want the image to appear and then click on the Add Media icon.

10. In the Add Media window click on the Upload files and then Select Files.

11. Find the photo you downloaded on your computer and then click Open to start uploading the image.
12. While your image is uploading you will see a progress bar.
13. Once the image has uploaded paste the HTML code into the caption field.
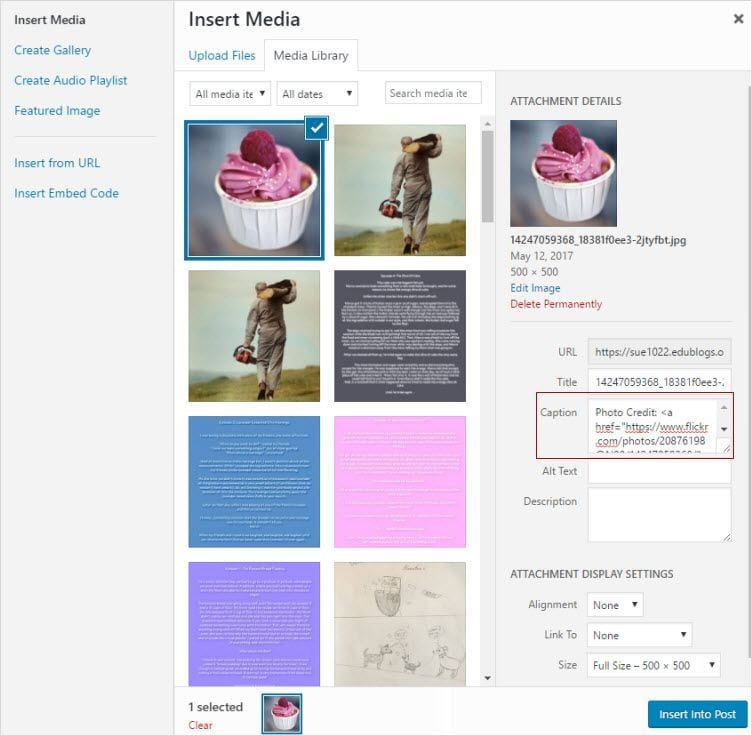
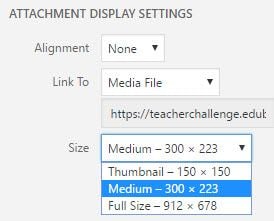
14. Select the size you want to insert from the dropdown menu next to ‘Size‘ in the attachment display settings.
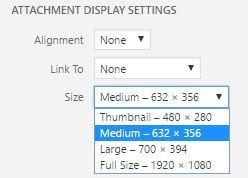
13. Click Insert into Post.
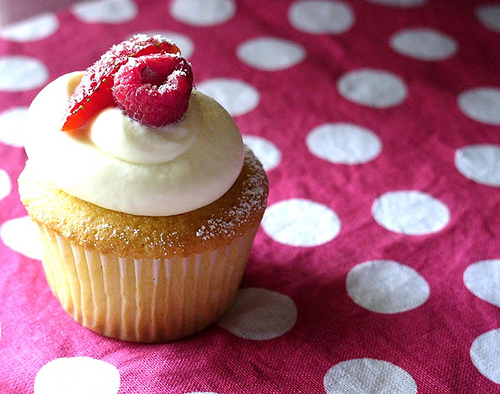
14. Your image will insert into your post and should look like the example below with the photo credit below it!

Free And Public Domain Images
There are websites that provide public domain images that are free to use, or have their own free to use licensing.
Some of these are licensed with a Creative Commons Zero license. This is the least restrictive Creative Commons license and means there are no restrictions on use and no attribution required (although it can be polite to still attribute a Creative Commons Zero image).
Public domain works are those works that:
- Automatically enter the public domain when created because they are not copyrightable.
- Their copyright has expired.
- Their creator has assigned their work to the public domain.
Public domain images are free and available for unrestricted use.
Back to Top
Attributing Free And Public Domain Images
Public domain images and free to use images may not have a strict legal requirement of attribution, depending on the jurisdiction of content reuse, and depending on the terms and conditions of use of content from the website, but attribution is recommended to give correct provenance for most of these sites.
This means within or at the end your blog post it is recommended to attribute the image, include their copyright information and link the photo back to its original photo page.
Here’s a list of free and public domain websites:
All the images on Pixabay and Unsplash are Creative Commons Zero. They do not require any attribution and can be modified.
You need to refer to the terms and conditions on the other websites to see if attribution is needed and how it is meant to be added.
Back to Top
Add Image From Pixabay
Here is how to add an image from Pixabay if you don’t want to use the plugin as described above:
1. Go to Pixabay
2. Enter your search term and press Enter.

3. Click on the image you want to use (you can’t use any image in the sponsored images row).
4. This takes you to the image page.
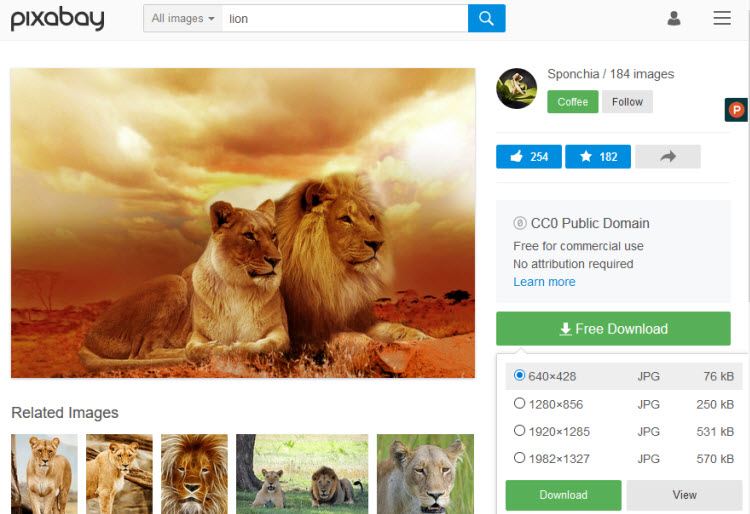
5. Click on Free Download, select the size you want to download and then click Download. Save the image to your computer.
6. Go to Posts > Add New

7. Place your cursor where you want the image to appear and then click on the Add Media icon.

8. In the Add Media window click on the Upload files and then Select Files.
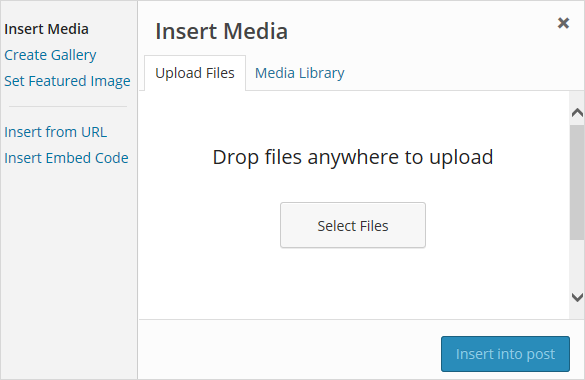
9. Find the photo you downloaded on your computer and then click Open to start uploading the image.
10. Select the size you want to insert from the drop-down menu next to ‘Size‘ in the attachment display settings.
11. Click Insert into Post.
Back to Top
More Sources Of Free And Public Domain Images
Here are some good free and public domain image websites to use with students:
Openclipart
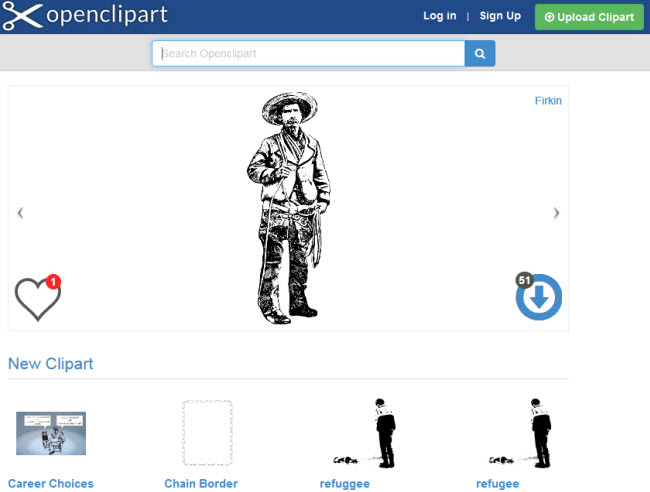
Openclipart is a gallery of clip art images that have been released into the public domain that can be used freely, for personal and commercial use, without attribution.
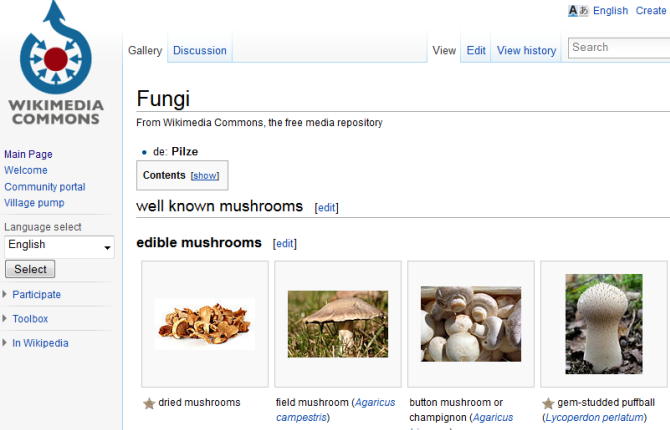
Wikimedia Commons
Wikimedia Commons is a media file repository for public domain and freely-licensed educational media content, including images, sound and video clips.
Images and other media on Wikimedia Commons are almost all under some kind of free license (usually public domain, CC-BY, CC-BY-SA, or GFDL (GNU Free Documentation license).
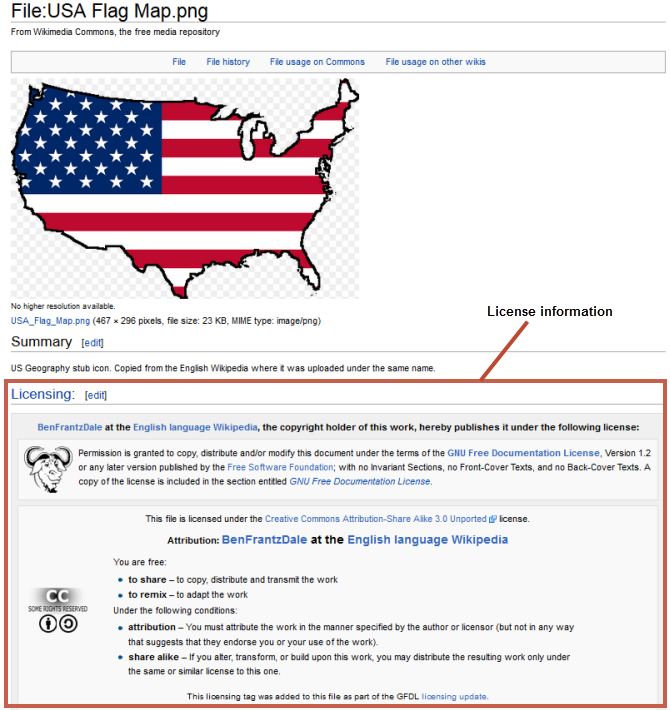
Clicking on an image or media file on Wikimedia Commons takes you to the information page for that file. This is where you’ll find the information supplied by the uploader, including the copyright status, the copyright owner, and the license conditions.
The following image from Wikimedia Commons is license under GNU Free Documentation and Creative Commons ShareAlike 3.0.
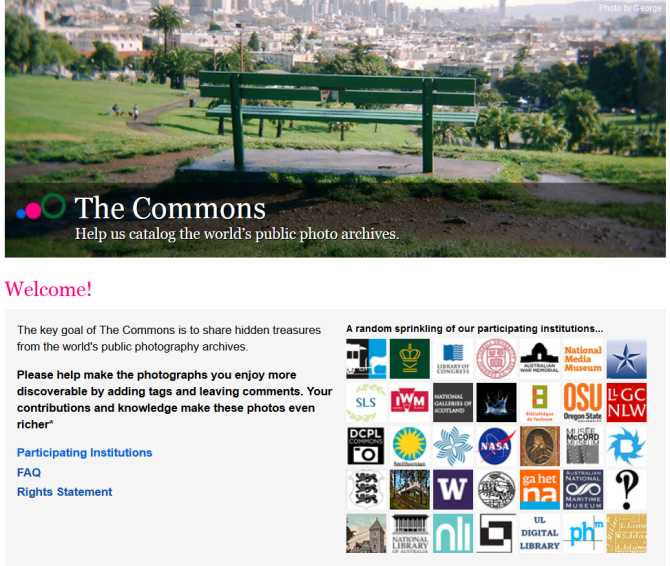
The Commons
The Commons was set up to help share photos and images from the World’s public photography archives. There are over 56 institutions contributing images to The Commons.
A special rights statement — ‘No known copyright restrictions’ — was created to provide a copyright framework allowing institutions to add their photos to Flickr Commons and define how the public could use their work through their own rights statement.
Once you’ve located an image on The Commons you should click on the ‘No known copyright restrictions’ beneath the image.
This takes you to the Rights Statement for the Institution who supplied the image. This is where you’ll find information on how the institution would like the image to be attributed.

Below is an example of attributing an image from The Commons.
![River Cave, Margaret River [Western Australia, 2] [Frank Hurley] Courtesy of the National Library of Australia](https://teacherchallenge.edublogs.org/files/2013/09/9781155584_120ef3c486-1zys9lk.jpg)
Getty Open Content images
Getty Open Content images are all available digital images to which the Getty holds the rights or that are in the public domain to be used for any purpose. No permission is required.
The Getty requests that you use the following source credit when reproducing an image:
Digital image courtesy of the Getty’s Open Content Program.
Here’s an example of attributing an image from Getty’s open content program.
![Vincent van Gogh [Dutch, 1853 - 1890], Irises, Dutch, 1889, Oil on canvas, Digital image courtesy of the Getty’s Open Content Program.](https://teacherchallenge.edublogs.org/files/2013/09/00094701-11wy04t.jpg)
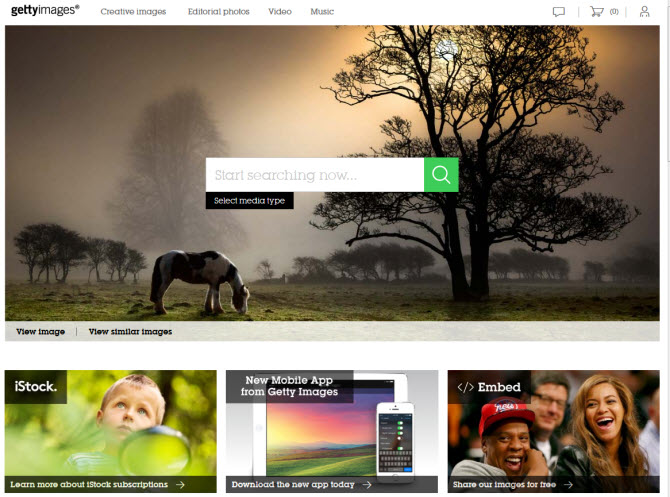
Getty Images
Getty Images is an American Stock photo agency which allows their images to be used for free for non-commercial use. Getty Images have no relationship with the J. Paul Getty Trust and the Getty Open Content images.
Once you have found an image on Getty Images you can embed it into a post or page using their embed code
Using Your Own Images
The alternative options for sourcing images from other websites are to upload your own photos or create images using online tools.
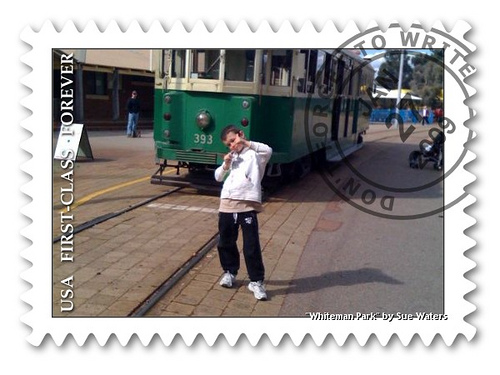
Here are some ideas for creating your own images:
- Photo Editors like Befunky, fd’s Flickr Tools
- Tag Cloud Creators such as Wordle or WordArt.com
- Fun photo tools CutMyPic, Glitterfly, PhotoFunia
- Drawing tools like Google Drawings or Auto Draw
Note: Many online tools are 13+ so check the terms and conditions if working with younger students.
Using Student Photos Online
Even though 99.99% of visitors to your class blog will be well meaning parents, students, community members, or interested visitors from around the world, the unfortunate reality is that those with bad intentions can also visit public sites. There are also cases where the personal background of a student might mean they need more privacy and anonymity than others.
Decisions on whether to use student photographs or not are often about protecting educators from having problems with parents, caregivers, or administrators who have concerns about cyber-predators.
Information that helps someone identify a student should always be shared with care.
Before using any student photos online, even on a private blog, you need to:
- Find out your school, district or Education Department guidelines for sharing student photos online — make sure you follow these guidelines.
- Find out if there are forms caregivers and students need to sign to consent to use of student photos online — make sure you have all forms signed by parents or caregivers.
- Respect the wishes of caregivers and students while understanding consent to use photos can be withdrawn at any time.
Remember it isn’t possible to stop parents, students, and caregivers from downloading photos and sharing them on their social networks, even if you are using a private blog. If you don’t want a photo shared on a social network then don’t upload the photo.
Our recommendations:
- Don’t use student photos for avatars. There are many tools available where students can create their own avatars such as those listed on The Student Blogging Challenge.
- If you do use any photos of students – don’t use their name in the file name and don’t refer to the student by name, even their first name, in the caption under the photo or in the post.
- Avoid the use of any photos that can identify individual students. A safe compromise is to only use photo taken from behind students. Some teachers also like to add emojis over the students’ faces using tools like Luna Pic (desktop) or various mobile apps.
Here’s an example of the emoji approach from teacher, Rob Kelly.
Teaching the Grade 3 students @berwicklodgeps to use @scratch on the computers today was a huge success. ☺️ I threw them in the deep end and they all came out swimming. Congratulations everyone! 🎉😺🎉You’re officially #coders. #educoach #scratch #edutech #aussieed pic.twitter.com/rMJ0mgxJBF
— Rob Kelly (B.Ed) (@robkellytweets) May 25, 2018
Refer to Should You Use Student Photos Online for examples of student photos that are less likely to cause issues.
Your Task
We’d like you to add your voice and ideas to our ongoing conversation about student blogging by completing the following tasks:
- Add a Creative Commons image or public domain image to a post. Or try using any of the tools mentioned in this post. Then leave a comment with a link to your post so we can take a look.
- Read through the most recent comments in reply to this step, click on a link to someone else’s post to check out the image they added. Then leave a response to their comment.


300 comments on “Step 7: Images, Copyright, And Creative Commons”
I added a few pictures and media to support. pan4.edublogs.com
https://drdriggers.edublogs.org/wp-admin/post.php?post=11&action=edit
https://flippin4reading.edublogs.org/2025/01/17/11/
I added a computer graphic from openclipart to my blog.
https://kaustin343.edublogs.org/course-description/
https://tashielletam1.edublogs.org/2022/10/14/photo-copy-right-example/
That is a pretty picture! check out mine https://studentsofknowledge610.edublogs.org/2022/11/27/the-flame-of-the-youth/
Whoops, Hope my links are working:
https://maria248.edublogs.org/2021/12/20/blogs-are-for-people/
Hello,
I like how you added a quote that was related to the lesson
Hello,
Here is my
creative commons image on my blog.
Maria
I like your BLOG Wordle image.
I uploaded my header photo from a cc flickr image. I didn’t initially check what its attribution requirements were until I read about it in this section, so thank you for that reminder!
I used Photos for Class and a photo of my own to try a couple of different options. Love that Photos for Class is a student friendly safe collection for kids in the classroom. Definitely promoting it for that reason and the ease of citations included along with the picture.
https://popcsmedialab.edublogs.org/category/blogging/
I just learned about using Photos for Class with this tutorial. What an easy way to reinforce copyright and ensure students find appropriate images for use in their projects. I like your speech bubble find, too!
I added an image to my page that I found as a Creative Common Licenses at https://www.flickr.com/photos/182229932@N07/49014247267.
My site: https://ssullivan4.edublogs.org/discovering-ace/?preview_id=3&preview_nonce=81e0bad6c1&preview=true
Adding images creates a wonderful viewing experience for blog visitors!
I agree. Images really make a blog post more engaging and the visuals help supplement the text in a lovely, inviting manner!
Got a creative post done https://ksredl.edublogs.org/2021/02/05/jumping-into-the-1st-grade/
I think i posted something as a good start. I have a lot of pictures to post soon.
https://kamaambong.edublogs.org/2020/06/25/enrolment-2020-2021/
I have a lot of images that I need to go back and check on licensing and cite or replace! I need to be better about setting a good example for my students!
I was thinking the same thing, including images I was using in my new blog so I went back and changed them.
I agree, setting a good example for learners is really important.
It is great to learn about image licencing. I think I would make sure all images from this point forward are CC licensed.
https://bhilditch.edublogs.org/2020/02/15/happy-presidents-day/
https://emilyscuteri.edublogs.org/why-blog-heres-why/
I added my pictures with Pixabay.
I like your pictures on your blog, they are simple and education oriented.
https://emilyscuteri.edublogs.org/why-blog-heres-why/ \
I added my picture with PIxabay.
Clean and neat, bright and easy to read your post!
Hello Bloggers,
I have used Pixabay images on my blog because the are “creative commons zero” and do not require attribution. I did add one picture to a page that has attribution so I could be sure I knew how to include photo credits. Originally I did not have a photo credit on this page. In my opinion, the page looked better when the picture did not have attribution.
https://vblasberg.edublogs.org/scavenger-hunt/
Such a great idea.
Hello guys, So I chose to create a post about the types of vertebrates. There are definitions of each, and fun picture examples. I chose to use Pixabay to make sure that the photos were not copywrite. It was very easy to use the plugin to use the tool Pixabay. Then I simply search the type of picture I wanted and inserted it into my post. Take a look at the example and let me know what you think.
http://kennedyclassadventures.edublogs.org/2020/02/08/68/
Hello Ms. Kennedy,
Your pictures look great! I prefer to use Pixabay too! It keeps things simple:) Originally I was going to the Pixabay site to get pictures until I started to use the plug in. This is a great short cut!
I like your post! Your blog looks amazing. I think it’s great that you made a post making sure everyone was navigating your blog successfully.
Here is the link to my Creative Commons image! http://alainacianchetti.edublogs.org/creative-commons/
Ruff! Ruff! Thanks for sharing Aliana!
Hey Alaina,
Cute picture of the puppy you chose for your creative commons image! Way to go navigating through all of these tools!
That picture is so adorable! Your blog looks great 🙂
Thank you for such a thorough and useful guide to adding images. I have always been wary of using images grabbed from Google, but never had the time to research how to do it properly so I always resorted to taking my own photos! This is going to be a great time saver for me and I will be adding photo attribution into my rubric for blogging.
I found some beautiful photos of our home city and added a pic of some native wildlife too.
http://jemimat.edublogs.org/about/
Your home city looks amazing! We dont always have the time or opportunity to take our own photos, so having a vast source online is indeed a life-saver. Giving proper credit for the photos we use shows respect, and also helps to promote the creator of the image used. Glad to see you enjoying the blogging challenge.
Thank you for the information. We will be able to add photos to our blog securely and wisely.
https://lddewar.edublogs.org/2019/08/19/photographs/
This is all great information and I will review it again and again when I get to students blogging.
I don’t envision using anything other than my content on my blog. I did find an image from Photos for Class and added it to my contact me page.
http://laurasnowed.edublogs.org/contact-me/
This is all great information and I will review it again and again when I get to students blogging. I don’t envision using anything other than my content on my blog. I did find an image from Photos for Class and added it to my contact me page. http://laurasnowed.edublogs.org/contact-me/
You created such a crisp look, I love simple and to the point.
I chose an image of a girl on the computer with a teacher. I thought it woud go perfectly with my introductory post. You can take a look here http://ismiley77.edublogs.org/
great picture and attribution!
Love the picture, great job using this new tool!
Your blog is easy to understand and access, very clear correlation between the image and the content!
In an age where clicking “share” is so common, students don’t tend to think about where the image originated. My students can really benefit from the information you shared about the different levels of Creative Commons licenses. Thank you!
I agree with you, I actually feel like all teachers should learn about this, I know that I am guilty of using images from google images and assuming that it was fair game. Now I know better. I will make sure that I inform my fellow colleagues since my students will be formally taught this valuable lesson.
I included two photos from Pixabay and one from Compfight. Feel free to take a look! Thanks!
http://mskvcooksenglishclass.edublogs.org/blogging-guidelines/
http://mskvcooksenglishclass.edublogs.org/how-to-comment/
http://mskvcooksenglishclass.edublogs.org/more-blog-guidelinesexplanation-of-point-system/
Hi MrsK
I like the images that you chose and I think it is fantastic that we can find suitable images for free now and have plugins that make attributing credit easy.
I activated the creative Compfight plug-in and added a lovely giraffe picture to my page. I think this will be a useful tool for my students and a great discussion on licensing and images that they can use legally.
I have a feeling I will need to create a classroom poster with sites to obtain public domain images.
http://dcrowningshield.edublogs.org/2019/02/27/in-love-with-giraffes/
Hi there,
I’ve made some posters that might save you reinventing the wheel. Here is the link to the post http://www.kathleenamorris.com/2018/10/21/free-images/
Enjoy!
Thank you for all the resources you provide. You make a teachers life easy.
The giraffe photo is such a cool idea! The giraffe is cute! I think it would also be good to explain copyright rules to students as well. It is very important that they are knowledgeable about copyright and how to give proper attribution to images.
I use Pixabay most of the times! This is an example page: http://teed3018.edublogs.org/guias-de-publicacion
I activated the Compfight plug-in and will talk about this next week with my students. It’s a fun picture on my blog (I really like cats) and it seemed rather easy to use. Here’s the link. http://thewriteclass.edublogs.org/2019/02/25/look-what-i-learned/
That looks great. Well done! And what a cute cat 😸
Kathleen Morris
Edublogs Community Manager
@kathleen_morris
I really love the picture that I added..
Here is my link
http://tcoleman6.edublogs.org/