Step 3: Publishing Your First Posts
Welcome to the third step in our free self-paced course designed to help you set up your own personal or professional educator blog!
The aim of this step is to:
- Help you understand how posts are used on personal blogs.
- Provide tips for writing effective posts.
- Teach you how to publish your first posts.
Introduction to posts
Your posts are where you’ll publish your main content such as your reflections, what you’ve learned, and information you want to share with others. They are commonly displayed in reverse-chronological order with the most recent post at the top of the page.
By default, your home page is your blog post page and this is where you’ll see your new posts published.
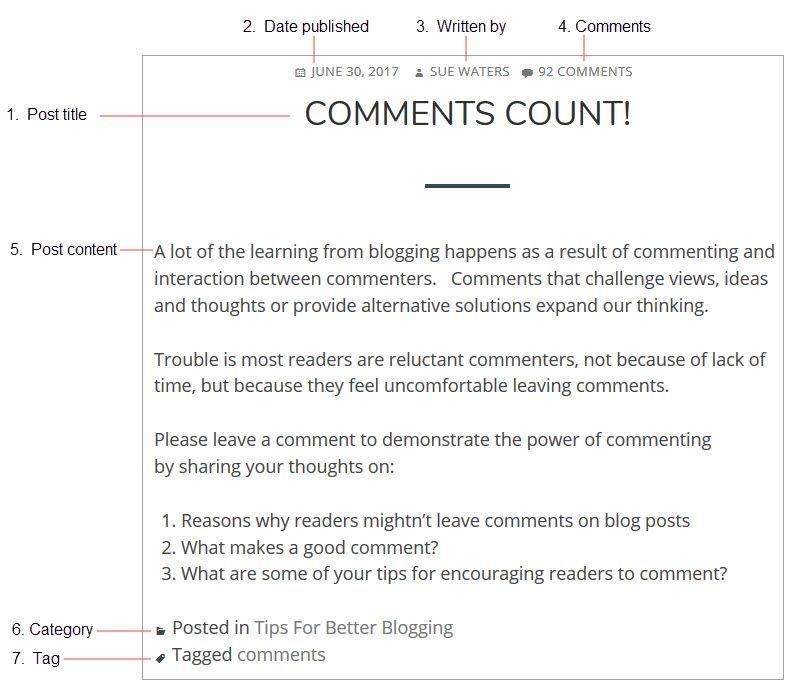
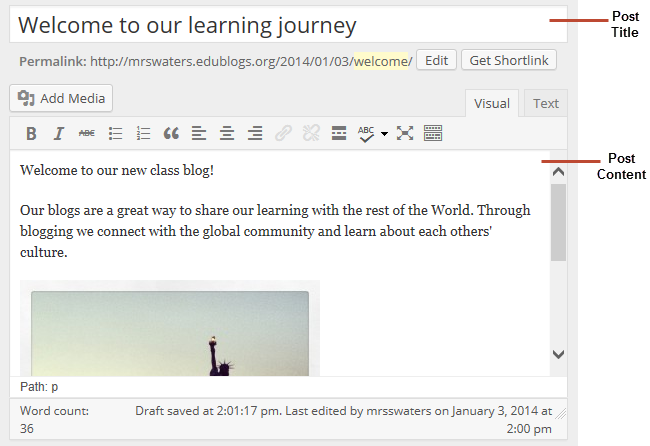
If you look closely at a post you will see it is normally made up of:
- Post Title — tells the reader what the post is about. A great post title grabs the readers attention and is more likely to encourage them to read your post.
- Date published — all posts display the date a post was published. You’ll normally see this displayed at the top of the post.
- Written by — most themes display the name of the post author. Your username is automatically displayed unless you’ve changed your display name.
- Your post content — this is the main information that you want to share or reflect on. It could be a mixture of text, links, images, videos etc.
- Comments — all themes have a link to comments. This is where your readers can click to write a comment in response to your post. Comments allow readers to engage in discussions, share their thoughts, and connect with your blog.
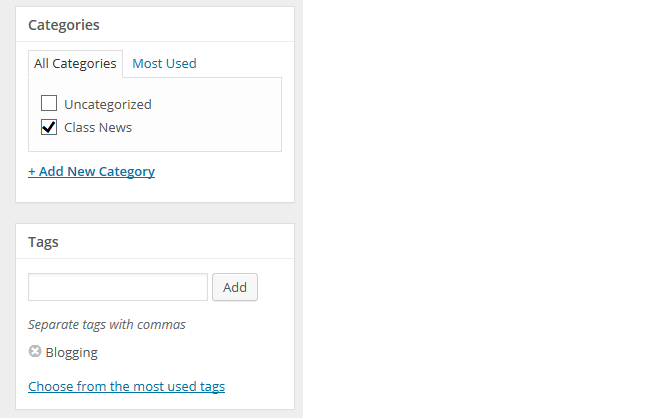
- Categories — are used to help readers locate posts on your blog. Categories are often used like chapters of a book; they provide a general overview of the topics you blog about.
- Tags — are used to help readers locate posts on your blog. Tags are more like the index at the back of the book and explode the topic into a million bits.
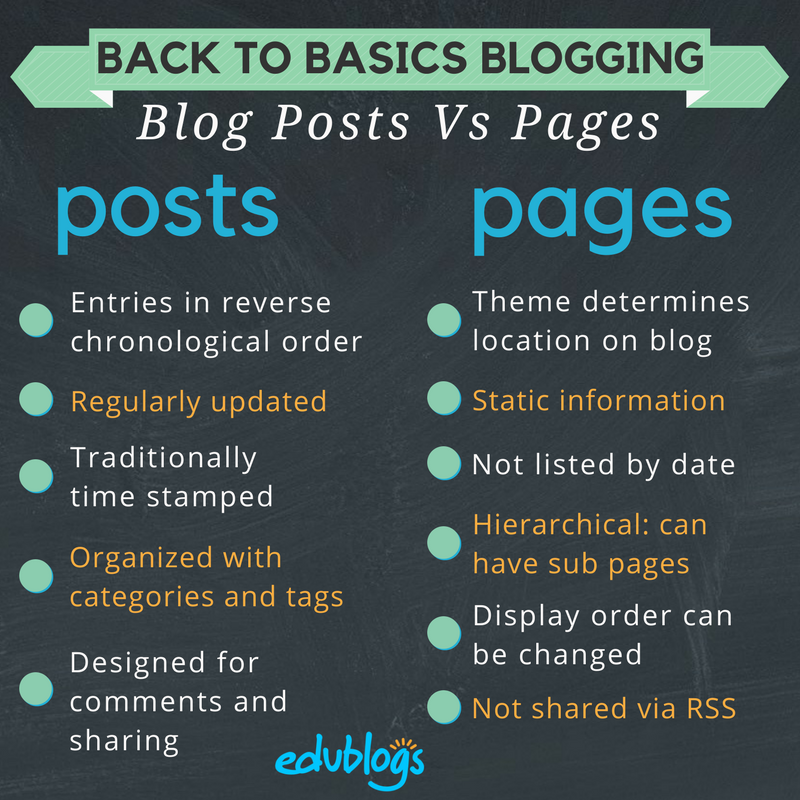
Watch this video to learn more about pages vs posts.
Here’s a quick summary of the difference between posts and pages.
Who publishes the posts?
If you look closely at educator blogs you’ll see some are group blogs where several individuals publish posts on the blog, while on other blogs the posts are published by just one educator.
Individual educator blogs are more common because most people are more motivated to post on their own blog due to personal ownership.
The Connected Principals, Two Writing Teachers, and The Edublogger are examples of group blogs. You can check out other group blogs here!
Here are examples of personal educator blogs:
- Larry Ferlazzo’s Websites of the Day
- The Principal of Change
- Free Technology for Teachers
- Cool Cat Teacher Blog
- Kathleen Morris Primary Tech
- Teacher Reboot Camp
- Dangerously Irrelevant
Find more examples of educator blogs here.
Watch this video by Steve Wheeler on 3 Things you need to know about blogging!
Examples of posts on personal educator blogs
So what do you publish as posts on your blog? Your reflections, what you’ve learned, how-tos, resources, and cool information — there’s so much you can share!
Often, posts on professional educator blogs are either about sharing thoughts, sharing professional practice, sharing resources, or sharing news.
Examples of sharing thoughts on professional educator blogs:
- 3 Phrases I’ve Been Rethinking by George Couros (George often notes that the process of blogging helps him organize and develop his thoughts).
- Flexible Seating: What’s The Point? by Chris Wejr (The Wejr Board)
Examples of sharing professional practice on educator blogs:
- Beyond Ourselves… by Edna Sackson (What Ed Said)
- iPhoneography Hunt by Cathy Hunt (iPad Art Room)
Examples of sharing resources on educator blogs:
- Five Tips For Teaching Students How To Research And Filter Information by Kathleen Morris (Primary Tech)
- 1st Day Student Survey With Google Forms by Catlin Tucker
Examples of sharing news on educator blogs:
- Kahoot Adds A New Feature For Teachers by Richard Byrne (Free Technology 4 Teachers)
- New Study Finds That School Attendance Awards Either Don’t Help Or Actually Decrease Students Coming To School by Larry Ferlazzo
Starting out your posts don’t have to be perfect — blogging is a work in progress!
The key is to take the first steps! Here’s my very first post ever — if I never wrote my first posts I wouldn’t be here helping you today!
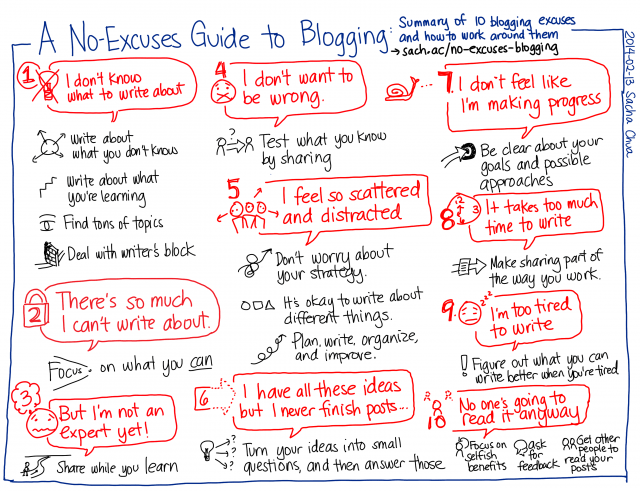
Check out this A No-Excuses Guide to Blogging by Sacha Chua.
Blog Post Ideas
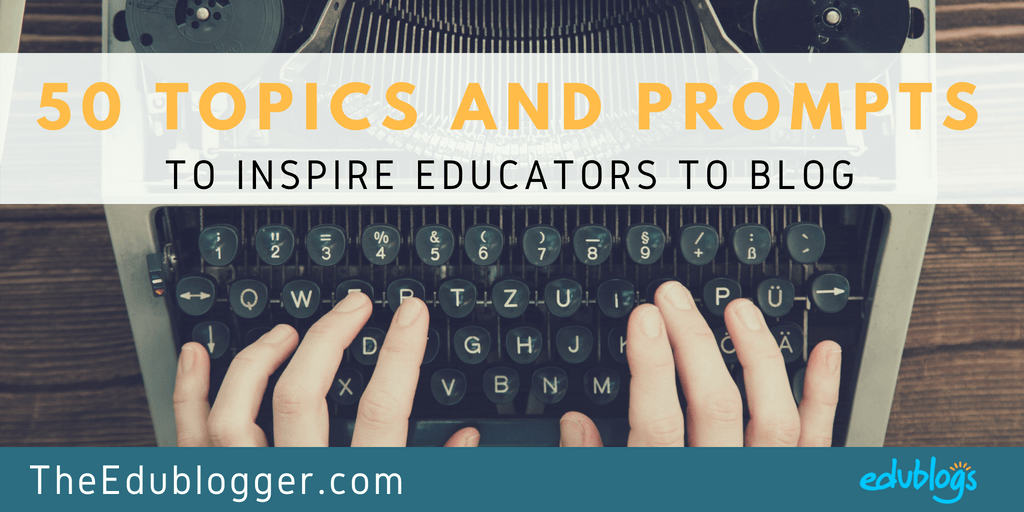
Look for specific ideas of what you can write about? Check out The Edublogger’s 50 blog topics and prompts for teachers.
How to publish a new post
(Scroll down to find a PDF summary)
You publish a post as follows:
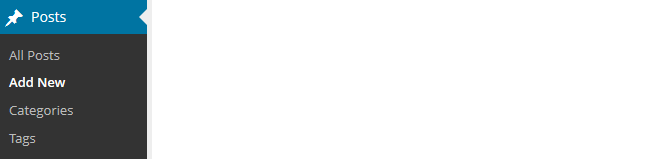
1. Go to Posts > Add New.
2. Give your post a title and add your content.
3. Add your tags and categories (learn about categories and tags here).
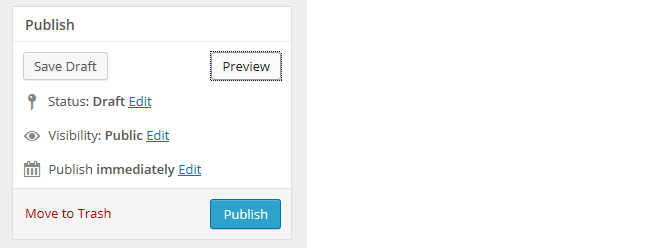
4. When finished writing click Publish.
5. Presto! Your post will now display on your blog so others can read!
Previewing your Draft
Before you publish your post it is a good idea to use the preview option to see what it looks like to your readers.
You preview a post by clicking on Save Draft and then click Preview. This opens up a draft version of your post in a new tab.

Then just go back to your draft and make any changes you want!
Back to Top
Intro to Visual Editor
The area where you write your post is by default in Visual Editing mode which uses WYSIWYG (What You See Is What You Get) option for formatting.
It works similar to any word processing software.
Simply write your post, highlight any text you want to format and then click the appropriate button in the toolbar to add formatting such as bold, italics, or numbered list.
The Toolbar toggle icon is used to view the advanced formatting options including heading styles, underlining, font color, custom characters, undo, redo.
You switch between Visual Editing mode and HTML editing mode by clicking on the Visual or Text tab.

Below is a quick video tutorial on the visual editor.
PDF Cheat Sheet: Writing Posts
This PDF guide summarizes how to write a post. Save it to your computer or print it off. You’ll find the ‘download’ button under the document.
 Loading...
Tips for writing better blog posts
Reading online is different from reading in text on paper.
The easier to read and more engaging your posts are, the more likely they’ll be read and the better your message will be conveyed.
Here are some tips to help you write better posts on personal blogs:
Back to Top
1. Use attention grabbing titles
Titles on blog posts are like titles on books. The better the title, the more it’ll grab the attention of readers and the greater the chance people will read what you’ve written.
Captivating and intriguing titles draw readers every time. Back that with a well written post and you can’t lose.
For further tips on writing post titles, refer to Seven Easy Ways to Write Better Titles for Your Blog Posts by Ali Luke.
Back to Top
2. Use short paragraphs
Posts with really long paragraphs are harder to read online.
Here are some quick tips:
- Break your posts up with paragraphs.
- The more paragraphs the better.
- Short paragraphs are better than long.
- If you need to make some paragraphs one or two sentences long so they are visually easier to read online then do it!
- Start each paragraph strong and encourage the reader to read on.
Varying your sentence length is also a powerful strategy, as demonstrated here by Gary Provost.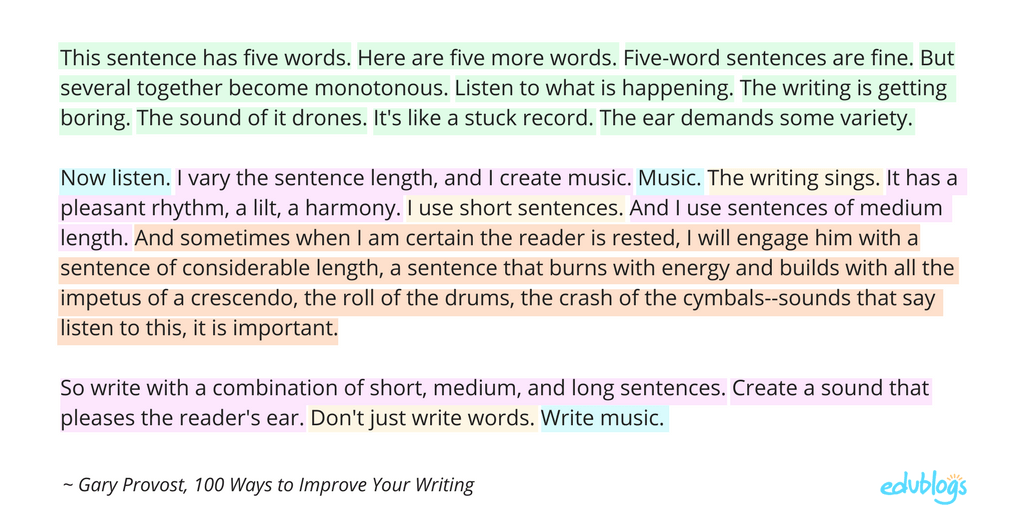
Back to Top
3. Use Headings
Use headings, and, where appropriate, bullet points or numbered lists, to break up the post into manageable bite-sized chunks.
To create a heading you simply:
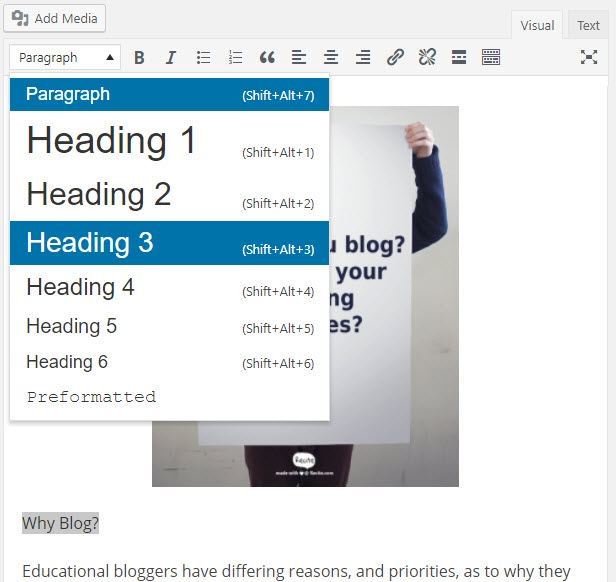
- Highlight the text you want to change into a heading
- Select the Heading Style you want to apply from the advanced formatting toolbar (you access the advanced formatting toolbar by clicking on the Toolbar toggle icon). Heading 1 is your post title. Start at Heading 2, then Heading 3 for sub-headings under that and so on.
- Preview your post to make sure that headings you’ve used have broken your post into manageable chunks
Back to Top
4. Remember to Link
Failing to link is one of the biggest mistakes made by new bloggers.
Linking to articles, websites, or other blogger’s post when you write about them is an important part of blogging.
Your readers want to be able to easily check out the information without needing to use Google.
Links are the building blocks of the web.
When you link, you are:
- Crediting those who inspired your post.
- Making it easy for readers to check out resources and information for themselves.
- Building community, continuation of the conversation, and reciprocity.
It’s good blogging etiquette to link to:
- A person’s blog if you mention a blogger
- The post if you are talking about a particular post on a blog
- Website or article if mentioned in your post
Here is how to add a link:
1. Copy the URL of the website you want to link to.

2. In the post you’re writing, highlight the text you want to link.
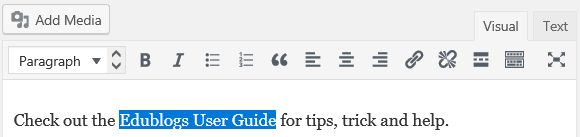
3. Paste the URL you copied directly over the highlighted text using a keyboard shortcut like CTRL V (PC) or CMD V (Mac).
4. The link is automatically created. The highlighted text now appears underlined and is blue to confirm it is linked.
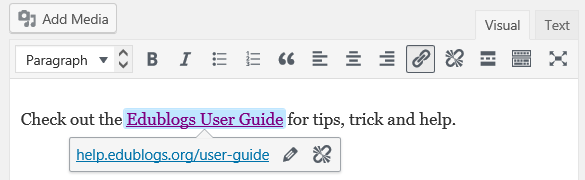
When you view your post you should now see the text is now linked in the post. Remember to check the URL you added is linking properly!
Back to Top
5. Enhance posts with images and media
When you look at personal blogs, you’ll notice bloggers enhance their posts with images and other types of media including videos and by embedding online tools.
We’ll show you how this is done later in this professional learning series on blogging.
Back to Top
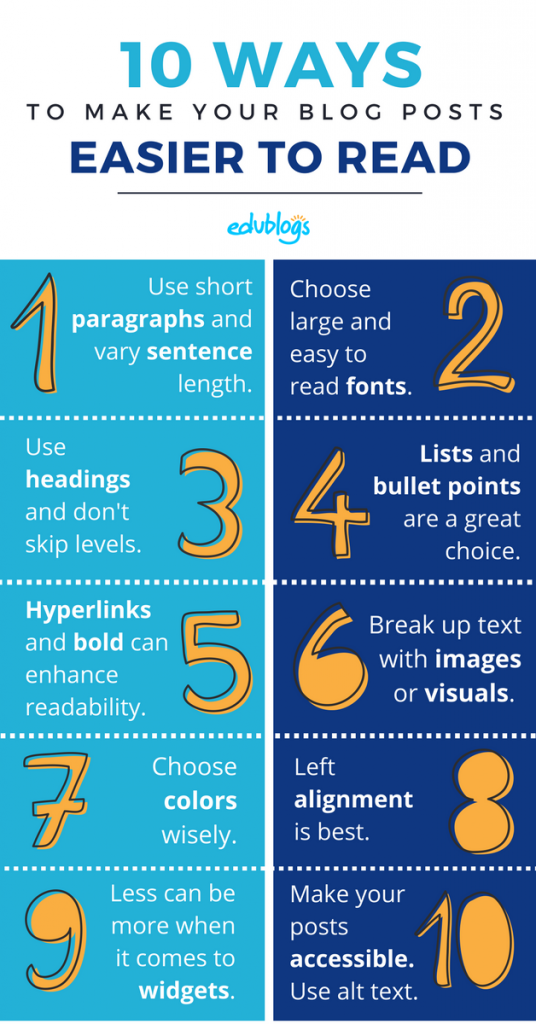
Read more tips for making your blog posts easier to read.
Commonly asked post questions
Here are answers to commonly asked questions we receive into Edublogs Support:
Back to Top
1. What does the ‘Not found’ message on my homepage mean?
By default, the front page of your blog is set to display your latest posts.
If you delete the default “Hello World’ post before you publish a new post, then your front page will display ‘Nothing Found’, ’404 – Not Found Error’ or something similar depending on the theme you are using.
This message is displayed because there is nothing to display on your front page.

All you need to do is go to Posts > Add New and publish a new post.
Once the new post is published, you’ll see it displayed on your homepage.
You’ll find more detailed step-by-step instructions on how to fix a Not Found message here.
2. How do you delete the Hello World Post?
Every newly created blog has the same default layout with posts displayed on its home page with a ‘Hello World’ post and a ‘Sample’ page.
You can delete this post at any time by going to Posts > All Posts.
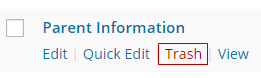
Hovering your mouse over the title of the Hello World post brings up four action links.
Now just click on Trash. This sends it to your Trash folder where it is permanently deleted within 30 days of when you trashed it.
Remember, if you delete all posts, and your homepage is your blog post page, you will see a ‘Not Found’ message.
To remove that message, you just need to publish a new post by going to Posts > Add New.
Back to Top
3. How do I change font type and size?
We’re often asked how to change the font type and size in posts. This is really easy to do.
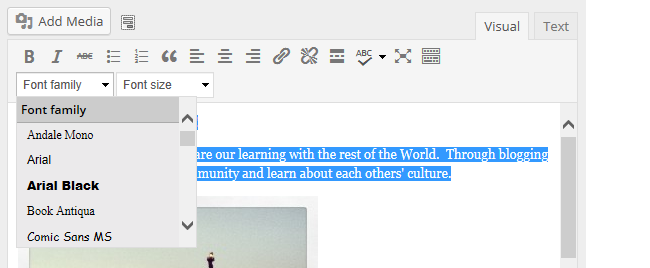
Just go to plugins and activate the Supreme Google Webfonts plugin.
Now when writing your post, you just highlight the text you want to change and then select the font family or font size from the drop-down menu that has been added to your advanced formatting toolbar in your visual editor.
4. Is it possible to publish posts to different pages on my blog?
We’re often asked if it is possible to add posts to other pages, rather than just the front page of the blog. This is commonly asked by educators who want to use one blog for multiple classes or subjects. Some teachers use this approach on their personal blog if they are setting up an ePortfolio to document their skills.
And yes you can! But it does involve slightly advanced blogging skills.
You do it by sending posts to different pages on your blog by assigning different categories to posts, based on the class or subject, and using a custom menu to create links to the categories from your top navigation. When students and parents click on their category they’re taken to all the posts for that class or subject. Check out Mr. Cartlidge’s Science Blog to see how it works.
You’ll find step by step instructions on using categories to organize multiple classes or subjects on your blog here.
We’ve set up a demo blog to show you it in action. When you click on the Geography link in the top navigation of our demo blog you are taken to all posts assigned the category Geography.
If you look at the AITSL Standards sub-menu on Paul Huebl’s blog you’ll see he has used this approach on his personal blog.
Remember, it does involve slightly advanced blogging skills — so leave a comment or email us at Edublogs Support if you need our assistance.
Your Task
We’d like you to add your voice and ideas to our ongoing conversation about blogging by undertaking one or more of these tasks:
- Video reflection: Watch this video by Steve Wheeler on 3 Things you need to know about blogging. Leave a comment to share what you learned from watching Steve’s video.
- What’s has been your excuse? Look through A No-Excuses Guide to Blogging Slideshare by Sacha Chua. What resonates most with you? What has your biggest obstacle been in the past? Tell us in a comment.
- Write a post: Check out the post examples listed above and then publish your first post. Leave a link to your first post in a comment so we can have a look at how you went.
- Blog post style: Do you think your blog will include more posts that are thoughts, professional practice, resources, or news? Or maybe you will include a mixture? Tell us in a comment.
- Better blog posts: Read 10 Tips For Making Your Blog Posts Easier To Read. Publish a new post incorporating some of these tips and then leave a comment with a link to the post so we can have a look at how you went. What tips did you adopt?
Also feel free to leave any questions you are having (or tips/advice) as well.
How to leave a comment: Scroll down to find the comment box. Write your comment, then enter your name and email address (email addresses are not published). Enter the anti-spam word. Press submit and we will moderate your comment ASAP.