Step 11: Set Up Student Blogs
Welcome to the eleventh and final step in our free professional learning series on class and student blogging!
The aim of this step is to guide you through the process of setting up your student blogs.
You may already have student blogs or this might be something that’s not on your agenda currently.
Whatever the case, it’s still a useful exercise to explore the topic of student blogs. If your students already have blogs, you might get some new ideas, or be able to share your own experiences with us.
If you won’t be having student blogs this year, maybe the information will be useful to store away for the future.
Why Educators Use Student Blogs
Educators normally start of with a class blog where the teacher writes the posts, and the students respond by writing comments.
This gives the teacher time to increase their skills while gradually introducing their students to blogging, and educating their students on what is required.
However, as the age of students increases, educators are more likely to have them to write posts on their own student blog.
Student learning and writing improves faster when each student has their own blog as ownership is an important part of blogging. We all have increased motivation when we feel personal ownership. Students are more motivated by their own blogs when class blogging is done well.
Another key benefit of student blogs is that they can be used as an ePortfolio or digital portfolio to create an archive of your students’ learning.
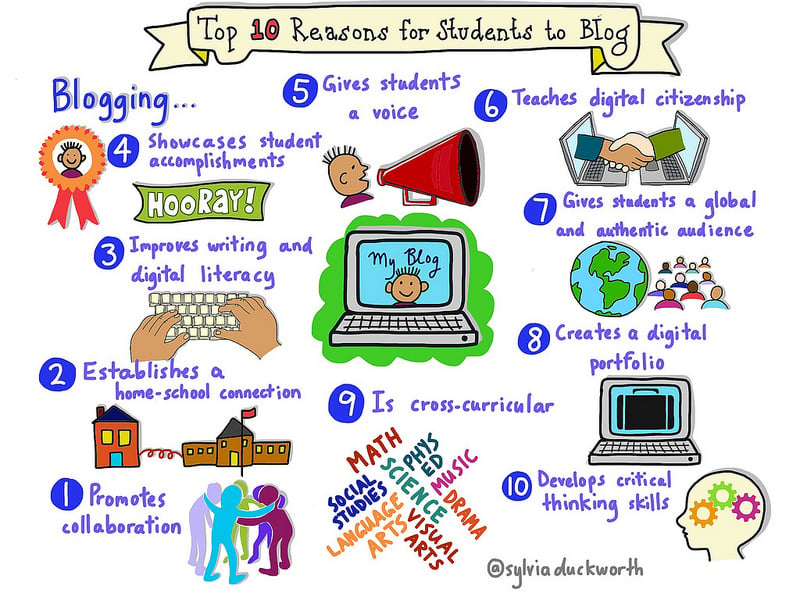
Image by Sylvia Duckworth licensed under Creative Commons ShareAlike 2.0.
Must Watch Videos
If you haven’t already seen the following videos, we encourage you to take a look.
The Possibility of Student Blogging by Andrea Hernandez and Silvia Tolisano provides an excellent explanation of:
- the blogging and commenting process,
- the impact of quality blogging on student literacy, and
- the importance of writing as part of a global audience.
To learn more about the benefits of student blogging in higher education, watch this video by students from the University of Western Australia.
Further Background Reading On Student Blogs
Check out Different Approaches To Using Student Blogs And Digital Portfolios on The Edublogger for more background information on student blogs.
This post uses a continuum to demonstrate the different ways that student blogs are used.
![]()
Examples Of Student Blogs
Looking at other blogs is a great way to get ideas and inspiration. This is something you could do as the teacher, but it can also be beneficial for students to explore other student blogs.
Here are some good places to find student blogs:
- The Student Blogging Challenge list of participating students
- Team Two Eagles — Becky Versteeg does a great job of blogging with her grade two students
- The Geelong College Middle School (note, some of these are public and some are password protected)
- Jurupa Hills High School Photography
- SCHS Open Studio — high school ceramics
If you come across any specific examples of student blogs that you think are worth sharing, please let us know. Leave a comment with the URL so we can add to our list and provide inspiration to others.
Tips For Creating Student Blogs
You can use any blogging platform you like including Edublogs, WordPress, and Blogger, however, when we write detailed instructions they will refer to Edublogs.
You can adapt this information to the blogging platform you are using.
Unsure about what blogging platform to use? Edublogs is based on WordPress software that’s designed for education which makes it an excellent choice.
Want to connect student accounts with your school’s username and password? Check out CampusPress — Edublogs premium solution for schools, districts, and universities. Learn more about CampusPress here.
We’ll now go through three important things to consider before creating your student blogs.
Back to Top
Student Usernames, Blog URLs, And Blog Titles
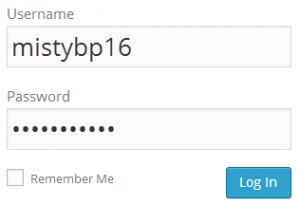
Educators normally use the same name for both the student’s username and blog URL. Keep them simple and easy for the student to remember.
Most educators use a combination of their student’s first name followed by numbers that might represent the year, class number, and/or school initials.
This is done to:
- Protect the identity of the student (by not including their last name)
- Ensure their username is unique (as Edublogs has close to 1,000,000 users).
For example, you could have:
- Username mistybp16
- Blog URL mistybp16.edublogs.org
- Blog title Misty’s Blog
If you want the students to use the blog for their entire school life, you might consider using a combination of letters combined with a number that represents the year they started school or are finishing school.
Your student’s username is what they use to sign into a blog dashboard and is displayed on posts and comments they write.
The blog title is one of the first things a reader sees when visiting a blog. Unlike the URL, the title can be changed easily.
We recommend you keep the student’s first name as the first part of the blog title if you’re using My Class. This makes it easier to identify a student blog from the Class Blog widget. The Class blog widget is used to list all student blogs attached to My Class.
Remember, you can always change the blog title any time via Settings > General in the student blog dashboard.
Back to Top
Add Yourself To Your Student Blogs
Always add yourself as an administrator to your student blog.
This means if you need to edit/delete a post, page, or comment you can quickly access their blog from your blog dashboard.
We’ll show you how to do this using My Class tool below.
Back to Top
Moderate Comments
Educators either prefer to let their students moderate their own comments or they moderate all the comments for their students. There are pros and cons to each approach.
Sometimes, educators moderate to begin with but then hand over responsibility when their students demonstrate that they’re ready.
We’ll show you how to moderate comments using My Class tool below.
Create Your Student Blogs With My Class
Now you’ve done all the research, it’s time to create your student blogs!
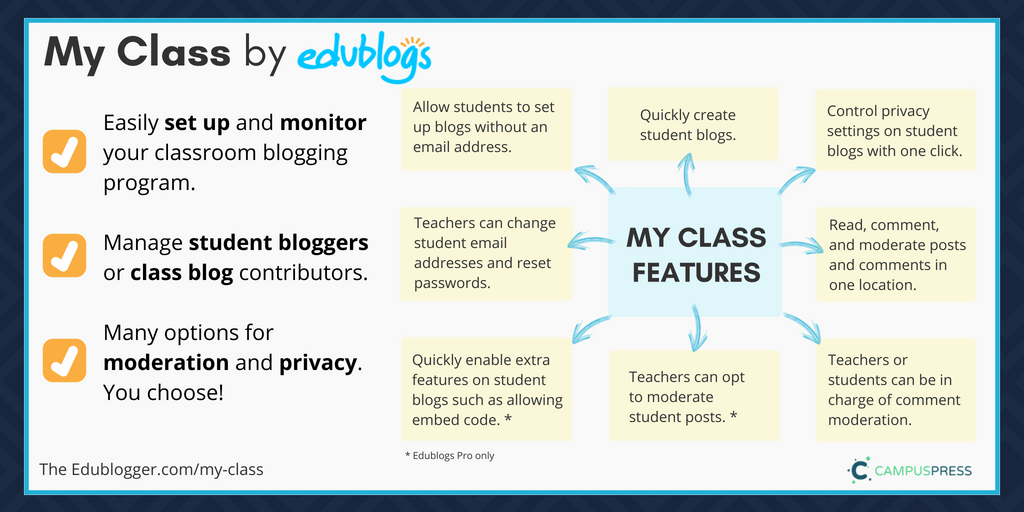
The easiest way to set up and manage all student blogs is using My Class.
My Class is a management tool that teachers use to:
- Quickly create student blogs with or without a student email address.
- Allow students to publish their own posts on their student blogs and/or the class blog.
- Control comment moderation settings on student blogs. Either the teacher or student can be in charge of comment moderation.
- Control the privacy settings on all student blogs with just one click! Blogs can be public, private, or somewhere in between (e.g. search engines can be blocked or only logged in users can visit blogs).
- Quickly view and/or moderate posts* and comments in one location in the Reader.
- Quickly enable extra features on student blogs such as allowing embed code. *
- Configure the settings to ensure all student posts are reviewed by a teacher before the posts are published. *
*Note: My Class is available with free blogs; however, Edublogs Pro allows for teacher moderated posts and using embed code.
Want to read more about My Class or download some cheat sheets for you and your students? Check out this post on The Edublogger.
Getting Started With My Class
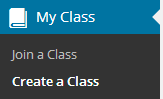
To get started you first need to Create a Class as follows:
1. Go to My Class > Create a Class.
2. Select the options that work for you, such as:
(1) Select ‘This is a class blog’
(2) Select ‘No – use if you want them to publish posts on their student blog’
(3) Choose if you want to moderate posts and comments on student blogs
(4) Choose your preferred privacy option
(5) Decide which users you want to manage your student blogs
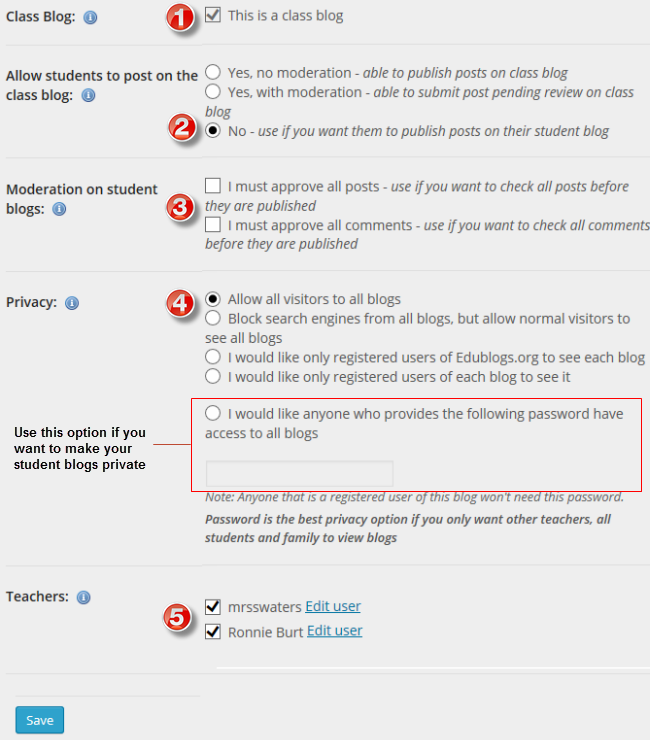
3. Click Save.
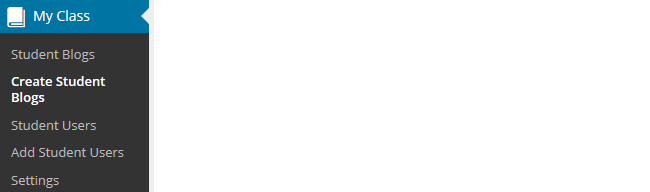
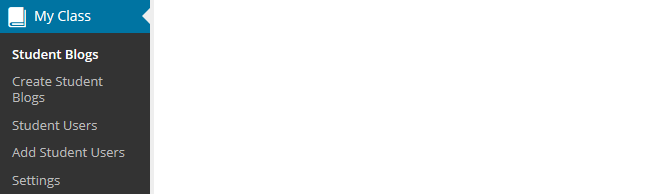
4. The My Class menu should change to the menu item shown below.
Once you’ve created your class there are two options for creating student blogs:
- You create the student blogs using My Class > Create Student blogs
- Students create their own blogs using the Edublogs sign up page
We’ll walk you through the first option.
Create Student Blogs Using My Class
The following instructions explain how you create the student blogs yourself using My Class. Refer to the create own student blog support page if you want students to create their own blogs and attach their blog to My Class.
You create student blogs as follows:
1. Go to My Class > Create Student blogs.
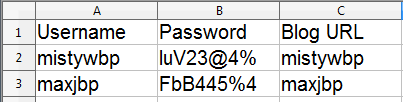
2. Add their username, email address (optional), password, blog URL, and blog title.
- If you leave the email address blank their user account is created using our no email option and you will be able to reset their password using the Edit link under their username in Users > All Users.
- All passwords are stored encrypted in our system and can’t be viewed by anyone, including the user. Record your students’ passwords in a spreadsheet as you create their account if you use our no email option.
- This creates their student blogs, adds them as a user to the class blog, adds you as a user to their student blog, and connects their student blog with the class blog.
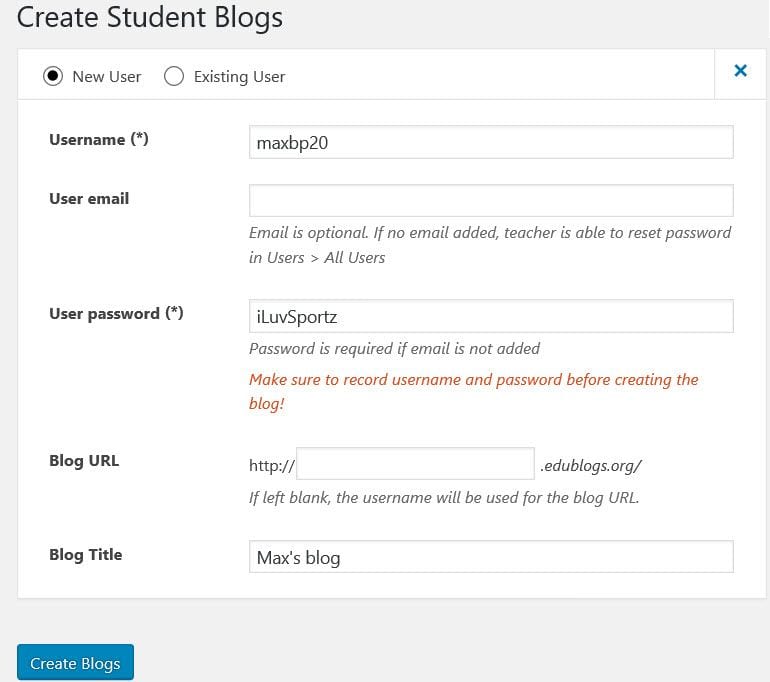
We recommend you use the preset password option and record their username/password/blog URL in a spreadsheet as you create their blogs.
Some teachers require students to inform them when passwords are changed so they have a record of the student’s latest password.
This is handy for those students who forget passwords or provided the wrong email address.
3. Click Submit.
Once you have created all your student blogs they will be listed in My Class > Student blogs where you’ll be able to view all pending posts, pages, and comments.
Add Student Blogs Link
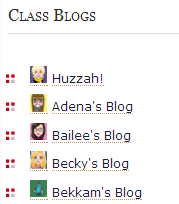
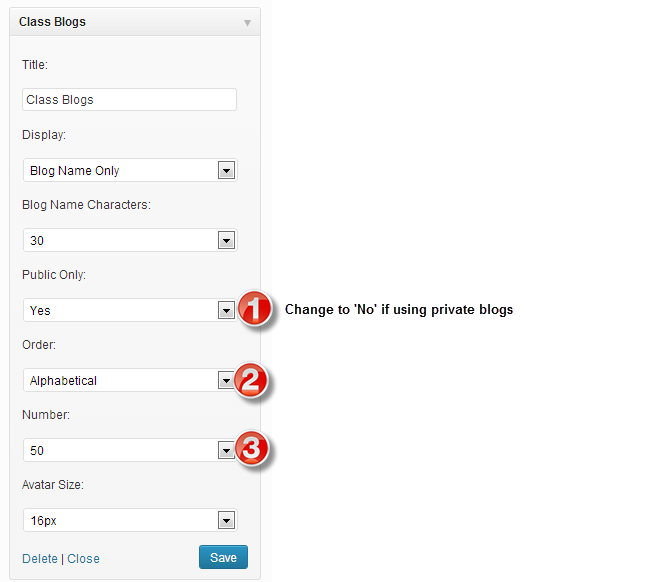
You and your students can easily add a link to all student blogs in the sidebar using the Class Blog widget as follows:
1. Go to Appearance > Widgets.

2. Drag the class blog widget to the desired sidebar.
3. The widget will automatically open.
4. Choose the options that suit you and then click Save.
(1) Select ’No’ under Public only if you are using private blogs
(2) Select alphabetical under order
(3) Select the number of blogs to display
Please note:
- You can only use ‘Blog Name Only’ if you have more than 10 student blogs.
- Any time you add any more student blogs to My Class, you update the Class blog list by opening up the Class blog widget and clicking Save.
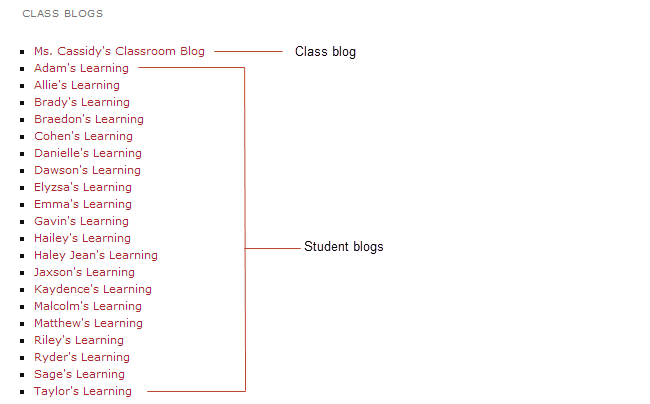
5. The widget will look something like below in the sidebar of your class blog and the sidebar of a student blog.
When you set up My Class, your student users are added as users to the class blog and to their own student blog.
The menu items the students see depends on which dashboard they are logged into and what settings you have set in My Class > Settings.
If your students see limited menu items it means they are logged into the class blog dashboard and need to navigate to their student blog dashboard.
You change blog dashboards as follows:
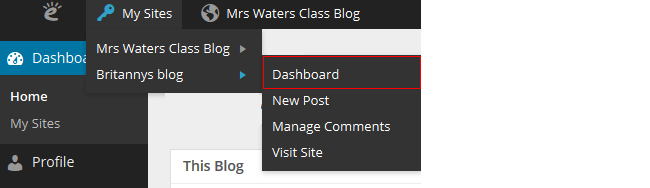
1. Go to My Sites drop-down menu in your admin bar.
2. Click on the dashboard of the blog you want to access.
Moderating Posts And Comments
Student posts and comments can be checked using any of the following:
- Dashboard > Reader
- My Class > Student blogs
- Dashboard > My Sites
- Users > Reports
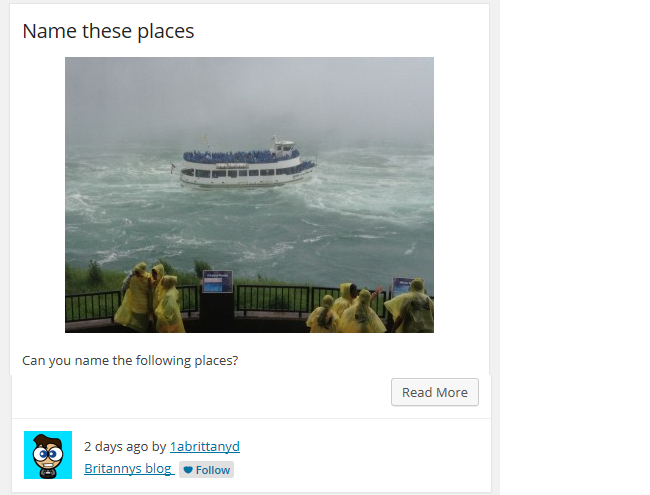
The Reader
The Reader is the fastest way to check all pending posts and comments on your student blogs.
This allows you to preview posts and comments and publish them with one click!
You would use the Reader if you used the following My Class settings:

The Reader is also where you and your students can read and comment on each others’ posts.
You preview posts and comments as follows
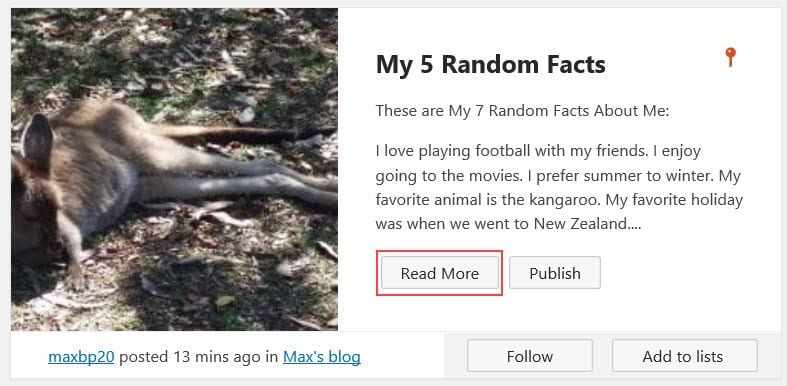
1. Go to Dashboard > Reader.
A number next to the Reader indicates there is a post or comment pending review.

2. Click on Pending tab

On the pending page, posts and comments are listed in reverse chronological order based on the date they were submitted.
3. Click on Read More if you want to read the full post or click on Publish if you are happy to publish the post.
- If you selected ‘I must approve all posts’ students aren’t able to edit the post once it is published.
- If you want the students to do further edits, you need to leave the post as pending or change the post to draft mode by opening it in edit mode.
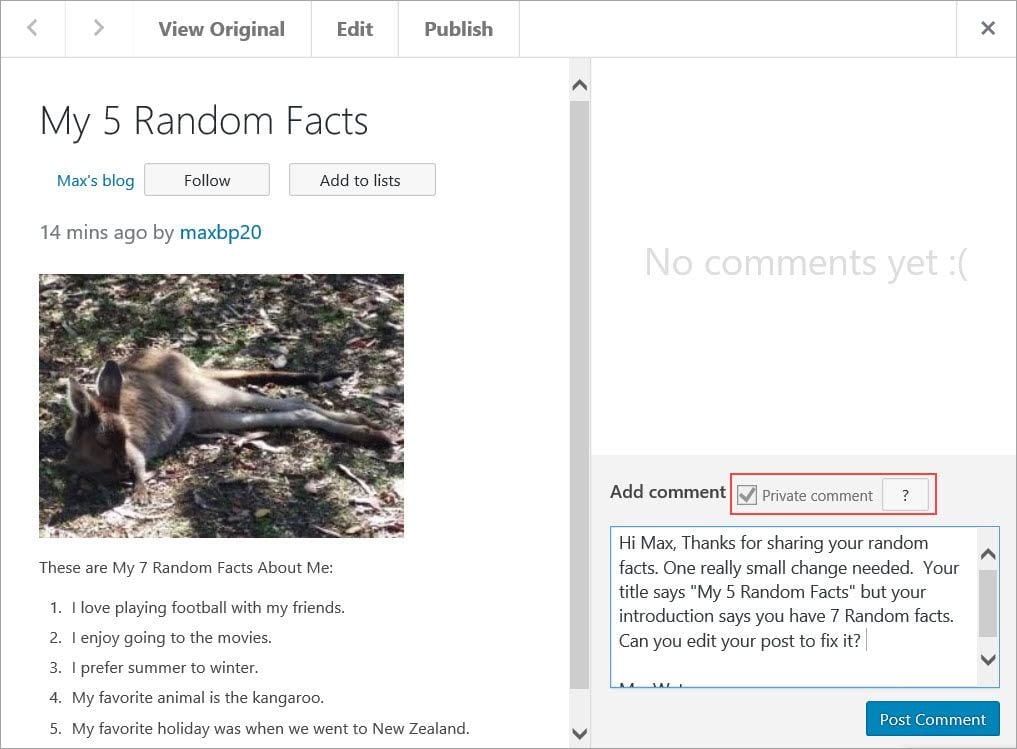
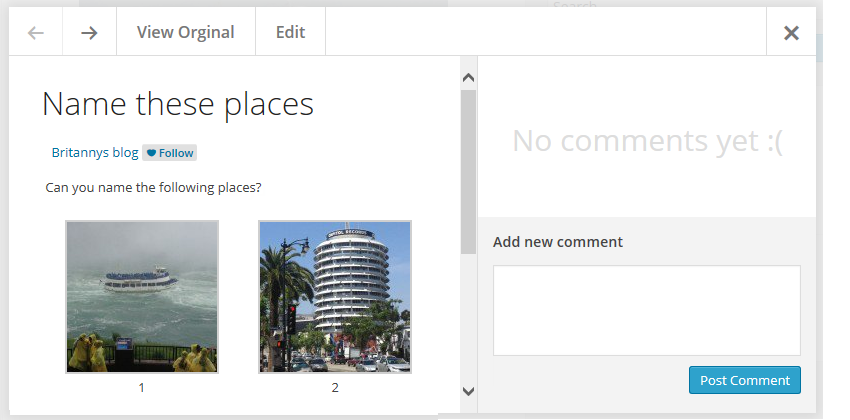
This displays the full post and allows you to select from the following options:
- View Original — when you click on ‘View original’ it loads the draft post on the student blog where you can see what the post will look like when published.
- Edit — clicking on Edit opens the post inside the dashboard of the student blog where you can make edits to the post.
- Publish — to publish the post, click on Publish. Please note if you selected ‘I must approve all posts’, students aren’t able to edit the post once it is published. If you want the students to do further edits you need to leave the post as pending or change the post to draft mode by opening it in edit mode.
- The forward and back arrows allow you to navigate to the next or previous student post or comment.
- You can send a private comment to the student by selecting Private comment, adding the message and then click Post Comment.
My Class > Student blogs
My Class > Student blogs and Dashboard > My Sites is where you’ll see all your student blogs listed. Here is where you can use the Dashboard link to access a student’s blog. You’ll also see the number of published and pending posts/pages/comments on their blogs.
Clicking on pending under a student blog takes you to the pending post or pending comments page inside their student blog dashboard where you can edit, approve, or publish the post or comment.

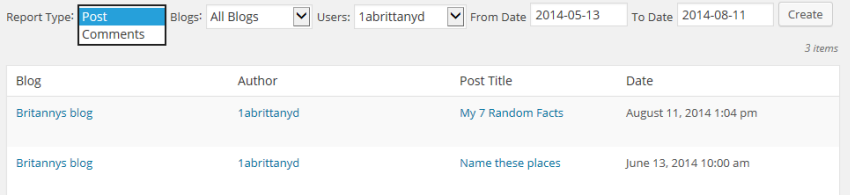
Reports
Reports, via Users > Reports, allows you to run a report on a specific student.
It allows you to check comments they’ve submitted on any blog, or posts they have published for a specified date range.
Reading Student Posts
The Reader automatically feeds all published posts from all student blogs and the class blog into the dashboard of every user attached to My Class. This is where you and your students can easily read and comment on each others’ posts.
You read posts as follows:
1. Go to Dashboard > Reader.
2. Click on Read More if you want to read the full post.
This displays the full post and allows you to select from the following options:
- View Original — when you click on ‘View original’ it loads the draft post on the student blog where you can see what the post will look like when published.
- Edit — clicking on Edit opens the post inside the dashboard of the student blog where you can make edits to the post (only visible to the teacher).
- Add New Comment — allows you to add a comment to the post from inside your dashboard.
- The forward and back arrows allow you to navigate to the next or previous student post or comment.
Getting Students Started
There is a range of different approaches teachers use to get their students started.
Here are some ideas worth checking out for your class:
- Miss Wyatt’s Student As Bloggers links to posts on basic blogging for students. The Student Bloggers blog contains basic skills for students to follow to learn to blog.
- The Student Blogging Challenge runs twice yearly starting in March and October. It is made up of a series of 10 weekly tasks all designed to improve blogging and commenting skills. Participating in the Student Blogging Challenge is a good way to develop your students’ blogging skills while connecting with a global audience.
- We have a Blogging Bootcamp course just for students. Set your students this course if you want them to learn about blogging at their own pace. Or you might pick and choose, and work through certain steps with your students.
Your Task
There are two choices for your task depending on whether or not you have student blogs:
- Do you have student blogs? If you do, your task is to leave a comment and tell us how they work. Do you have a good system in place or is there something you’d like to do differently? Hopefully, you have tips and examples to share with others.
- If you don’t have student blogs, leave a comment and share your thoughts on adding student blogs in the future. Is this something you’d like to investigate one day? Or are you happy just having a class blog or educator blog? Tell us the reasons why or why not.
Note: If you’d rather complete the task as a blog post, feel free! Just pop the link in a comment for us to look at.
As an added bonus, why not reach out to a student blogger and offer them some encouragement? There is a list of student blogs for the Student Blogging Challenge. Any of these young learners would love to hear from you. This is even something you could do with your class.
Finally, We encourage you to read through the most recent comments in reply to this step and leave a response to another person’s comment.
Request For Course Certificate
Have you completed each of the 11 steps in this course AND left a comment on each post? Maybe you’d like a certificate to show that you’ve completed the Blogging With Students Teacher Challenge course!
Fill out the form below to receive your certificate via email. Alternatively, click here to open the form in a new tab.
If you don’t receive your certificate, please look in your junk/spam folder.
Claim Your Badge!
If you’ve completed the challenge, feel free to proudly display this badge on the sidebar of your blog. Alternatively, you might like to add it to your About page to demonstrate your professional learning.
Simply right click on the image and save it to your computer. Then add it to your sidebar by following these instructions.
We’re so happy to have you as part of our Teacher Challenge community!
![]()