Step 8: Embed Content in Posts
Welcome to the eighth step in our free professional learning series on class and student blogging!
The aim of this step is to:
- Introduce you to online tools that you can embed into posts and pages.
- Learn how to embed content into posts and pages.
We’ve embedded examples of each tool in this post to help you work out how each tool could be used with your students.
Some of these tools aren’t designed to be viewed on mobile devices. These won’t load and you may see a white space in place of the content if you are reading this post a mobile device.
Embedding Content in Posts
If you look closely at class blogs you’ll notice many of have cool interactive tools embedded in posts and pages. Embedding content like slides, quizzes, polls, videos, and storybooks into posts creates opportunities for reader engagement and interaction not achievable using plain text or images.
Most online tools provide embed code that you can use to embed what you’ve found or created into posts.
Below are some popular tools used by educators sorted by activity type to help get you started.
We’ve included a brief explanation of why they’re used, and embedded examples of each so you can check how they work.
Tools were chosen on the basis of their popularity, ease of use, and ability to be embedded into posts. There are many more tools out there and you’re welcome to share them with us!
A Note On Age Restrictions
It’s important to be aware that children cannot sign up for many online tools, even if they seem designed for education.
Websites based in the US that are collecting information from children under the age of 13 are required by law to comply with Children’s Online Privacy Protection Act (COPPA).
These laws also extend to sites that are not located in the US but might be used by children in the US. Many countries adopt similar policies too.
If you look in the Terms and Conditions of many websites, you will find that children under 13 are not allowed to create an account or access the tool.
Some tools, such as PhotoPeach, state that “Persons under 13 years of age are required to have a parent or guardian review and complete the registration process.”
If you work with young students, get into the habit of looking for the information about age restrictions. It’s usually located under “Terms and Conditions” (sometimes under “Terms” or “Privacy”). These can usually be found right down the bottom or up the top of a website.
Tip: Use Control F (or Command F on Mac) to bring up a search box to find what you’re looking for. The Terms and Conditions are often lengthy. I often try typing in a search term like “13” or “children” to find the age information.
Getting around limitations with under 13s
- Teachers can still have accounts to create content for the blog.
- Have students sign up at home with their parents when this is allowed in the Terms.
- Use tools that don’t require signing up (eg. Tagxedo or Make Beliefs Comix).
- Use tools that allow teachers to create student accounts.
Audio Hosting Websites
Audio is used for a wide range of purpose including:
- grammar and fluency reading practice
- delivering content
- engaging auditory learners
- creating podcasts
Educators use audio hosting websites when they want to embed their audio within embedded players rather than uploading them directly to posts as a link. Anchor.fm and SoundCloud are commonly used audio hosting websites.
Anchor.fm
Anchor.fm is an excellent free service for recording, hosting, and distributing podcasts.
![]()
You can create recordings on your computer or on the mobile app.
There are some great options for background music and you can even publish your Anchor recordings straight to iTunes, Spotify, Google Play etc. This could make it easy for your parents and students to keep up to date when they’re on-the-go.
Yet another excellent feature is that you can record a podcast with a guest or co-host in another city or country. All you both need is the app!
Richard Byrne from Free Technology For Teachers has created a tutorial on how to create a podcast with Anchor.
Find the full post on Richard’s Practical Ed Tech blog.
Richard also created a short screencast to demonstrate how to embed an Anchor podcast into an Edublogs blog.
Note: If you don’t want to work with the text editor as demonstrated above, you can just click on Add Media > Insert Embed Code > Insert Into Post. If you need more help with embedding an HTML code, check out the instructions later in this post.
Anchor.fm is a tool for people aged over 13.
SoundCloud
SoundCloud is an online audio distribution platform that allows users to upload, record, promote and share their own sounds.
The Soundcloud embedded below was used by the teacher to engage the students, showcase their creativity while summarizing the essence of a story into something memorable. You can read more about the activity and check out more of their Soundclouds here.
Your students must be over 13 if you want them to upload their own audio to Soundcloud.
Brainstorming Tools
Brainstorming tools help students think up new and creative ideas quickly and easily. Brainstorming allows students to comprehend connections between concepts and helps them with their thinking process.
Popplet
Popplet is a popular collaborative brainstorming tool that can be used to create graphic organizers, timelines, and many other visual organization forms. Popplet is also a powerful presentation tool. Students can create Popplets on their computers or using the iOS app.
The Popplet embedded below shows how it can be used for maths.
Students must be over 13 to create their own Popplet.
Watch this video on how to use the Popplet lite app.
Padlet
Padlet is an online notice board creator. As of 2018, you can now only create 3 Padlets with the free plan.
You can read more about using Padlet with students here. Students under 13 are allowed to create their own Padlet provided it is under the supervision of the teacher or school.
Comic and Cartoon Tools
Comic and cartoons tools can be very engaging for students, especially visual learners, and are another way that students can enhance their posts with images.
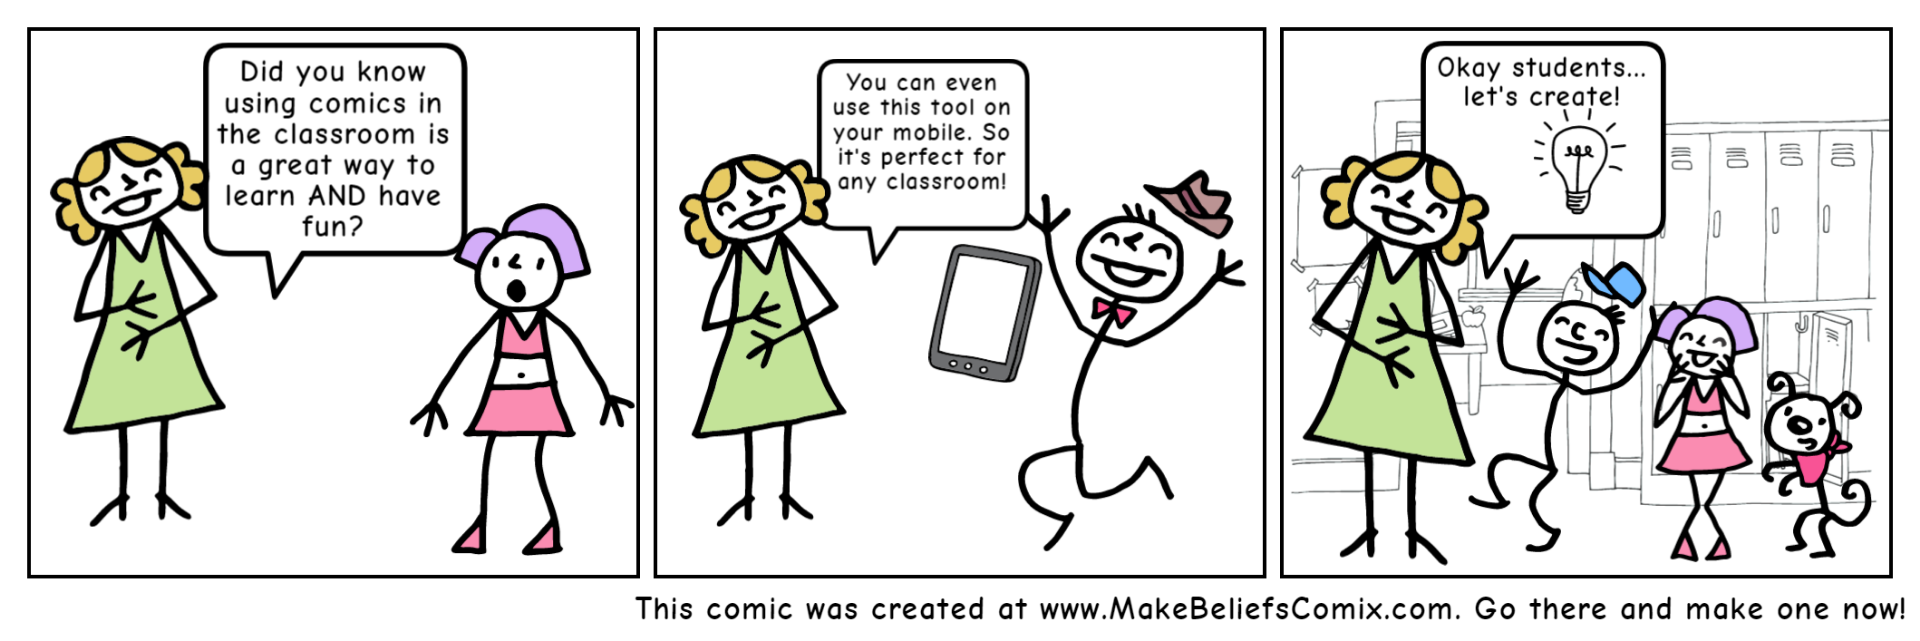
Students under 13 can create their own comics using Make Beliefs Comix.
This is a tool you can’t embed. You just save it as an image (click on “save to disk”) and insert it into your blog post as you would any other image.
Here are some examples from MakeBeliefsComix.
Curation Tools
Curation tools allow you to collect, preserve, maintain, archive, and share information. The goal of content curation is to find the most relevant content pertaining to a specific category and funneling this information for yourself and your readers in a very targeted way.
LiveBinders
LiveBinders allows you to curate webpages, PDFs, documents, images, or videos into a digital 3 ring binder. Content can be curated by tab and subtabs within tabs.
The LiveBinder below is used by the teacher to share resources from classes.
Check out the following for more information: Using LiveBinders on iPads
Students under 13 are allowed to create their own LiveBinders provided their parent or guardian agrees to their terms and conditions.
Click here to open this binder in a new window.
Poll, Survey, and Quiz Tools
Online polling and survey tools help you gather opinions, collect votes, and see and share results immediately. Some of these tools can also be used to create quizzes.
Google Forms
Google Forms is part of the freeware web based office suite offered by Google within Google Drive. Google Forms can be used for planning events, surveys, student quizzes, and collecting other information in an easy, streamlined way.
The Google Form embedded below is an example of how you can use it for a simple poll. You’ll find an example of a more extensive Google Form embedded in this post. Graphs and data generated from this form were compiled into our State of Educational Blogging 2016 post.
Watch this video to learn more about using Google Forms.
CrowdSignal (Formerly PollDaddy)
CrowdSignal allows you to quickly create online surveys, polls, and quizzes.
Presentation Tools
Presentation tools allow you to publish and share presentations in a range of formats online.
Animoto
Animoto is a great tool for quickly creating professional looking videos from your images. It allows students to focus on content creation rather than trying to learn an editing or manipulation tool. In the school context, Animoto For Education is an ideal tool for students to create their own book trailers, digital stories, or music videos.
Students under 13 are allowed to use Animoto for Education under direct supervision of the teacher within the classroom. Teachers can sign up for an Animoto for Education account for free.
Merry Beau is an Irish teacher with a great blog called If Only The Best Birds Sang…
Merry uses Animoto a lot in a variety of ways and her students love seeing their work showcased. Here are two examples.
f
Biteable
Biteable allows you to make animated videos and presentations easily. Students under 13 are allowed to create their own Biteable presentation.
Below is an example of a presentation created using Biteable.
Australian Animals on Biteable.
Google Slides Presentation
Google Presentation is part of the freeware web based office suite offered by Google within Google Drive.
Google Slides can be a great way to share student work on a class blog when students don’t have their own blogs.
Here are two examples from Miss Jordan’s class blog.
Digital work: Haiku poems
Here the students each wrote a Haiku poem on a Google slide on their iPads. They shared their finished product with the teacher.
The slides were collated into one master slideshow by following the instructions on the Erintegration blog.
Offline work: Wacky Wednesday
In this lesson, the students created their own Wacky Wednesday rhyme and illustration after studying the Dr. Seuss book.
Photographs of all the students’ work were put into a Google slideshow.
Note: If you just want a slideshow of photos, you can do a similar thing using the Meta Slider Plugin in Edublogs.
Haiku Deck
Haiku Deck is a tool that allows you to create presentations using their website on your computer or their app on your iOS device. Haiku Deck works by combining beautiful images with minimal text. As you type a word(s) on the slide Haiku Deck searches Creative Commons images to find images to match your text. You can also upload images from your computer.
Below is an example of a Haiku deck created by a student.
Students under 13 are allowed to create their own Haiku Deck presentations provided their parent or guardian agrees to the terms and conditions.
You can create 3 Haiku Decks with the free version.
Persuasive Presentation – Created with Haiku Deck, presentation software that inspires;
For more ideas, check out Haiku Deck’s Pinterest board of Education case studies.
PowToon
Powtoon is an online tool that allows you to make animated videos and presentations easily. Students under 18 are allowed to use the Education version of Powtoon.
Refer to PowToon’s quick start guide to learn how to create a PowToon video.
Prezi
Prezi is an online presentation and storytelling tool that uses a single canvas instead of traditional series of slides. The images, text, videos and other objects are placed on the canvas and users can zoom in and out.
Below is an example of a Prezi created by a student.
Students under 13 aren’t allowed to create their own Prezis. Students over 13 are allowed to use provided their parent or guardian agrees to the terms and conditions.
SlideShare is a site where you can host your presentations and share with others. Slideshare is ideal for those who want to embed presentations in their posts and websites rather than upload their PowerPoints directly and insert as a link.
Students under 13 can’t upload slides to SlideShare but they can embed SlideShares created by other people in posts.
ThingLink
ThingLink is an easy to use online tool that allows you to make any graphic or photo interactive. With ThingLink you can create multiple hot spots on specific parts of your image that link to a website, video, music, text, or audio file.
Read more about using ThingLink with students here. Students under 13 can use ThingLink under supervision of teacher or school.
Hover your mouse over the ThngLink below to check out how it works.
Check out Westwood with Iford Orchid Class Blog which uses a ThingLink to introduce the students.
Slideshow Tools
Slideshow tools allow you to create and share slideshows.
PhotoPeach
PhotoPeach allows you to quickly upload photos to create great looking slideshows and even simple quizzes. Students under 13 are allowed to create their own PhotoPeach presentation provided their parent or guardian agrees to the terms and conditions.
Watch this video to see how to create slideshows using PhotoPeach.
Embed in posts
Once you’ve created your content using one of the above online tools you embed into a post as follows:
1. Copy the embed code.
- Websites use a range of different icons to represent embed code.
- Look for icons like </>, the word Embed, Share, the share icon, HTML or hover your mouse over icons until you see the word Embed.
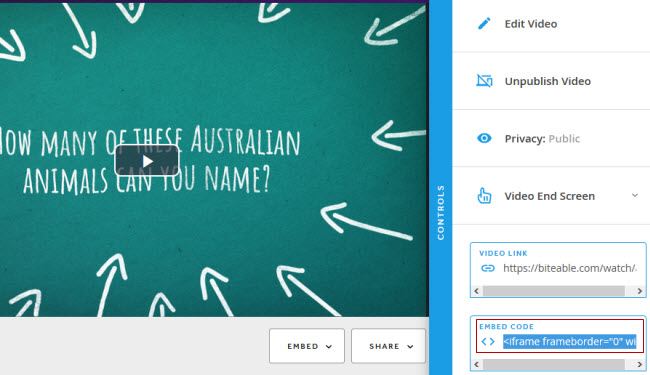
For example, if you created a Biteable video the embed code is located in the Controls panel when you view your video:
2. Go to Posts > Add New

3. Place your cursor where you want the video to appear and then click on the Add Media button.

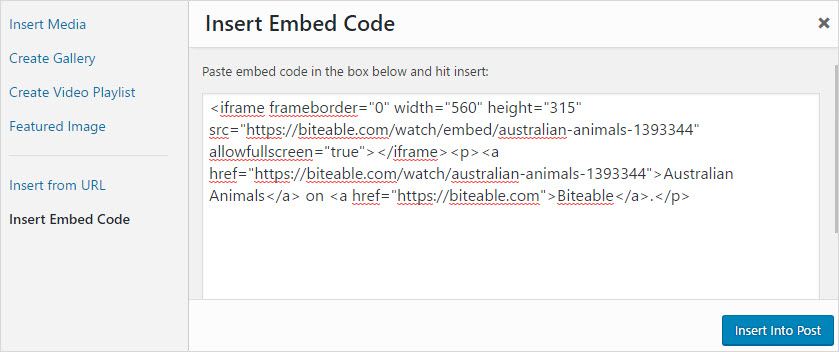
4. In the Add Media window click on the Insert Embed Code tab.

5. Paste the embed code into the Insert Embed code box and click Insert into post.
6. When you have finished writing your post click Publish.
7. You should see your embedded content when you view the published post.
How To Embed Content Cheat Sheet
This printable cheat sheet walks you through embedding an HTML code in a blog post.
Feel free to give this PDF to your students or embed it on your blog.
This document uses Padlet as an example. The same process applies to any online tool that offers embed codes (including videos on sites like YouTube).
These steps apply to both posts and pages.
 Loading...
More Tools To Embed
For more ideas of free web tools that can be embedded on your blog, check out this post by Australian high school teacher, Roslyn Green.
Roslyn shares examples of six web tools that she uses to create interactive learning content on her blog.
They are:

Your Task
We’d like you to add your voice and ideas to our ongoing conversation about student blogging by completing the following tasks:
- Choose one or more of the tools embedded in this post and try using the tool with your students or try creating something using it. Leave a comment with a link to what you created or where you’ve embedded the tool so we can check out how you went.
- Read through the most recent comments in reply to this step and leave a response to another person’s comment.
Remember, embedding isn’t enabled on free blogs to prevent misuse by spammers. If you have a free blog, you’re welcome to just use one of the tools and share the link, or accept a complimentary upgrade to complete the course and try embedding. Contact us to organise this free upgrade.