Welcome to the seventh step in our free professional learning series on class and student blogging!
The aim of this step is to:
- Discuss copyright, fair use, and using images on blogs.
- Introduce you to Creative Commons.
- Explain how to find and add Creative Commons images to posts.
- Define free and public domain images, and explain how to source them.
Introduction To Copyright, Fair Use, And Images In Posts
You can’t just use any image you like in a blog post.
Why? Because unless stated otherwise, the law automatically grants full “copyright” over any creative work a person makes.

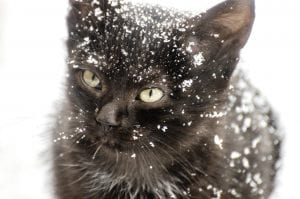
- Dexter the cat hates those that steal his photos…
You may be thinking it’s okay because as educators, we have a few more flexible rules, called “Fair Use”, to play by.
Fair use, in some cases, means you may have more flexible copyright rules if an image, text, video, etc. is being used for educational purposes.
The trouble is, most of the laws and rules that cover fair use and education were written well before the invention of the web. They don’t apply to use of copyright material on the internet. Using copyright material leaves you open to copyright infringement.
So what does this mean?
You need to:
- Learn what images you are and aren’t allowed to use, and why.
- Learn how to correctly attribute images you are allowed to use.
- Educate your students that you can’t just use any images online on your blogs (or other digital work).
- Show them how to source and attribute images they are allowed to use.
Understanding digital copyright is an essential skill we need to understand and teach our students.
Refer to The Educator’s Guide to Copyright, Fair Use, and Creative Commons for comprehensive information on the use of images, curriculum docs, text and quotes, music, and videos.
The safest way to source images for your blog is to either:
- Use Creative Commons images.
- Use free (Creative Commons Zero) or public domain images.
- Use your own photos or use images you’ve created.
Including The Source Is Not Enough
A situation we commonly see on blogs is where someone uses an image they found online and then include a link to the site they got it from.
For example,
Just because you link to the source of an image, does not mean you can use it. You would need to ask the image creator for permission.
Read on to find out about Creative Commons and ways you can find images to use — legally and ethically.
Introduction to Creative Commons
Creative Commons, founded in 2001, is an organization that provides free content licenses that people can apply to their work. These are known as Creative Commons licenses.
When you license your work with Creative Commons, you are allowing people to use it without having to ask permission, provided they use it in the manner stated in your Creative Commons license.
The reason people use Creative Commons licenses is to make it easier for everyone to share and adapt creative work without the concern of copyright infringement.
Watch this video on Creative Commons.
Creative Commons licenses are used for books, websites, blogs, photographs, films, videos, songs, and other audio and visual recordings.
If an image, or website, doesn’t include a Creative Commons license, or isn’t public domain work, or doesn’t indicate that the content is free to use, then it is automatically implied that all content is copyright and you shouldn’t use it! Put simply — unless stated otherwise, it is copyright.
There are websites that provide public domain images that are free to use, or have their own free to use licensing, but you need to make sure you follow their terms and conditions of use.
For those wondering, unless a blogger includes a Creative Commons license, all content on that blog is automatically the copyright of the blogger.
Back to Top
Creative Commons Licenses
There are several different types of Creative Commons licenses people use depending on what restriction(s) they want to apply to their work.
Here is a quick summary of the different types of Creative Commons licenses:
 Attribution CC BY
Allowed to share (to copy, distribute and transmit the work), remix (to adapt the work) and use it for commercial purposes provided you attribute the work in the manner specified by the author or licensor.
 Attribution-NoDerivs
Allowed to share (to copy, distribute and transmit the work) and use it for commercial purposes provided you do not alter, transform or build upon the work and you attribute it in the manner specified by the author or licensor.
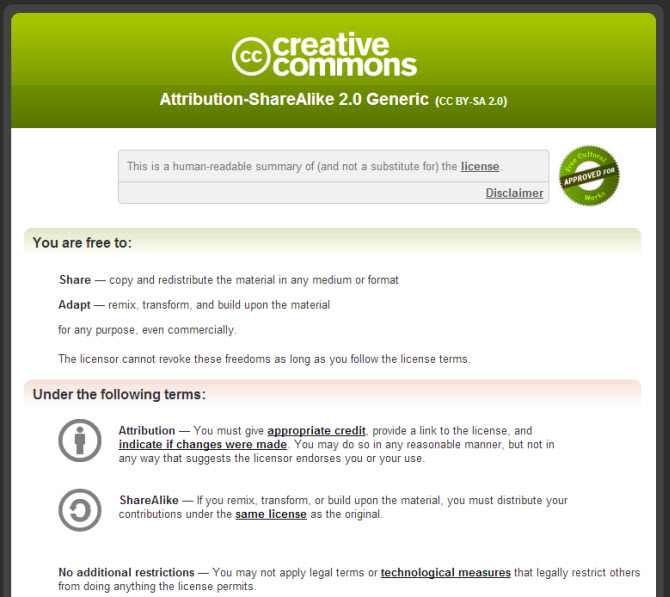
 Attribution-NonCommercial-ShareAlike
Allowed to share (to copy, distribute and transmit the work) and remix (to adapt the work) provided it isn’t used for commercial purposes, you attribute the work in the manner specified by the author or licensor and you distribute it under the same license.![]()
Allowed to share (to copy, distribute and transmit the work) and remix (to adapt the work) and use it for commercial purposes provided if you alter, transform or build upon the work provided you distribute it under the similar license. You must attribute the work in the manner specified by the author or licensor.
 Attribution-NonCommercial
Allowed to share (to copy, distribute and transmit the work) and remix (to adapt the work) provided it isn’t used for commercial purposes. You must attribute the work in the manner specified by the author or licensor.
 Attribution-NonCommercial-NoDerivs
Allowed to share (to copy, distribute and transmit the work) provided you do not alter, transform or build upon the work or use it for commercial purposes and you attribute it in the manner specified by the author or licensor.
Confused About Licenses?
If you want to add a Creative Commons license to your own work and you’re not sure what one you should add, try this license chooser tool. It also gives you the right license graphic to use.
Flickr Creative Commons Images
One of the most common sources of Creative Commons images used by bloggers is Flickr (an online photo sharing website).
Unfortunately, it is often assumed the Flickr images are licensed under Creative Commons and are allowed to be used. This isn’t the case.
- Images marked as “All Rights Reserved” are copyrighted and require permission from the person who uploaded it to Flickr.
- Images with “Some rights reserved” means the Flickr user has applied a Creative Commons license to their photo and you can use the image in the manner specified by the license.
If you look at images directly on Flickr always check to see which license applies to ensure you only use the image in the manner specified by the license.
The license is listed below the image.
For those you might be allowed to use, click on “Some rights reserved” for further explanation.
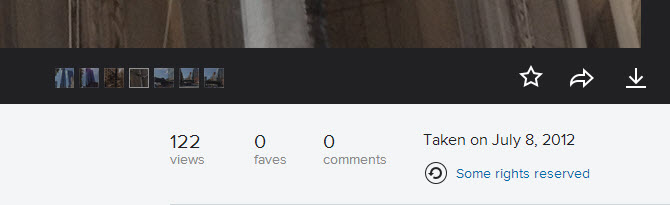
This takes you to the Creative Commons license where you can read how you are allowed to use the image.
Finding Creative Commons Images
A useful option for finding Flickr Creative Commons images is to use one of the great Flickr Search Engines.
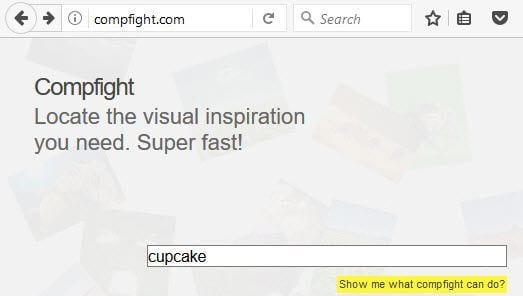
Compfight
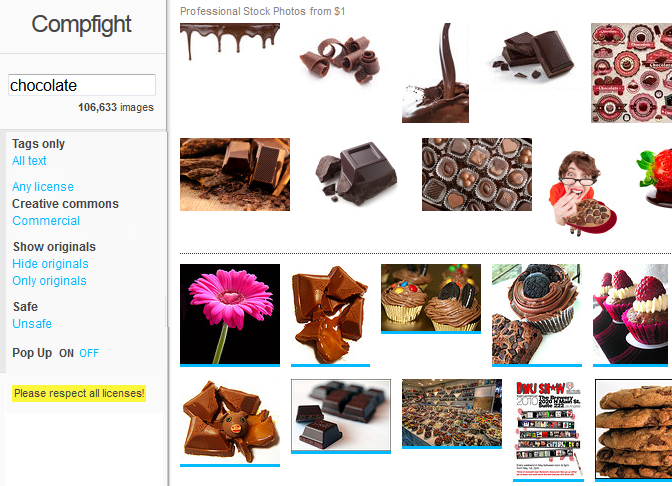
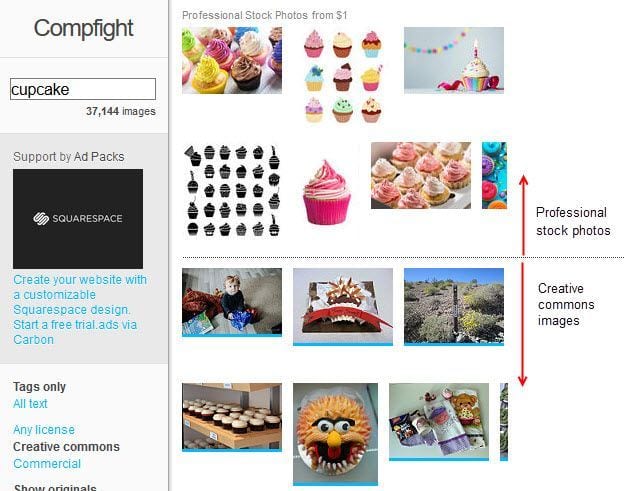
Compfight is one of the most popular Flickr Search engines. It provides a range of search options including search by tags only vs. all the text, licenses, the option to show or hide originals, and turn on/off the safe content filter.
All images above the line returned by your Compfight search are professional stock photos — they aren’t free to use. Those below the line are Flickr Photos.

Photos for Class
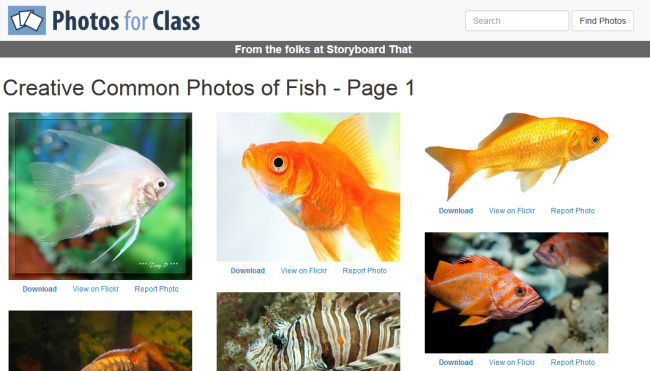
Photos for Class is a student friendly place for searching safe images from Creative Commons Flickr (and more recently, Pixabay Safe Search).
The downloaded images include attribution of the photographer and the image license terms.
Multicolr Search Lab
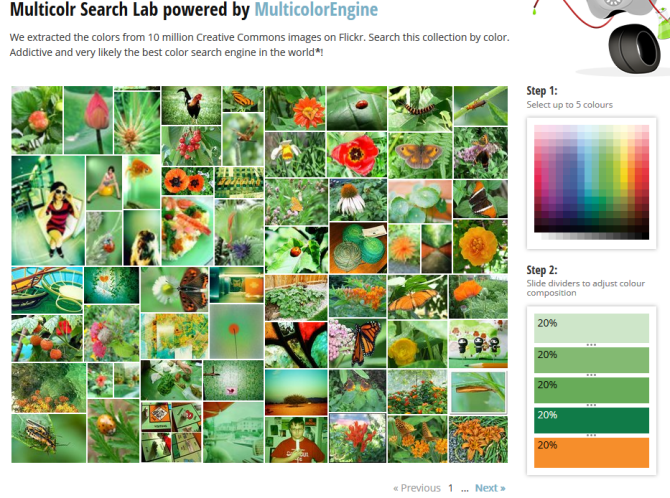
Multicolr Search Lab allows you to search Flickr images by color. This is a handy tool when you’re trying to match specific colors. All you need to do is select up to 5 colors.
Back to Top
Creative Commons And Image Attribution
It’s a requirement of all Creative Commons Licenses that you attribute the original author. This means you can’t just use a Creative Commons image without correctly acknowledging the person who originally created it.
Within or at the end your blog post you must:
- attribute the image,
- include their copyright information,
- and you should link the photo back to its original photo page.
Here’s an example of image attribution:

Photo by Chotda licensed under Creative Commons Attribution 2.0 Generic.
Back to Top
Use The Pixabay Plugin To Add Creative Commons Images To Post
The Pixabay plugin is a quick and easy tool to find quality public domain images from Pixabay and upload them to your site with just one click.
Below is an example of an image inserted using Pixabay plugin.
Using Pixabay
Once you have activated the Pixabay plugin in Plugins > All you use it as follows:
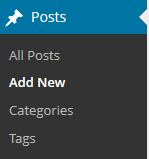
1. Go to Posts > Add New (or Pages > Add New)
2. Write your post.
3. Place your cursor where you want the image to appear and then click on the Pixabay icon.

4. Add your search term and press enter.
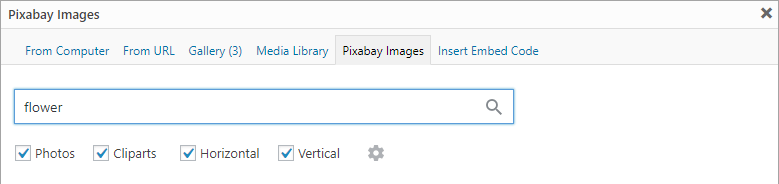
5. Click on the image you want to insert into your post.

6. This uploads the image from Pixabay into your media library.
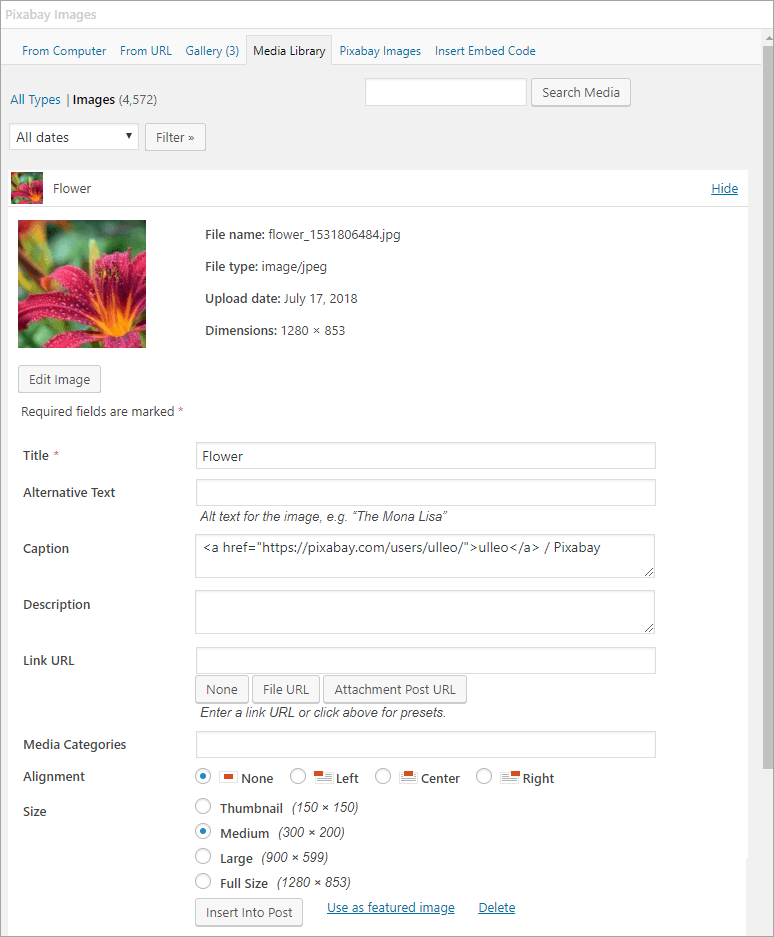
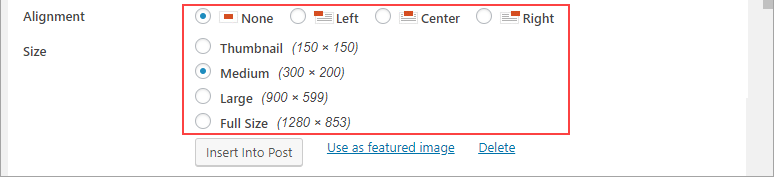
7. Select the Alignment, Size and then click Insert into post.
7. The image is added to the post with a link to the user who uploaded it to Pixabay.

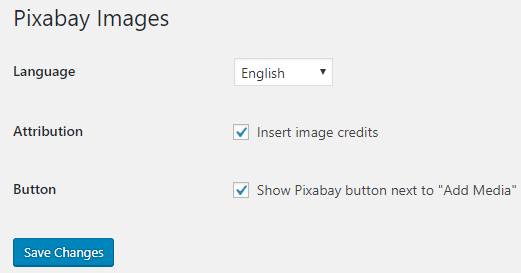
Pixabay Settings
You can change the Pixabay options in Settings > Pixabay. In most situations, you would not change these settings.
Add An Image From The Compfight Website
Compfight is an image search engine that uses Creative Commons images from Flickr.
Here is how to add a photo using the Compfight website:
1. Go to Compfight.
2. Add your search term and then click Enter.
3. Click on Creative Commons on the search results page.

4. Click on the Creative Commons image you want to use (from below the line).
You can only use an image from below the line. All images above the line are professional stock photos and can only be used if you purchase them.
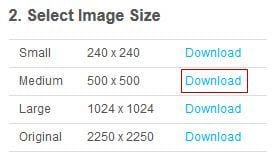
5. This launches a pop up image window.

6. Click on ‘Download‘ next to the size you want to use to download it onto your computer.
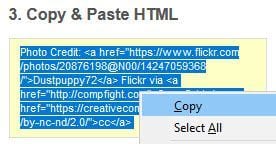
7. Copy the HTML.
8. Go to Posts > Add New
9. Place your cursor where you want the image to appear and then click on the Add Media icon.

10. In the Add Media window click on the Upload files and then Select Files.

11. Find the photo you downloaded on your computer and then click Open to start uploading the image.
12. While your image is uploading you will see a progress bar.
13. Once the image has uploaded paste the HTML code into the caption field.
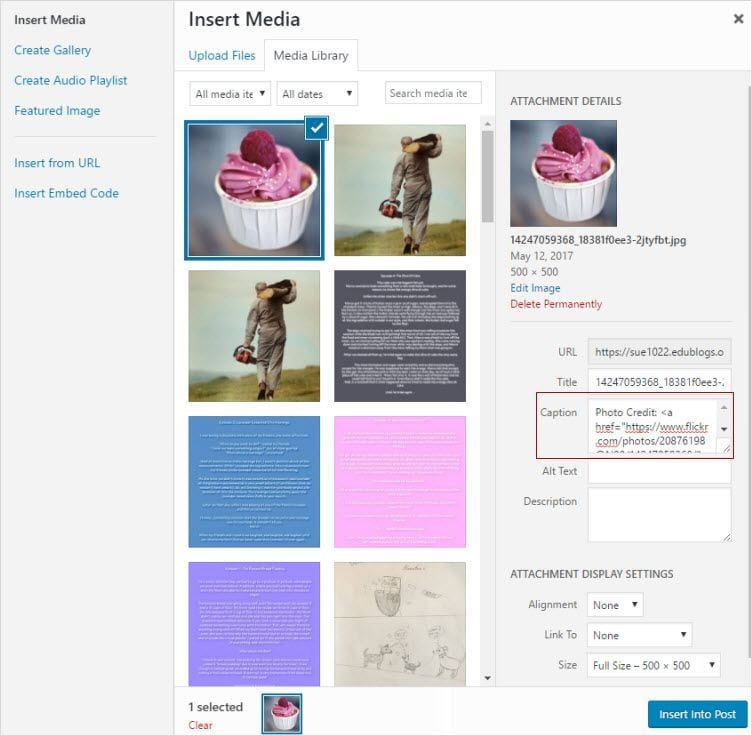
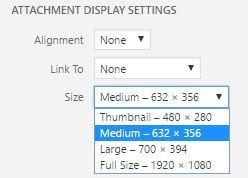
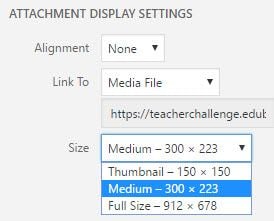
14. Select the size you want to insert from the dropdown menu next to ‘Size‘ in the attachment display settings.
13. Click Insert into Post.
14. Your image will insert into your post and should look like the example below with the photo credit below it!

Free And Public Domain Images
There are websites that provide public domain images that are free to use, or have their own free to use licensing.
Some of these are licensed with a Creative Commons Zero license. This is the least restrictive Creative Commons license and means there are no restrictions on use and no attribution required (although it can be polite to still attribute a Creative Commons Zero image).
Public domain works are those works that:
- Automatically enter the public domain when created because they are not copyrightable.
- Their copyright has expired.
- Their creator has assigned their work to the public domain.
Public domain images are free and available for unrestricted use.
Back to Top
Attributing Free And Public Domain Images
Public domain images and free to use images may not have a strict legal requirement of attribution, depending on the jurisdiction of content reuse, and depending on the terms and conditions of use of content from the website, but attribution is recommended to give correct provenance for most of these sites.
This means within or at the end your blog post it is recommended to attribute the image, include their copyright information and link the photo back to its original photo page.
Here’s a list of free and public domain websites:
All the images on Pixabay and Unsplash are Creative Commons Zero. They do not require any attribution and can be modified.
You need to refer to the terms and conditions on the other websites to see if attribution is needed and how it is meant to be added.
Back to Top
Add Image From Pixabay
Here is how to add an image from Pixabay if you don’t want to use the plugin as described above:
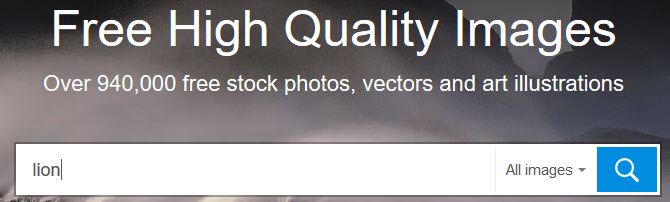
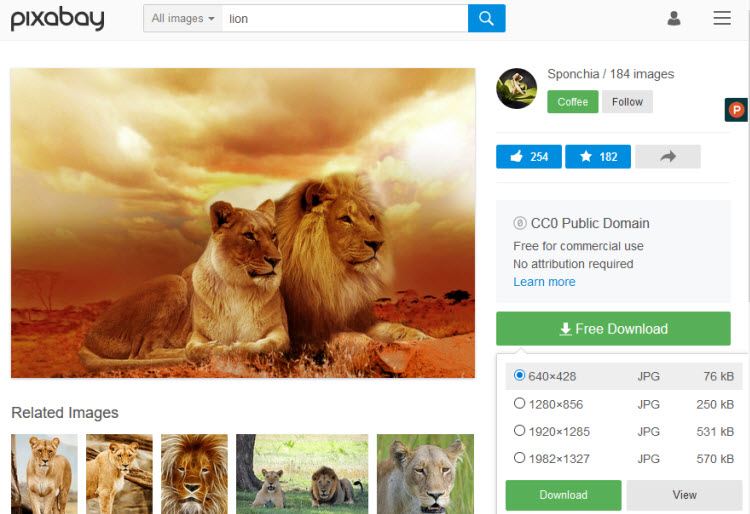
1. Go to Pixabay
2. Enter your search term and press Enter.
3. Click on the image you want to use (you can’t use any image in the sponsored images row).
4. This takes you to the image page.
5. Click on Free Download, select the size you want to download and then click Download. Save the image to your computer.
6. Go to Posts > Add New

7. Place your cursor where you want the image to appear and then click on the Add Media icon.

8. In the Add Media window click on the Upload files and then Select Files.
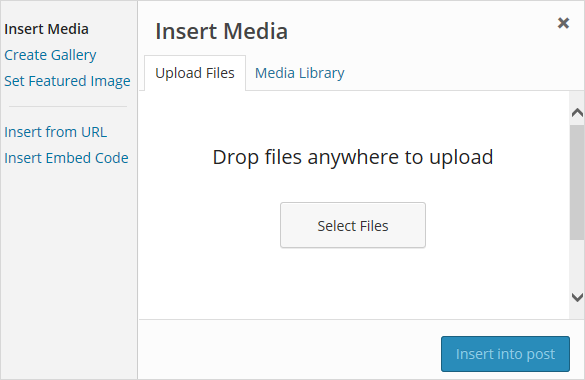
9. Find the photo you downloaded on your computer and then click Open to start uploading the image.
10. Select the size you want to insert from the drop-down menu next to ‘Size‘ in the attachment display settings.
11. Click Insert into Post.
Back to Top
More Sources Of Free And Public Domain Images
Here are some good free and public domain image websites to use with students:
Openclipart
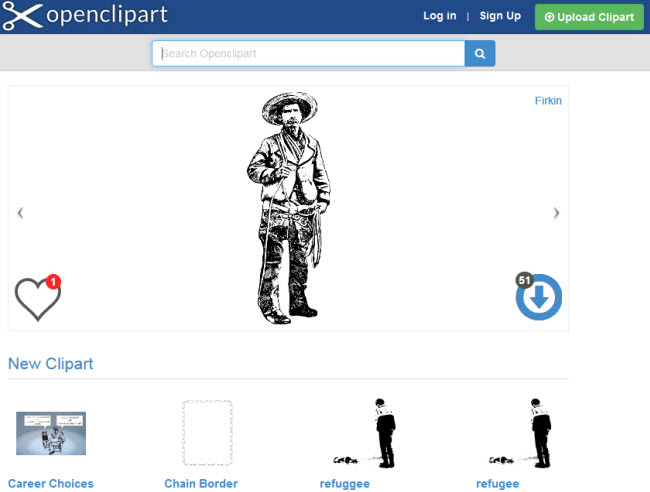
Openclipart is a gallery of clip art images that have been released into the public domain that can be used freely, for personal and commercial use, without attribution.
Wikimedia Commons
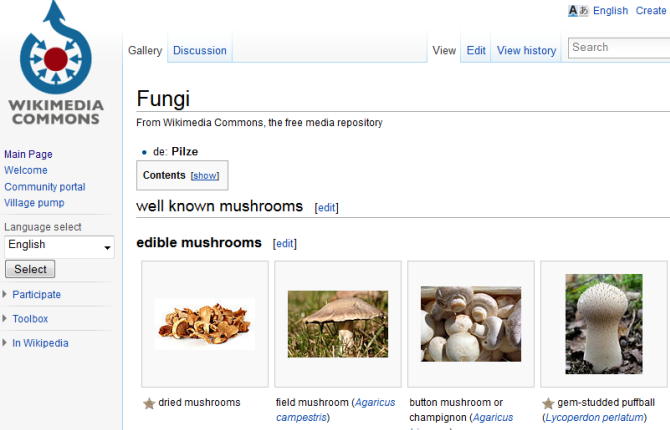
Wikimedia Commons is a media file repository for public domain and freely-licensed educational media content, including images, sound and video clips.
Images and other media on Wikimedia Commons are almost all under some kind of free license (usually public domain, CC-BY, CC-BY-SA, or GFDL (GNU Free Documentation license).
Clicking on an image or media file on Wikimedia Commons takes you to the information page for that file. This is where you’ll find the information supplied by the uploader, including the copyright status, the copyright owner, and the license conditions.
The following image from Wikimedia Commons is license under GNU Free Documentation and Creative Commons ShareAlike 3.0.

The Commons
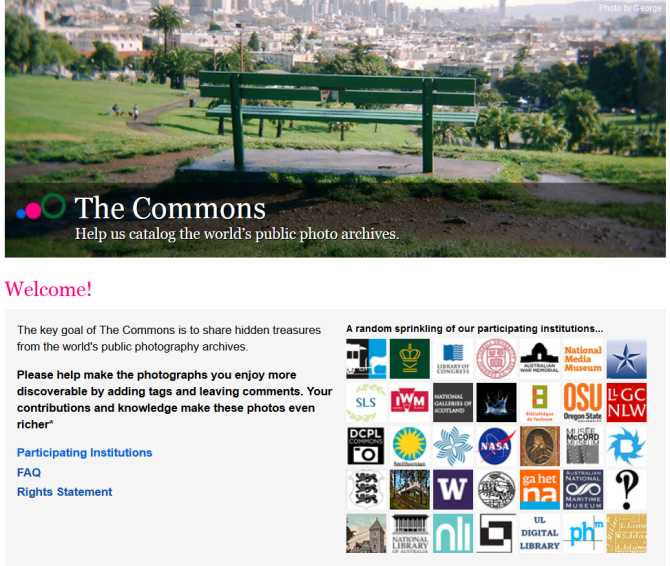
The Commons was set up to help share photos and images from the World’s public photography archives. There are over 56 institutions contributing images to The Commons.
A special rights statement — ‘No known copyright restrictions’ — was created to provide a copyright framework allowing institutions to add their photos to Flickr Commons and define how the public could use their work through their own rights statement.
Once you’ve located an image on The Commons you should click on the ‘No known copyright restrictions’ beneath the image.
This takes you to the Rights Statement for the Institution who supplied the image. This is where you’ll find information on how the institution would like the image to be attributed.

Below is an example of attributing an image from The Commons.
![River Cave, Margaret River [Western Australia, 2] [Frank Hurley] Courtesy of the National Library of Australia](https://teacherchallenge.edublogs.org/files/2013/09/9781155584_120ef3c486-1zys9lk.jpg)
Getty Open Content images
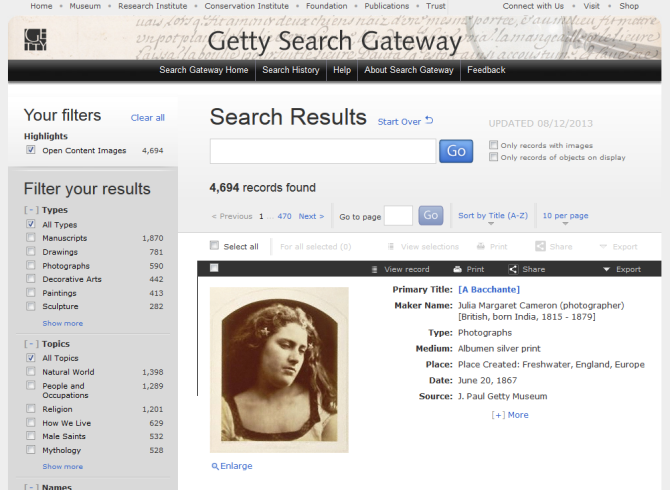
Getty Open Content images are all available digital images to which the Getty holds the rights or that are in the public domain to be used for any purpose. No permission is required.
The Getty requests that you use the following source credit when reproducing an image:
Digital image courtesy of the Getty’s Open Content Program.
Here’s an example of attributing an image from Getty’s open content program.
![Vincent van Gogh [Dutch, 1853 - 1890], Irises, Dutch, 1889, Oil on canvas, Digital image courtesy of the Getty’s Open Content Program.](https://teacherchallenge.edublogs.org/files/2013/09/00094701-11wy04t.jpg)
Getty Images
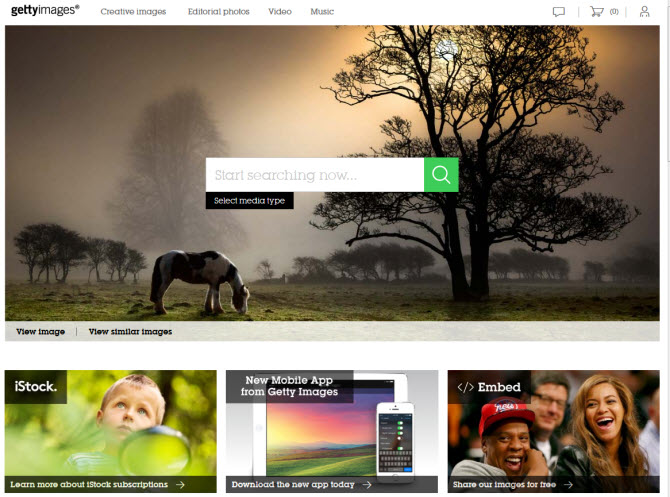
Getty Images is an American Stock photo agency which allows their images to be used for free for non-commercial use. Getty Images have no relationship with the J. Paul Getty Trust and the Getty Open Content images.
Once you have found an image on Getty Images you can embed it into a post or page using their embed code
Using Your Own Images
The alternative options for sourcing images from other websites are to upload your own photos or create images using online tools.
Here are some ideas for creating your own images:
- Photo Editors like Befunky, fd’s Flickr Tools
- Tag Cloud Creators such as Wordle or WordArt.com
- Fun photo tools CutMyPic, Glitterfly, PhotoFunia
- Drawing tools like Google Drawings or Auto Draw
Note: Many online tools are 13+ so check the terms and conditions if working with younger students.
Using Student Photos Online
Even though 99.99% of visitors to your class blog will be well meaning parents, students, community members, or interested visitors from around the world, the unfortunate reality is that those with bad intentions can also visit public sites. There are also cases where the personal background of a student might mean they need more privacy and anonymity than others.
Decisions on whether to use student photographs or not are often about protecting educators from having problems with parents, caregivers, or administrators who have concerns about cyber-predators.
Information that helps someone identify a student should always be shared with care.
Before using any student photos online, even on a private blog, you need to:
- Find out your school, district or Education Department guidelines for sharing student photos online — make sure you follow these guidelines.
- Find out if there are forms caregivers and students need to sign to consent to use of student photos online — make sure you have all forms signed by parents or caregivers.
- Respect the wishes of caregivers and students while understanding consent to use photos can be withdrawn at any time.
Remember it isn’t possible to stop parents, students, and caregivers from downloading photos and sharing them on their social networks, even if you are using a private blog. If you don’t want a photo shared on a social network then don’t upload the photo.
Our recommendations:
- Don’t use student photos for avatars. There are many tools available where students can create their own avatars such as those listed on The Student Blogging Challenge.
- If you do use any photos of students – don’t use their name in the file name and don’t refer to the student by name, even their first name, in the caption under the photo or in the post.
- Avoid the use of any photos that can identify individual students. A safe compromise is to only use photo taken from behind students. Some teachers also like to add emojis over the students’ faces using tools like Luna Pic (desktop) or various mobile apps.
Here’s an example of the emoji approach from teacher, Rob Kelly.
Teaching the Grade 3 students @berwicklodgeps to use @scratch on the computers today was a huge success. ☺️ I threw them in the deep end and they all came out swimming. Congratulations everyone! 🎉😺🎉You’re officially #coders. #educoach #scratch #edutech #aussieed pic.twitter.com/rMJ0mgxJBF
— Rob Kelly (B.Ed) (@robkellytweets) May 25, 2018
Refer to Should You Use Student Photos Online for examples of student photos that are less likely to cause issues.
Your Task
We’d like you to add your voice and ideas to our ongoing conversation about student blogging by completing the following tasks:
- Add a Creative Commons image or public domain image to a post. Or try using any of the tools mentioned in this post. Then leave a comment with a link to your post so we can take a look.
- Read through the most recent comments in reply to this step, click on a link to someone else’s post to check out the image they added. Then leave a response to their comment.
I forgot to post the link to my images that I have added to my blog. The link to my blog is http://mholley.edublogs.org/
I am very glad to have some resources for free to use images! I went to creative commons and checked out both flickr and wikimedia. I found that flickr is great for photographic images and wikimedia is more balanced between “cartoonish” images and gifs and photographic images. I chose wikimedia and posted a picture of a ladybug to my very first welcome post. I did this because I use a ladybug theme in my classroom and all of my homework folders, labels, and decorations throughout my room depict ladybugs. I also added a wordle image to my Valentine’s post because I love making wordles and they are so easy to make! You will have to have an updated version of java if you want to make a wordle and don’t forget to check your pop up blockers before trying to create one. As far as using photographs of your students on your blog, I think it is a great idea and highly motivating to the students. Photographs give students some real ownership to a blog and a feel that they are really part of the blogging process. Our district has photo release forms, so I just have the children fill these out at the beginning of the year and make a note of any student that does not turn one in or doesn’t want their photo taken. I also like the idea of taking the pictures of the students from behind because while they will recognize themselves, no one who doesn’t really know them will!
Ooops, I forgot to add my link. So here is my post again, with the link. I created a new post about the students’ participation in “Read the Most, Coast to Coast”. I inserted 3 photos that I took of the guest author and readers for who I had permission to include in the photos. Even though I have a photo release from all of my students, I did take the pictures from the back as I thought this might motivate the students to recollect where there were in the photos. I added a creative commons image, although I found the whole process of finding an image and the appropriate attribution a tedious process. The URL was so long and I thought it was distracting to the picture, so I went to Tiny URL and created a smaller URL. I also created a Wordle using words about “reading”, but I thought it was too much to add with all of the other photos. My post is at: http://mrsholley2.edublogs.org/
I created a new post about the students’ participation in “Read the Most, Coast to Coast”. I inserted 3 photos that I took of the guest author and readers for whom I had permission to include in the photos. Even though I have a photo release from all of my students, I did take the pictures from the back as I thought this might motivate the students to recall where there were sitting during each of the readings. I added a creative commons image, although I found the whole process of finding an image and including the attribution a tedious and at times, frustrating, process. The URL was so long and distracting to the picture, that I went to Tiny URL and created a smaller URL. I also created a Wordle using words about “reading”, but I thought it was too much to add with all of the other photos.
I had a hard time finding a picture from commons and other sites that was free to use.Ii don’t know why I couldn’t easily find a picture, as it appears other folks did this easily. BUT….I finally used pixabay and had success!
http://blogs.wcpss.net/innovation/2015/02/24/contact-me/
I’m going to have to work on this abit as I still find it hard. All the above posts I looked at looked so good, everyone did a great job. I like all this learning I am doing. Thanks
Hey Lisa. The link you provided linked to the post preview, which other people aren’t able to view, so I have tweaked your comment to link to the post itself. I hope you don’t mind.
I’m glad you’re having fun learning about blogging, however when you’ve added your image from Pixabay, you appear to have linked directly to the image on the Pixabay servers, rather than downloading the image and uploading it to your blog via the Add Media button. Unfortunately Pixabay don’t allow this (they call it Hotlinking) and have blocked the display of the image.
The creative commons image I added can be found at https://sjaslmc.edublogs.org/spring-2015/. On this same page I added an image I made on Toondoo.
Taking pictures of students is a concern of mine. I think it is a great idea to take pictures from the back. In my student permission slip I require the parent to make the decision if they want their child photographed, I also added an avatar creator on the blog for students to create their own avatar. Many of the kids on my newspaper love to draw. Drawing pictures of various news articles will be used too.
Hi all,
I used a creative commons image from Compfight to compliment my welcome post. The following is the link:
http://wjsheban.edublogs.org/2015/02/16/welcome-to-our-class-blog/
Next, I created a Wordle using the text from my Blogging Guidelines post. I also adjusted the Wordle color settings to match my blog theme colors. Clicking the image takes you to a larger version on the Wordle site. This is my first Wordle and I’m impressed how it turned out. Here’s the link:
http://wjsheban.edublogs.org/blogging-guidelines/
I don’t teach children but would suggest minimizing the use of student photos online. Parental permission is a must and the photo’s should be taken from behind students or avoiding facial close-ups. Never write the students name on the caption as well. However, I do see a lot of student photos in the sample blogs here, so I think that some parents like to see their child’s progress in the class blogs.
Thanks for reading,
William
Hi William, thanks for your comment, and for being a part of the challenge.
I agree that parental permission is essential when using student photos or names on a blog, and also that full names should never be used.
I think there is a correct and safe way to use student photos online, but it’s up to the teachers to be vigilent that the students’ security is protected. In my own son’s school we have signed a permission slip for his photo to be used on theri blog, and I’m happy to do that because I know they will handle that situation carefully.
I’m glad your enjoying getting involved with the challenge!
Elliott Bristow
Edublogs Support
I love your Wordle. I have tried to use it several times. I seem to be missing something. The box is always empty. My Jave is updated and I downloaded sandbox.
Photosforclass.com is a great site from which educators can download pictures! the correct citation is included with the download, making it clean and easy. There are a lot of high quality photos on the site. The one that I used can be found on this blog post:
http://nancyvculture.edublogs.org/2015/02/22/using-images-in-blog/
Hi Nancy
Thanks for sharing http://photosforclass.com/ I hadn’t seen them before. Very handy website. The only issue I see with their photos is the original size is around 1000 pixels which is generally too wide to use on most blogs without resizing. Would be better if the images were about 650 pixels wide.
Great find!
Sue Waters
Support Manager
Edublogs | CampusPress
Good point regarding size, Sue!
Nancy
I am totally guilty of using Google Images to get images that I want to use. I am aware of copyright, ethics and all that comes with using images found on the Internet. It’s just so easy to Google it and find what I need. I used the creative commons Google search to find an image to replace one that I had on my blog. I found another toolbox, though it did not have the wording I wanted like the one I found earlier that was not a CC image. I inserted the toolbox into PowerPoint and added the wording and saved it as an image. I looks great and I have not infringed on anyone’s rights. Here is the post that contains the new image:http://dspears.edublogs.org/2014/09/08/hello-world/
As for using student photos, I think it is a great way to increase interest from students and parents on the Blog. Our district has a student photo release form that all parents must sign if student photos are to be posted on the Internet. Teachers are responsible for getting the forms and do a great job of making sure they have these forms on file.
Hi dspears
I think we’ve all been guilty of using copyright images. You can activate the Compfight plugin in Plugins. This adds a Compfight icon to your post editor and is the fastest way of finding and adding images with attribution to your posts.
Teachers are more likely to get caught out by uploading copyright PDFs and docs to their blogs while we find students are more likely to be using the copyright images.
Thanks for sharing how you manage the use of students’ photos in your school district.
Sue Waters
Support Manager
Edublogs | CampusPress
I finished the challenge for this week it was really fun. Visit please see ya later. Thank you for visiting last time.david6pm.edublogs.org
I am pleased to know about the Compfight source for images. I like to use images to base discussion around with the students. We also use images a lot for descriptive writing and persuasive writing. Using images for developing the skills of inference and prediction is something I do a lot. Having this resource makes all that searching and referencing much easier. I have used some of my own images of my students paper blogging on a post. Using student images involves a constant reassesment of policies and practises in place at your school. We have an ict agreement that all parents and students sign. I prefer to use images that aren’t posed front-on shots, but taken without a clear view of the students face and never use a name in a tag or caption. http://tmayling.edublogs.org/2014/09/12/paper-blogging/
Hi Tina,
Photos are a great base for discussion with students and using for writing. I also have an Interesting Facts Flipboard magazine ( http://flip.it/0cb44 ) where I share articles that I find interesting. You may find some articles in the magazine that the students might like.
Sue Waters
Support Manager
Edublogs | CampusPress
I’ve swapped out all of my images so that they are on the up and up and I’m in line with copyright law. I used Compfight which is amazing. It is so easy to find high quality images… of anything.
I have used Wordle before. I checked out Crappy Graphs (which I can’t wait to use) and TooDoo.
Being a digital photography teacher, using photos of students is of particular concern as students love taking photos of each other. Every student in our district has the option of opting in to have their photo used for school purposes, like on the district website or in the newsletter for example. I make sure that every student has consented and if not then photos of that student are not allowed on the blogs and the other students are informed of this before they start a project.
Amy Capalbo
Hi Amy
Good idea to check which students have signed consent. I would also check that the consent form includes the use on blogs as consent forms vary between schools and school districts. Some consent forms are very specific in terms of where the photos can be used.
Comfight makes it so much easier to find and add photos! I would also look at some of the different photo apps if you use iPads or android tablets.
Thanks!
Sue Waters
Support Manager
Edublogs | CampusPress
I try to use my own photos where I can (we have students sign releases every year to use their image and their creations). I really like Getty Images and they have a great iPad app for students to use as well. Here is a link to my blog with some of my photos used as a resource: http://pwillemse.wordpress.com/2014/03/02/the-facts-of-memory-project/
Hi Petra
Thanks for sharing a link to your post and for telling us about the Getty Images iPad app. I hadn’t thought I including iPad options. Definitely need to take a closer look at apps as we have more students using iPads.
Sue Waters
Support Manager
Edublogs | CampusPress
Sue,
Thank you for the very helpful hints regarding posting pictures of students online. I especially liked the comment about captioning of photos and them not including names just a small blurb. Wise advice.
Excellent Post!
http://www.theedublogger.com/2013/09/26/we-should-talk-are-you-using-student-photos-online/
I have included a dice picture from Compfight into a post I will be completing outlining our first week at school. If you click on the photo it will take you directly to the Compfight site where I obtained the photo, however it is not putting a photo credit caption at the bottom of the photo like the one on the cupcake picture. Can you help? Am I to do that or does it take it from the URL I am to input?
http://essexcounty.edublogs.org/2014/09/06/week-1-what-an-amazing-first-week/
Hi Mrs Essex
With Compfight it depends if you are using the Compfight plugin or grabbing the photo directly from the Compfight website.
The Comfight plugin automatically adds all attribution and links the photo when you insert it into the post so there is no need to do anything extra. If you aren’t using the Comfight plugin then you add the attribution by following the steps shown in the Cupcake example.
You are able to use the Compfight plugin so should follow these instructions – http://help.edublogs.org/compfight-plugin/
Sue Waters
Support Manager
Edublogs | CampusPress
I have included a dice picture from Compfight into a post I will be completing outlining our first week at school. If you click on the photo it will take you directly to the Compfight site where I obtained the photo, however it is not putting a photo credit caption at the bottom of the photo like the one on the cupcake picture. Can you help? Am I to do that or does it take it from the URL I am to input?
I mostly get around any copyright issues by using my own images. I will definitely use compfight in the future. I know that there are two images on my blog that I just got from google and I need to give proper credit.
http://www.mrsmacinnis.edublogs.org/
I have really learned a lot from this stage of blogging and copyright issues. I tend to stay away from using images etc. from the web, but when creating a green screen project they come in handy for backgrounds etc. I really like Flickr and glad I have this resource to look back on when needed. There is so much information that I will process it all slowly whenever I have the time to work through each idea. Thank you so much for putting this together!
I like using student pictures on my blog as it does make it more interesting and personal, but am aware of the dangers out there too.
http://kidblog.org/MrsLeonardandMrsDsKindergarten/
I think it’s a great idea to use student photos online! I don’t plan on using photos that are not ones I have taken myself.
I added a word cloud from Tagxedo. Wordle was not playing nicely with my Mac, so we had to go our separate ways. Tagxedo came to my rescue. I used the names of the kids in my class – very cute, especially since I have some parents who do not want their children’s faces used in pics on the blog.
– Amanda
Again another interesting and useful challenge. Makes me think I can add pictures from other sites to make my blogs more interesting.
http://yrprepj.edublogs.org/2014/09/03/opera-australia-cinderella/
Well i have managed to find a free image and add to our Starry Night Van Gogh latest post although i haven’t seemed to be able to get the link to give credit the way it should… i thought i had followed all of the instructions but must have missed something 🙁 i deleted my first post and have now tried again but still not presenting like it did on the tutorial. I ended up adding the link underneath as well just so it was at least on the page. 🙂 I like the idea of adding artworks to show what our inspiration is but might just stick to student work photos 🙂 looking forward to checking out some of the image creators to once this crazy week is finished
Hi Leah
As long as you have the attribution somewhere on the page you have covered the requirement. The Getty Open Content is a good source for art work.
Sue Waters
Support Manager
Edublogs | CampusPress
This has been a great learning experience. I never knew there were specific websites that allowed anyone to share images freely. I did have an issue though, because an author’s credit was not entirely appropriate to put on a page for students, I had to go and find another photo until I found an appropriate credit on Compfight. I TRIED to upload it but Edublogs is incredibly slow whenever I try to upload media on the computer, as opposed to on the app on my iPhone, which is very fast, but not always appropriate when you have saved media to a computer. Is there a way to fix this problem? I have not been able to load any media today. Very frustrating to say the least!
Hi Katie
Sorry you were having trouble uploading images. It can depend on how many images you are uploading and your connection speed.
If you are uploading image directly from a digital camera, and uploading lots of photos at the same time, they will upload slowly due to the size of the images. Photos from digital cameras are large and are designed to be printed. For example, they can range in size from 3 to 5 MB. The best option is always to only upload a few at a time or resize the photos before uploading so they are smaller.
Sue Waters
Support Manager
Edublogs | CampusPress
Its really worth reading and watching. The part of the world where I am from, copyright and acknowledgement system is so poor that nobody care for it. The teacher challenge 7 in edublogs .com is an eye-opener and make me more responsible in teaching online.
Thanks a lot.
G’day everyone,
I have just been looking through lots of images on flickr and have found this great link which shows all licenses and links to images under each license https://www.flickr.com/creativecommons/ It is different to the one labelled commons mentioned in Sue’s post. The only problem is that it only shows the 100 most recent images for that license.
But if you click on more, it will take you to a search page where you can specify what license you want to search under.
Thank you for the great information on creative commons licensing. I continue to find this a bit complex and could be somewhat difficult to explain to my students. If it’s not straight forward, they tend to ignore it. Which I believe further contributes to the misuse of images from the web! I am going to strongly suggest the use of non- copyrighted works and public domain sights and hold them to the URL link and “courtesy of” attribution. I added a public domain photo to my about page and created a wordle which I added in the image widget. If time permits,and class is savvy enough, I may add some image creation lessons.
http://cunninghamclass.edublogs.org/
Mrs. C
G’day Mrs C,
The easiest way for students to find creative commons images is to use the compfight plugin that Sue mentions in her post. If their blog is connected to yours through the My Class setup http://teacherchallenge.edublogs.org/step-11-set-up-student-blogs/ then they should be able to activate the plugin.
Here is an example of my student bloggers blog with the compfight plugin being used http://www.eschoolblogs.org.au/students/
Sue Wyatt
Mentor: Teacher challenge
Founder: Student blogging challenge http://studentchallenge.edublogs.org
I think photos are an excellent way for students to gain more ownership with their blogs. I had a few students last year upload profile pictures on their own, and it really made the comment section come alive because you could actually see some real faces among my own. I would not mandate that student photos be used, but I would encourage it and at least show them how to do that at home.
I have added some images that I took to the stage 1 category under Daceyville. I had to do some fiddling but they are now added. Very pleased with my self, I am going to try and say away from Creative Commons and just use my images if possible.
My blog is at http://library1884.edublogs.org/
I am finally up to date. Yah!!!!
Hi Cheryl ( library1884 )
The images look really good on that page!
Using the Compfight plugin is an easy way to use Creative Commons images if you change your mind. The plugin is really easy to use and adds all of the required attribution.
Sue Waters
Support Manager
Edublogs | CampusPress
Thanks for the info on this interesting topic. Have activated the compfight plugin and inserted a few pics at the bottom of recent post Clarence the Robot. http://prepg.edublogs.org I tried the imagegenerator.org site and magazine cover but it went to nothing. Has anyone had success with this site? Love Getty Images!
Hi Fiona
Good work using the Compfight plugin. Makes adding creative commons images really easy! Sorry you had trouble with some of the tools for creating your own images. I’ve checked through the ones we included, removed some and added a few new ones. Hopefully this helps?
Sue Waters
Support Manager
Edublogs | CampusPress
http://karabeal.edublogs.org/2014/08/29/color-and-memories/
I used the Creative Commons free pictures on Flickr. I appreciated the information provided in this post, as I did not realize the different attributes given to photograph’s online (I knew I had to give credit to other’s images, but I did not know all the different levels). I think using student photo’s online can be beneficial as it shows students work, as it does not always have to be the student themselves. One has to be careful about showing the student themselves as anyone can download or screen shot the image, thus giving thousands or millions access to a picture that truly is not necessarily yours. Additionally, one needs to ensure that they have permission from the parent/guardian before posting any picture of the student and state specifically how the picture will be used or where it will be posted.
G’day Kara,
Been having a look at some of the blogs written by teachers in this challenge. I noticed for this post you have chosen a great image but do you realize the original is copyrighted? Here is the original in Flickr https://www.flickr.com/photos/clintriter/4253996974/
You will need to find a different image for your post. This creative commons is one of the most difficult things to teach students as they think, “It is on the web so it is there for everyone to use.”
When my students first used images on their blogs, one wanted to use an image she found of fireworks over Sydney Harbour Bridge but it was in an online newspaper. I said she needed to email the paper to find out if she could use it. They replied that no she couldn’t as they had paid the photographer for its use and she could be sued if she used it in her blog.
If unsure I get students to contact the owner. Others have said yes you can use it but put in a link to where you found it eg website etc. But with so many places to find creative commons images now, teachers and students should be able to find those that will suit their post.
PS Do you have the compfight plugin activated on your blog? This finds creative commons images with the attribution already included.
Sue Wyatt
Mentor: Teacher challenge
Founder: Student blogging challenge http://studentchallenge.edublogs.org
I’ve update my blog with an image: http://chssform5french2015.blogspot.com/
Thanks for this post 🙂
I have a question…
When you use images that are your own, or are screen grabs from your computer, what is the convention for attribution? Should bloggers add a line at the end of the post to the effect of ‘all images in this post created by the author, unless otherwise stated’? Or add a caption immediately under them image saying something like ‘image by author’?
e.g. The image at the top of the post with Dexter the cat…who made it? Do I assume the blog author did? Or am I left to ponder whether attribution is ‘missing’?
I know there is no one perfect answer to this, but I’d love your opinion!
That’s a great question, Kelli.
You’re right on that there is no single perfect answer, but I do have a couple of thoughts. If you believe the image will be shared by other people, and you want them to properly credit you, it’s a great idea to put your own attribution to model it for other users. Whether that is a link to your profile, or simply your name, is up to you.
I tend to focus more on the design element – adding an attribution takes valuable real estate on the page, so I usually add attributions only if a Creative Commons license requires attribution. If it is public domain or my own creation, I tend not to put an attribution since it looks clean without it.
Sometimes you might just choose to include small branding elements if you use a photo editor – for some of our social images, we include our brand name without being too obtrusive: https://plus.google.com/117425229322990646801/posts/iEZfHjXpwYq
It all comes down to personal opinion about how you want your own images used and referenced. Thanks for the question!
Hi Kelli and Dan, great question and response! I also recommend you read Sheri Edwards’s post on Whose image it is – http://whatelse.edublogs.org/2014/06/07/whose-image-is-it/ as it provides detailed explanation on how you can find the original source.
I tend to be the same as Dan. I’ll add image attribution if it is required however you do need to be careful as the person using an image may have used a copyright image.
Worth testing Dexter’s photo with tips shared in http://whatelse.edublogs.org/2014/06/07/whose-image-is-it/ to see if you can work out the original source of the image and how you might attribute it 🙂
Hi All, looks like you all had a great session on adding photos to posts! Glad our information of using images helped. I’ve just added on extra way of adding images using Getty Images. You may also find this helpful.
Thank you very much for your article! I am a speech pathologist and have learned so many ways to add technology into my sessions with students in a way that is safe and responsible. I now have a much better grasp on how to help my students understand copyright and what they could use on their own sites. Here is my work in progress:
http://blogs.goaj.org/msh/
It is my first blog so I am excited to see where it goes from here!
Thank you!
-Elisabeth Hogue
Dear Sue,
Thanks so much for the great blog post! There is so much information that I hope to be able to use this year. Not being tech savvy, I look forward to being able to just sit and work with the pictures. Hopefully I will soon be able to present the info to my students. http://blogs.goaj.org/efugate/2012/02/07/hello-world/
Thank you so much for sharing this information! It is so helpful to have all this information in one place. As a teacher, it helps to have this knowledge base to pass on to my students. I have a personal blog that I am working on. At this point, I am at the beginning stages.
From Holly Ball
http://lifeandtraveladdiction.wordpress.com
Thank you so much for all of this helpful information. I am very new to blogging and am looking forward to using it in my classroom this year. I was unaware of a lot of this information but am very glad I know now.
Thank you again!!
Please feel free to come and visit my blog!
http://blogs.goaj.org/eliverse/
Thank you,
Elizabeth
Thank you for the information you have presented to us in an easy-to-read format. It’s nice to see explanations about copyright all in one place. http://www.kerrimortenson.com
I am new to blogging so I really appreciated the information in this article. Thank you so much. I have a classroom blog for sharing student work and communicating with parents but also one for collaborating with other educators for which I have shared the link. http://blogs.goaj.org/room219/
Thank you for posting this information. It is incredibly helpful. I didn’t know that we had the opportunity to search for photos with editing rights.
Hi Sue,
Thank you so much for posting this. I am just starting a class blog and I hope to be a good example to my students. In the past I would just thought I could ‘copy/paste’ whatever I wanted, I now know how to properly site pictures!
Thanks for your hard work!
KC
http://blogs.goaj.org/kmurphy/
I was not aware of all the different ways photos are labeled; very interesting and a great detailed resource.
Thank you
Jen Mewhorter
http://blogs.goaj.org/jmewhorter/
Thanks for simplifying this complex concept. I would normally just avoid photos or videos or music because I didn’t understand how it all worked.
I now feel like I can not only implement photos now but teach my students how to use photos correctly as well!
Thanks again!
Thank you for putting this together. I have always been aware of copyright infringement, but as a junior high math teacher I use it infrequently. When I do, I forget what the Creative Commons symbols mean. Now I have a great place to go that has ALL the information I need, and can remind me of the many sites I can use to legally use pictures with my students!!
Thank you so much for this information. I am a science teacher that has students creating projects around a standard. Students are able to choose their median of choice, but I have always been asking about rules and policies. This article will help me teach the students.
Thank you so much,
Marie
Dear Sue,
Thank you for this blog. I learned about how to find and use pictures in an educational way and incorporate them more in my lessons. I am excited to teach my students how to search for and use pictures in the classroom as well.
Thank you, thank you!! This article is fantastic — very easy to understand as most people’s eyes glaze over when you try to explain copyright. The examples are excellent. I will be adding a link to this blog article to the Copyright page I created for staff in our district.
A fabulous, comprehensive blog for those of us who are starting, or thinking of starting, a blog. I didn’t realise there was so much copyright!
I want to post a new video of myself reading a picture book I have bought or borrowed each week. This is for a small education website with about ten members. Do I need to contact each author for permission, or is it ok to just read the author name etc?
When in doubt, contacting the author is always best. If the website you will be posting to is private, so only those 10 members can access, it should be fine (much like reading a book aloud in class or a library. However, publicly posting to the web where anyone can access would be different.
Hi, thank you for the very useful information you have shared. However, there seem to be a problem with one of you links, in particular the one to FlickrCC. It takes me to http://flickrcc.bluemountains.net/ an advertising site.
Thanks, Gordon. Looks like the site has moved. I’ll get the links updated or removed.
Hi Gordon, thanks for the reminder. I was aware that FlickrCC has discontinued their service and forgot to remove them. I’ve now removed their information and added in information about using Getty Images.